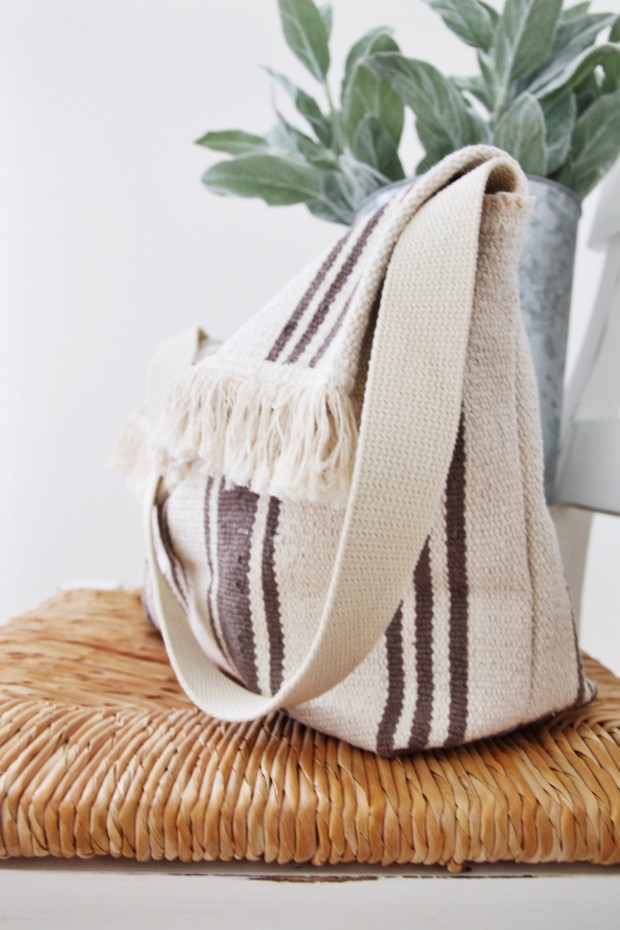
How to make a purse out of a kitchen rug
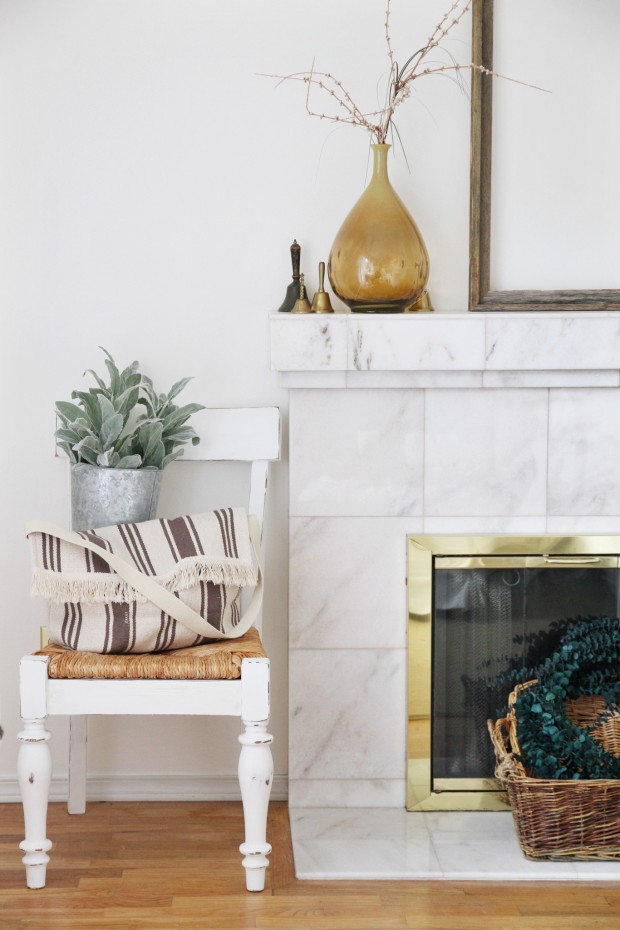
I am a huge fan of IKEA and have bought several of their cute striped kitchen rugs here. I love the print and thought how simple it would be to sew one into a bag. These rugs cost a few dollars and the whole project costs less than ten! You will need a sewing machine, but the project is manageable for beginning sewers.
Here is what you will need…
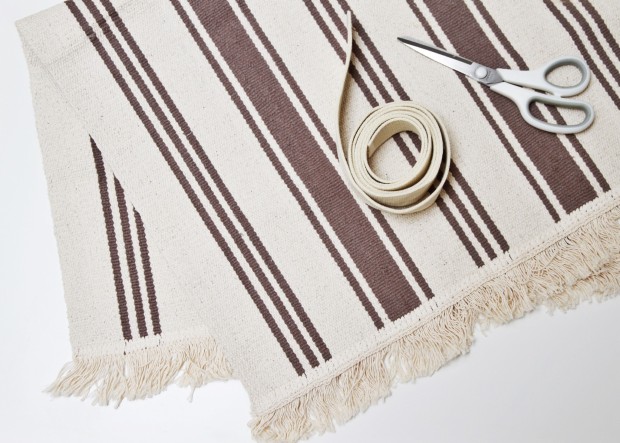
- A kitchen rug (I got mine from Ikea and there are some great options at Target
- I yard of 1 1/2 inch wide of cotton belting or webbing for the strap of the bag. When you are ready to sew it – I measured it across my shoulder to see how long I wanted it, so this is not an exact measurement
- Scissors
- Sewing machine
- All purpose sewing thread
Here is how you will sew this useful bag…
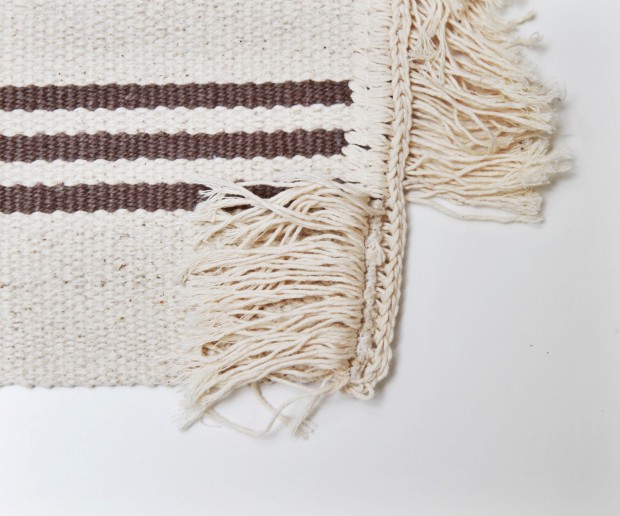
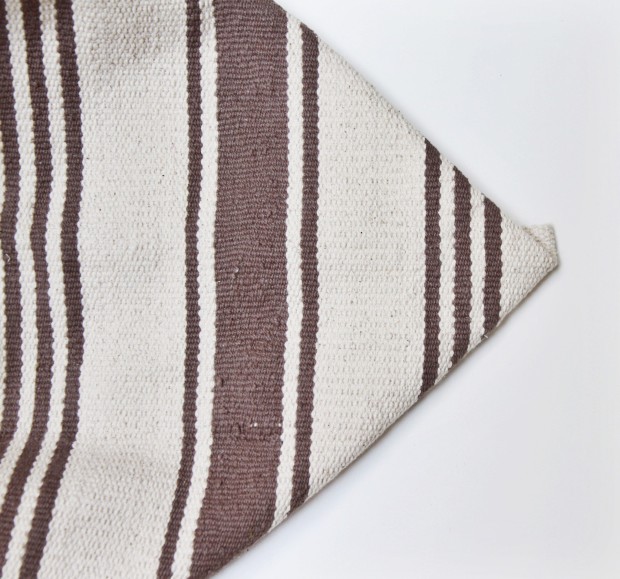
- Begin by taking only one side of the rug and unthreading the fringe.
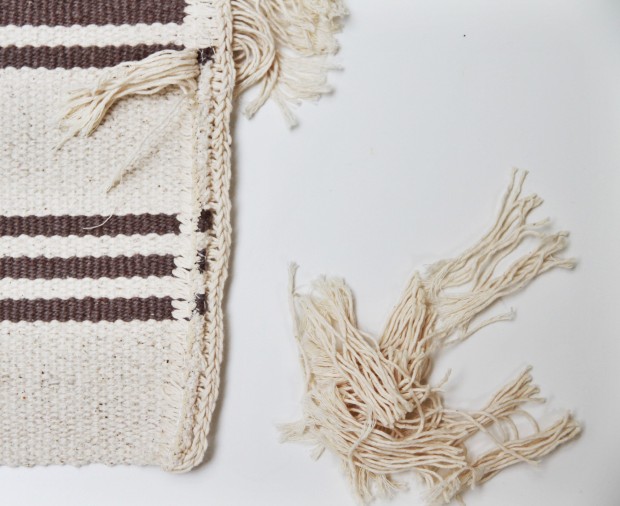
- Trim off the fringe.
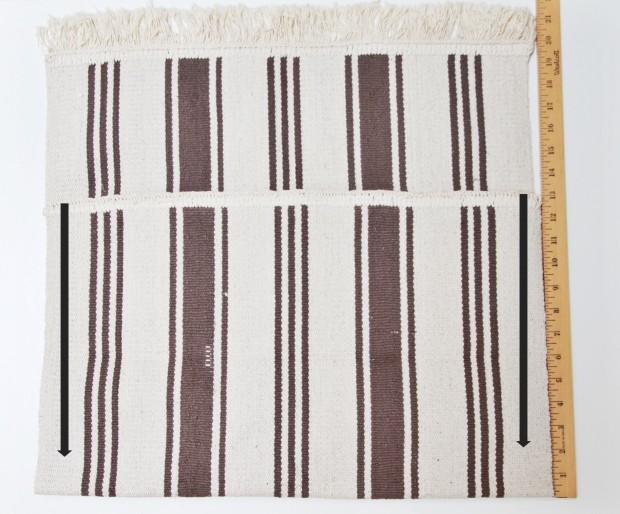
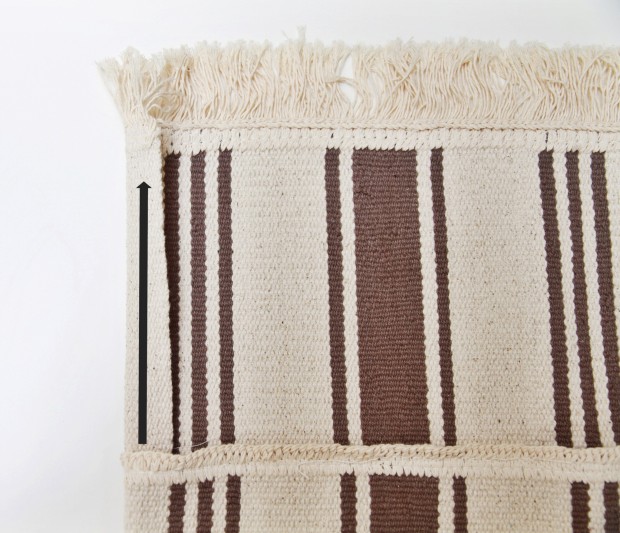
- Fold the newly cut side up 13 inches – the fringed side will remain longer. You can pin if preferred to hold in place.
- Back stitch and sew down a straight seam and back stitch again to the fold on each side so that you enclose the sides of your bag. Turn your bag inside out.
- Now on the top flap of your bag, fold in the side excess and hem it with the same simple stitch as done above
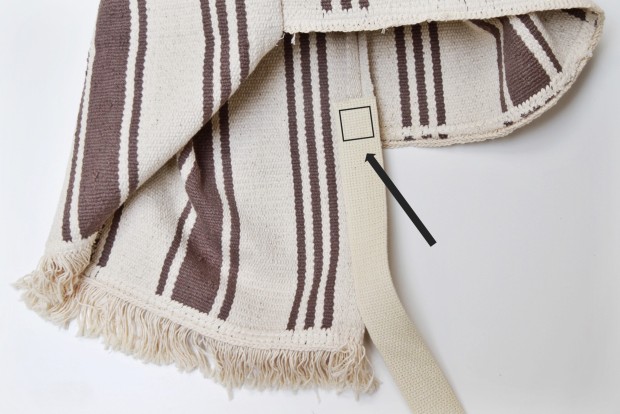
- Take your measured webbing and place it on the onside of one side of the bag (you can pin it in place if preferred). Stitch a square around the base (make sure to back stitch when you start and finish each seam)
- Stitch the other side of your webbing the same way.
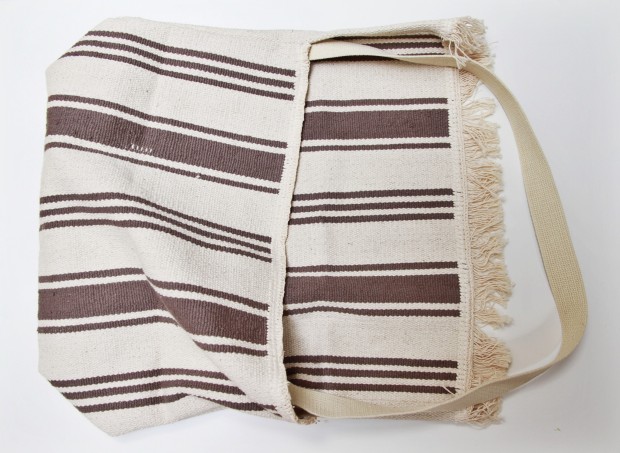
- With your bag inside out form and flatten a triangle with each corner by pressing in and out. This part reminds me a bit of folding Origami.
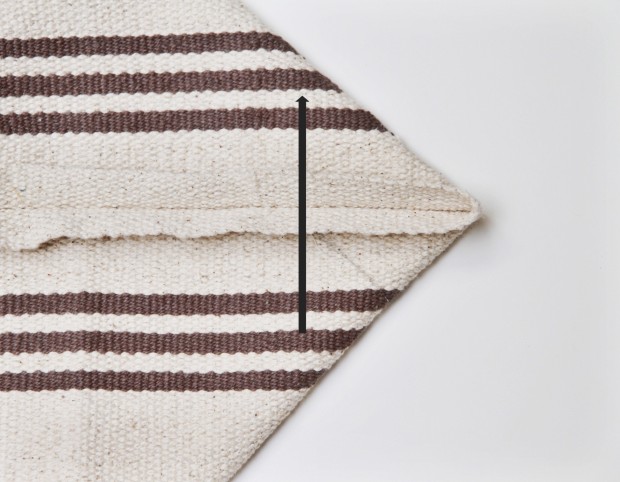
- Flip it over with the seams flat and showing. Sew a straight line across – about 3 inches in from the point (again, make sure to back stitch from beginning to end).
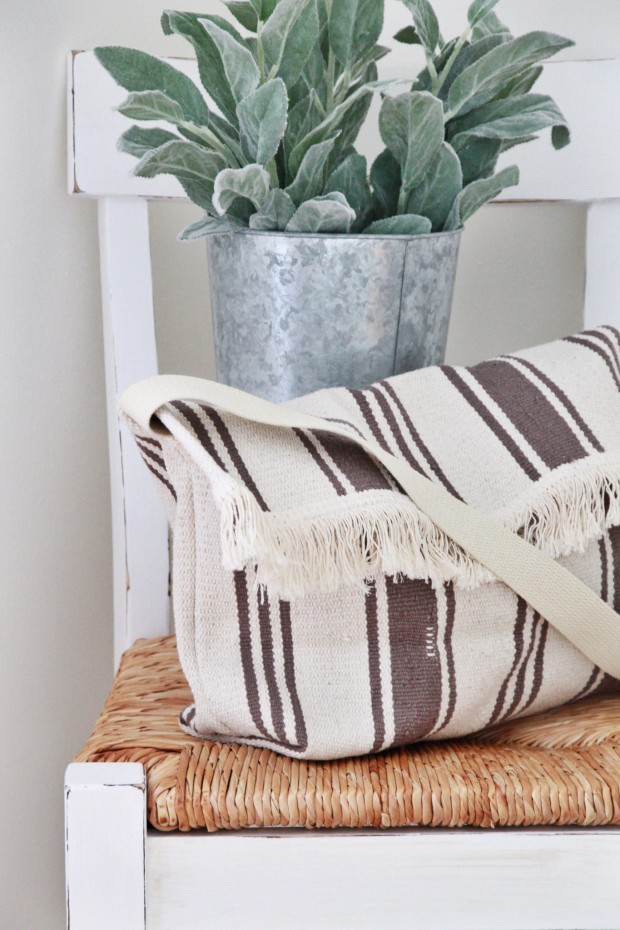
- That is it! Turn your bag outside in and enjoy!

Hope you let me know if you try this out and how it goes! I am not formally trained in sewing and much of it is self taught… That being said please feel free to ask any clarifying questions and I will do my best to answer them. Have a wonderful week all ~
*Chloe from Boxwood Ave has some great bag tutorials that are always inspiring me – like these two here and here!
And washable too! ♡
So true and another bonus! Thank you for stopping by!
This is so wonderful, Annie! I would love to give this a try. You’re so creative and the bag is fabulous!! XO
Hailey
http://www.themiddlecloset.com
Hailey thank you and hope you let me know how it goes if you try it out! Have a wonderful week ~
This is such a wonderful idea! I love the look of it, and since I’m a beginner on the sewing machine this is a great project for me to try. Thanks for the inspiration!
Thank you so much Cynthia and this really is a simple sewing project! I appreciate you stopping by here ~
You are brilliant !
Lucy, thank you so much for your encouragement and that means a lot as I think you are brilliant! I appreciate it~
This is super stylish, Annie! And for someone who can’t sew much, it is a project I think I could handle. I love your little collection of bells on the mantel, too 😉
Thanks so much Jamie and it really is pretty simple! I love that you noticed the bells ~ thank you! Have a great rest of your weekend!