DIY Fruit Stamped Farmer’s Market Bag
I am so excited to have my friend Chloe, from Boxwood Ave share a fun DIY project today! She is one talented and kind lady and I can’t wait for you to see her creativity! Enjoy!
Hi Zevy Joy readers! My name is Chloe Legras, I am the voice behind the blog Boxwood Avenue. Annie and I met through instagram, and we are now working together on Society Letters. I was so excited when Annie and I decided to do a blog swap, because she is one of the bloggers I most admire. She continues to inspire me through her kindness and awesome posts. Needless to say, I am very honored to be here today!
I am bringing you a fun DIY project that the kiddos can participate in too! The whole tutorial includes how to sew a tote from scratch, but if sewing isn’t your thing, you can buy a premade bag here, here, or here, and start at step 6.

Supplies:
Step 1: Fold your fabric in half and cut a large rectangle, leaving the fold line in tact (I cut mine 22 inches on the fold by 18 inches). You’re basically making a simple pillow case to start if that helps you visualize.
Step 2: On the opposite side of the fold – or ‘top’ of your tote iron and sew a double 1 inch hem.

Step 3: With pretty side in, pin and sew/serge up the sides of the tote, you should now have a sack.
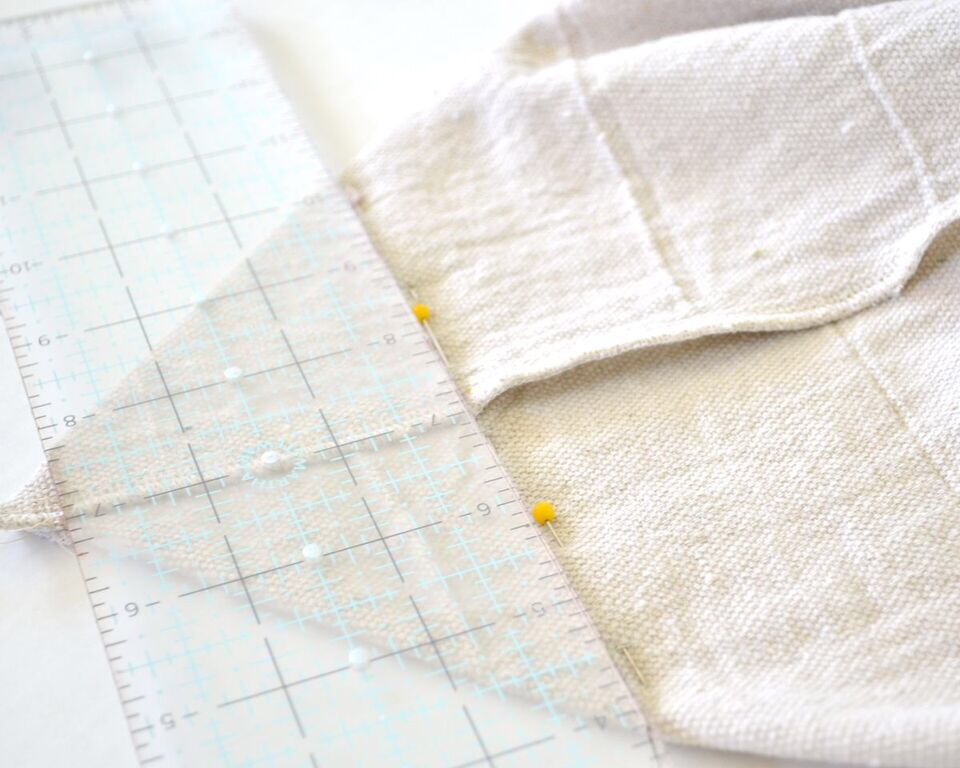
 Step 4: You’re going to want to form two gussets on each of the bottom corners of the sack. While the sack is still wrong side out, pinch the bottom seam (this is tricky because you didn’t actually sew a seam here, so just eye ball it) and the side seam together to form a triangle. The size of your triangle is up to you; just make sure it’s the same on both sides. Mark or pin a straight line, then sew/serge the triangles.


Step 5: Almost done! Just measure and attach some straps!

Step 6: Now that you’re finished sewing, it’s time to paint. Call over the kids and have them help out! Start by cutting the fruit in halves. Use a paper towel to dry off any citrus juice; it reacts to the paint in a weird way.

Step 7: Paint the fruit and stamp! How fun is this? The kids will love getting to play with their food.


Step 8: Once the paint has dried, use a hot iron to set. But don’t be impatient like me and iron before the paint has completely dried!

I hope that you’ve enjoyed this “how to”, and if you’re dying for more, be sure to visit the DIY section of Boxwood Avenue! You can also find both Annie and I over at Society Letters sharing all sorts of real life stories.


Ahh. I love this , great job beautiful. I will def try it out. You are so creative and super talented.!!! Xo
OMG I LOVE THIS!! What an awesome idea!!!! I might have to try this!
She did a fantastic job in this – I hope you do! Thanks for stopping by!