Cinnamon Salt Dough Tree Tutorial
This cinnamon salt dough tree tutorial is the perfect addition to your Christmas decor!

I have seen these adorable Christmas cookie trees all over and thought how it would be a treat to make one. Knowing that we are baking and eating enough sweets already, I decided to construct a cookie tree that would last over time. One that would even make a fun gift for someone. (Please note – these will not be edible cookie trees – just decorative).
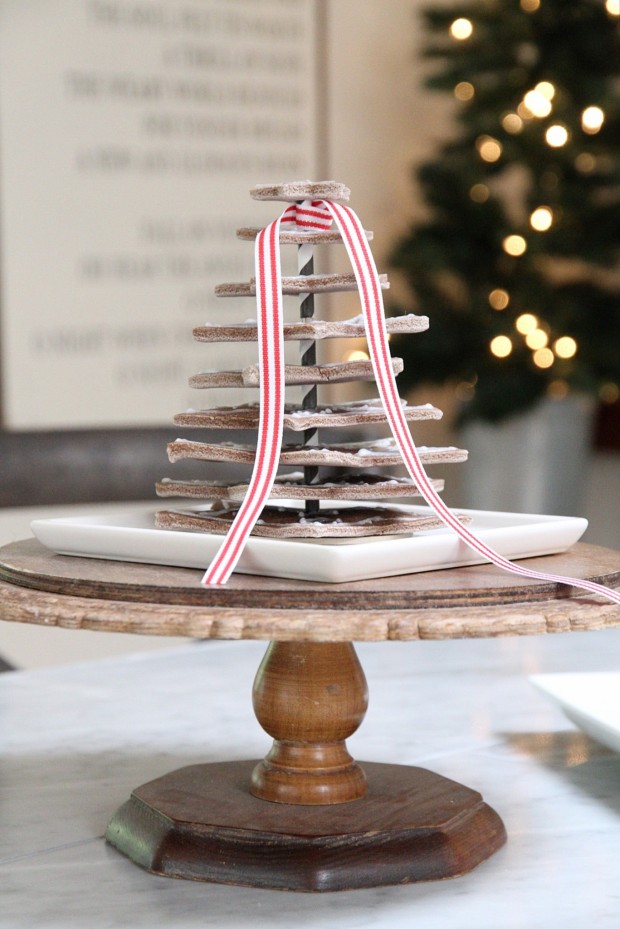
Well, I am sure it comes as no surprise that I love using salt dough for pretty much any Christmas decor. I have used it the past few years for our Christmas tree ornaments – including this year’s (pictured here). I adapted the recipe from The Imagination Tree.

This Christmas tree was simple to make and my littlest joined in the process (at least the salt dough making part).
Here is what you will need and can follow these steps for the salt dough…
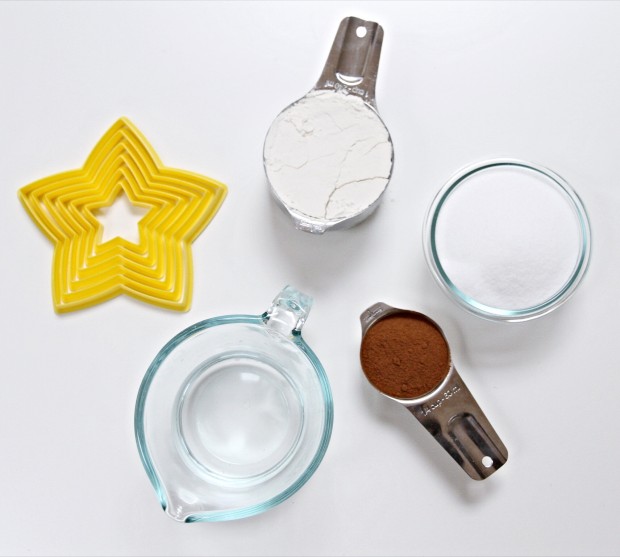
- Star or snowflake cookie cutters that go from small to large.
- 1 cup flour
- 1 cup salt
- 1/4 cinnamon
- 1/2 cup water
Mix all these ingredients together and form a dough similar to play-dough.
Here what you will need/how you will make the star shapes and some ideas for decorating them…
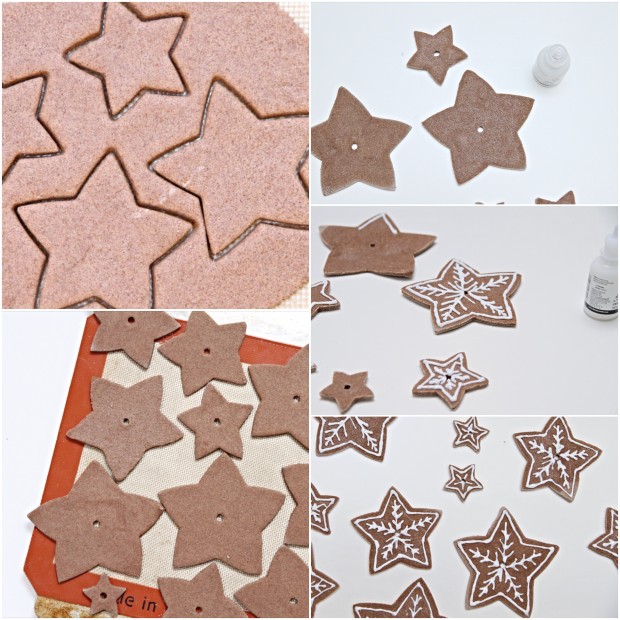
- Rolling pin, cookie sheet with a silicon mat and sparkly white puffy paint
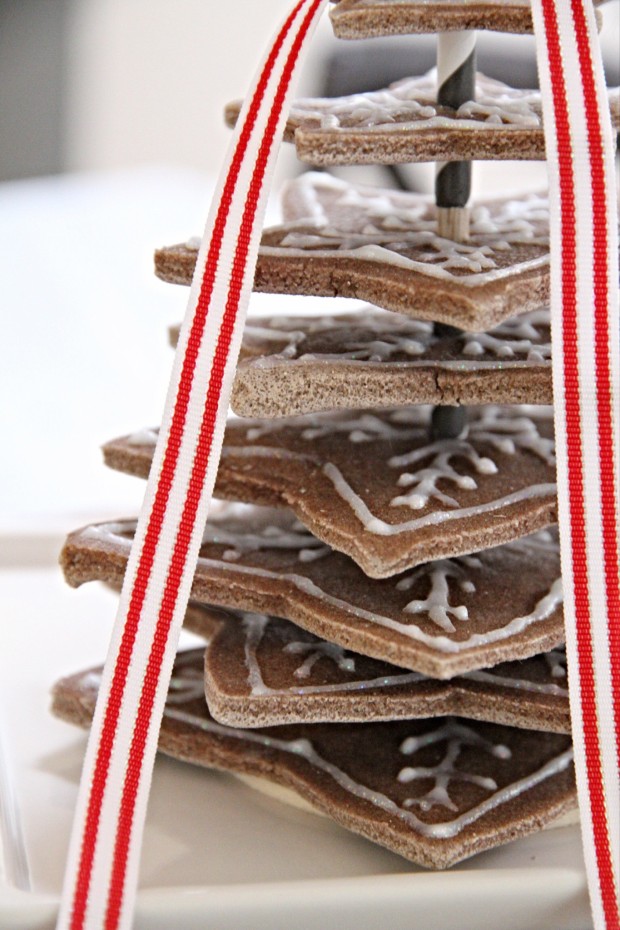
Roll out the dough and cut out the shapes using your star cookie cutters (remember to make enough of each varying size). Don’t forget to make a hole the size of the wooden dowel (shown/mentioned below) you will be using before you bake! Then put your shapes onto the silicon mats/cookie sheet. Bake your dough shapes at 200 degrees for at least a few hours (this will depend on the thickness of your shapes – it could be longer). Let the shapes cool and then decorate with the puffy paint. I decided to make the stars with outlines and then snowflakes inside.
Lastly, to assemble the tree you will need…
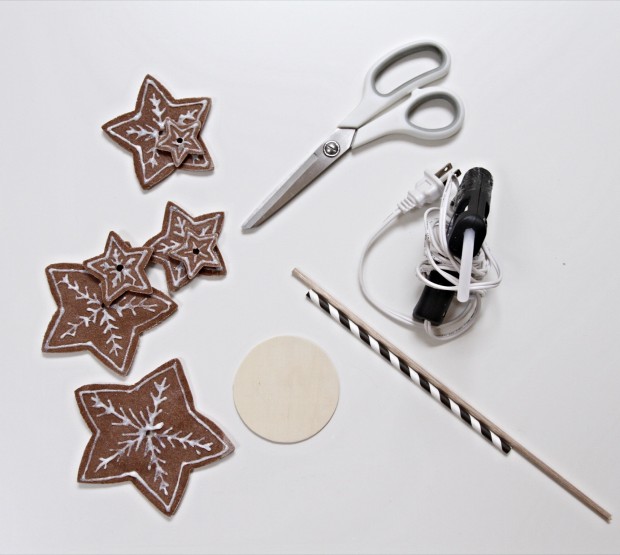
- Your completed salt dough shapes, scissors, a round thin wooden disc, thin wooden dowel, straw, glue gun and glue sticks. You will also need a hand saw to cut your wooden dowel to the appropriate size (not pictured).
And to finish the decorative tree follow these several steps…
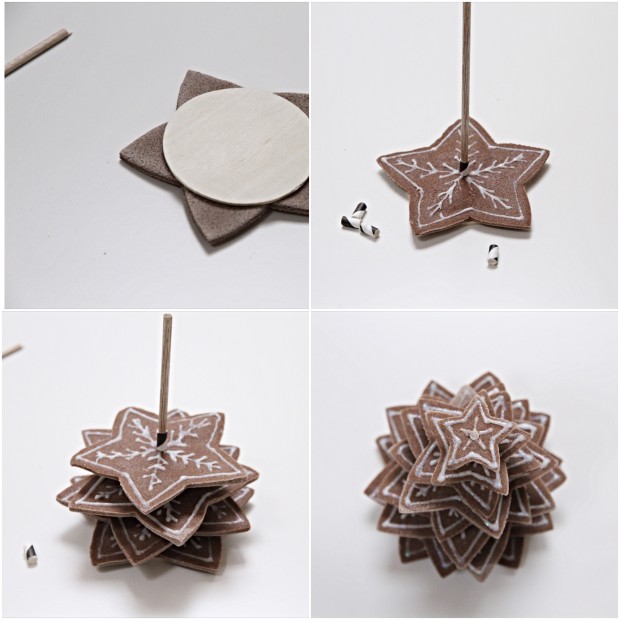
- At the very start, I layered all the pieces described and ordered below to know how long my wooden dowel would need to be. Then I carfully used a hand saw to cut the extra dowel off.
- Using your glue gun, carefully glue the wooden disc to the bottom of your largest star.
- Put some glue inside the hole of the bottom star and stick the dowel inside, holding it until it dries so it is stable.
- Cut your straw into small pieces – these will be used as spacers in between the stars. My spacers were about 1/3 an inch and you could make these bigger or smaller depending on how much space you want.
- Now put a spacer on the dowel and the largest bottom star. Then stack another big star, then a spacer.
- You will continue this process until you reach the top. I decided to stack some of the same size stars so that the tree would be taller. Turn the stars so that they alternate positions.
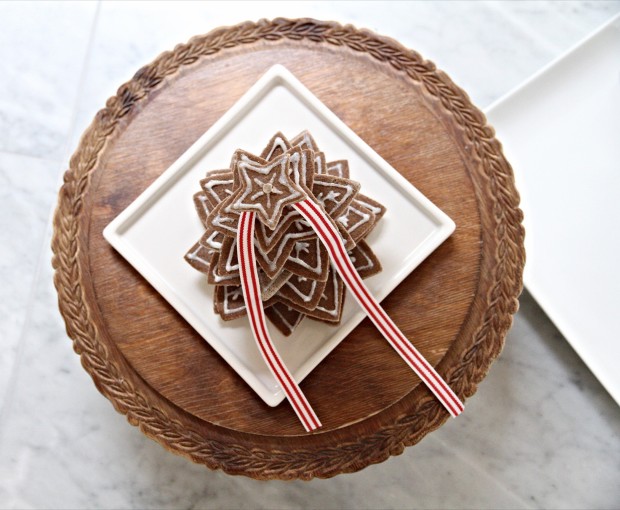
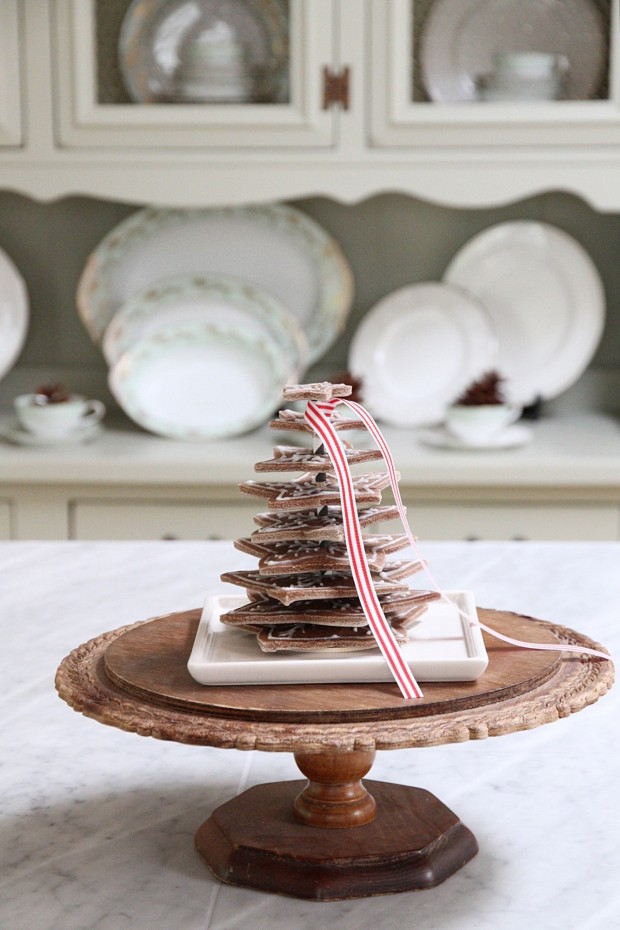
These would make a sweet addition to your kitchen decor! I hope you enjoy and let me know if you try them out. Thanks so much for stopping by this week.


So beautiful!I love how yours turned out!
Ty thank you very much!