DIY Faux Antler
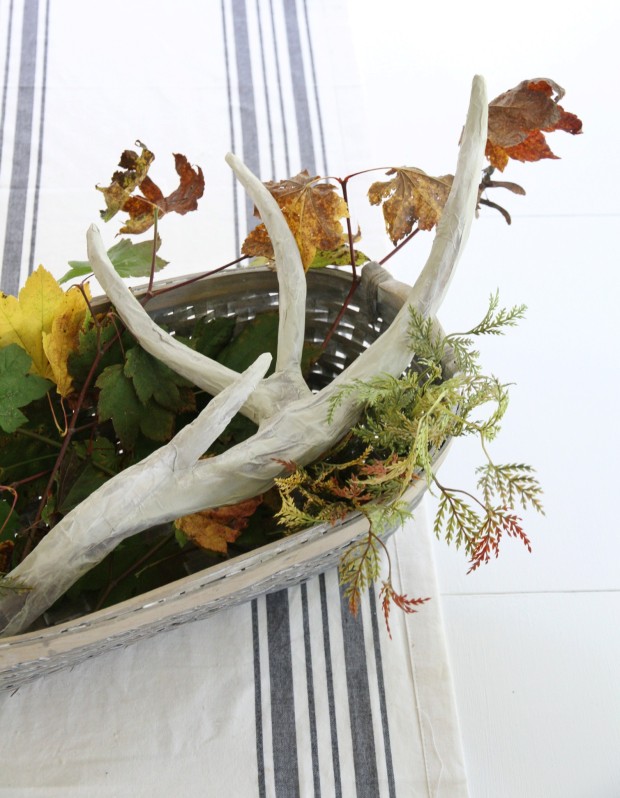
Since my oldest has headed to Kindergarten, my daughter and I have been getting used to the adjustment. Learning what our days look like now that it is her and I for the majority of the time; getting to see what she truly enjoys doing when it is just the two of us. One thing she has been asking for over and over again is “crafts”, like mother like daugher (insert winky face). So today we crafted and we got creative! I have thought it would be fun to have a faux antler for decor, but like many other times I have held off on the purchase. I am glad I did because there is no need to spend the money when you can make it using what you have around the house!
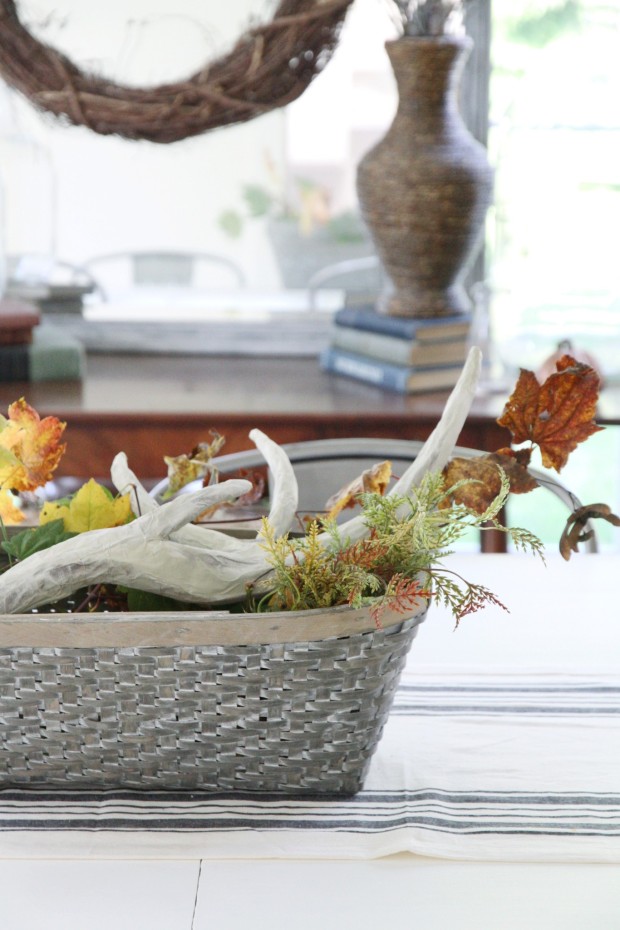
I used this same idea before when making the deer currently hanging over our mantel. I have always wanted to share how I did it, so today I suppose I am breaking it up into two parts; part one will be the short version.
Here is what you will need and how simple this really is…
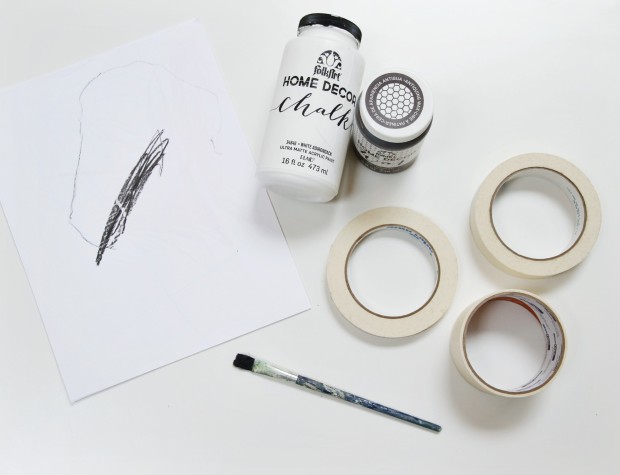
- Scrap paper (which we have tons of with all the pretty drawings we make around here)
- Masking tape of different sizes (preferably medium and large width)
- Chalk paint (I used brown, white and cream). This is the Folk Art Brand I used.
- Paintbrush
Here is how I made the antler…
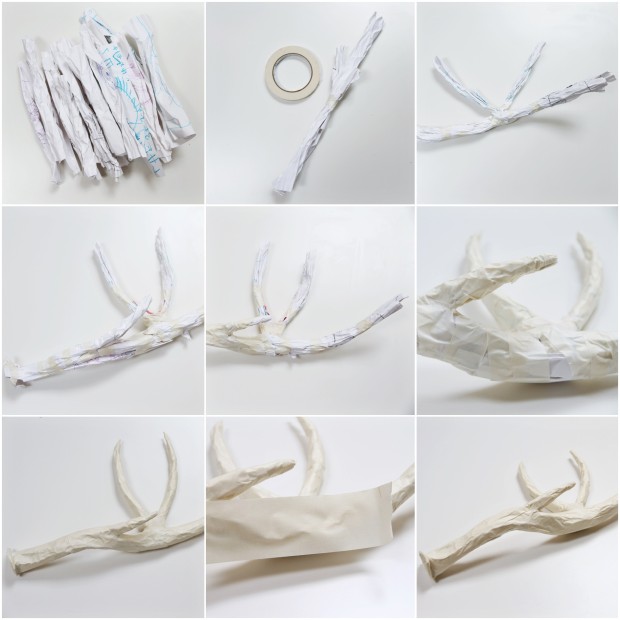
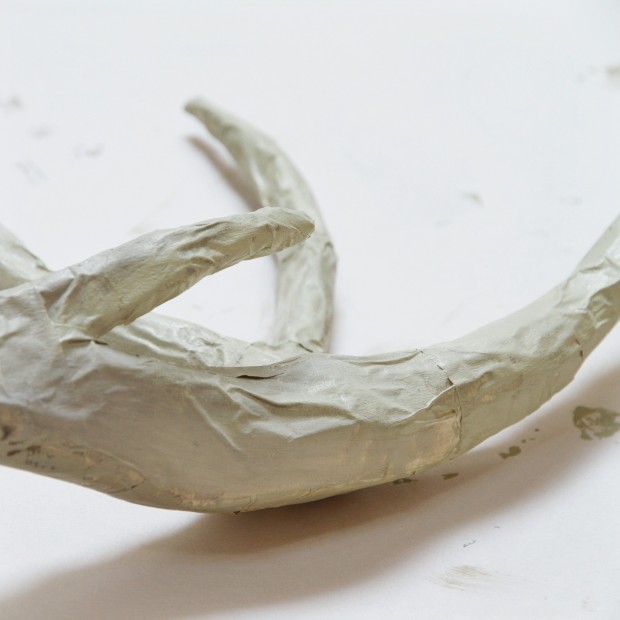
- Roll and squish each scrapbook paper into long rolls.
- Begin taping a couple rolls together to increase the length.
- Add points to the antler in the same way as described above. Use tape sparingly to hold in place at this time.
- Continue to add paper rolls until you have a shape that resembles an antler. Looking online at a picture of antlers would be very helpful if you are unsure about proportions.
- Once you have the shape you would like, start wrapping 2 inch pieces of tape around the antler until the entire thing is covered. You can do this a couple times to make the piece itself stronger.
- After you have the shape and strength that you would like for your antler, take the wider width tape and wrap it the long way to create longer ridges and smooth the look of the layers of tape beneath.
Now for the painting…

- I gave my sculpted antler a light coat of dark brown paint especially at the base.
- I added some dark throughout the rest of the antler to give it some dimension and depth.
- Then I painted layers of cream and white throughout and on top. There is no right or wrong for this. I kept mine mostly cream overall.
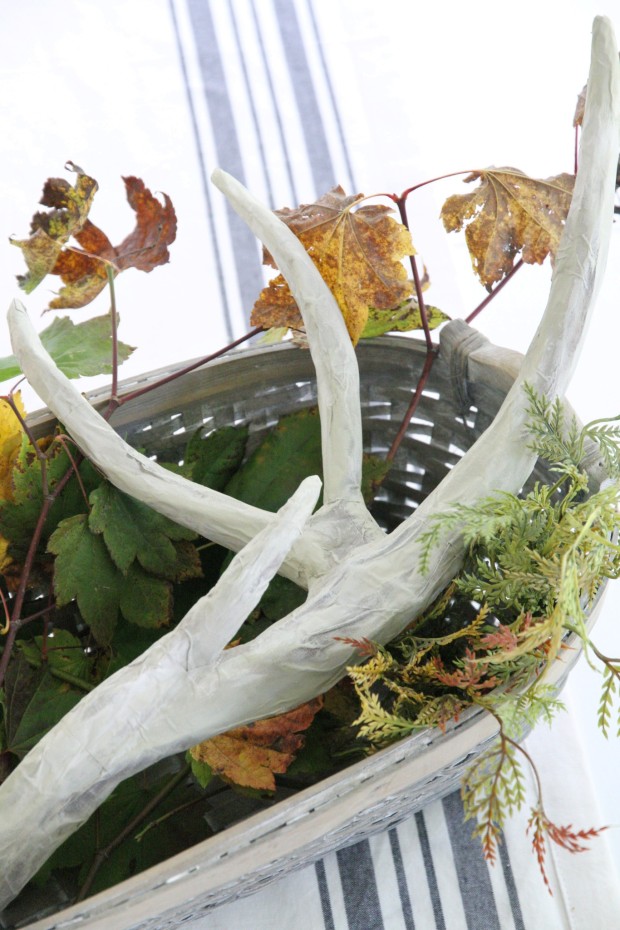
This really is a fun method for sculpting different shapes, I have been meaning to make pumpkins this way and think it would work perfect! What I also really like about this project is that antlers all look different and they are not perfect; so it is ok if no two are alike. My example has imperfections and I am deciding that that is just as it should be. Thanks so much for stopping by!
Stop it!!!!! You are GENIUS!!!!! I have some real ones from my dad but these are just awesome!!!
Courtney you are the sweetest! Thanks so much friend!
Great DIY! I will have to try and make a couple antlers to decorate with around the holidays 🙂
xo – Michelle
http://www.borncreativeblog.com
Michelle thank you so much and I hope you share!