An Inspired DIY Fringed Pillow
I will show you you how to make an inspired DIY fringed pillow!
Hello friends and welcome back! This week felt like it flew by and it was a good one! I got a little time to refuel and if I’m being honest, I struggle with doing that sometimes. I love taking care of those around me and forget that I have to take good care of me too – so this week was definitely good for my soul!
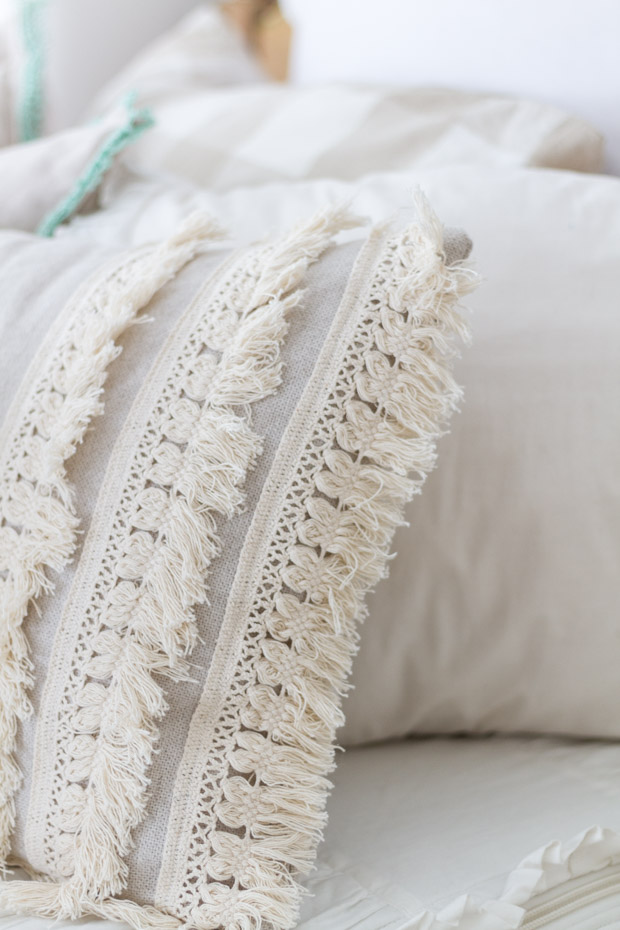
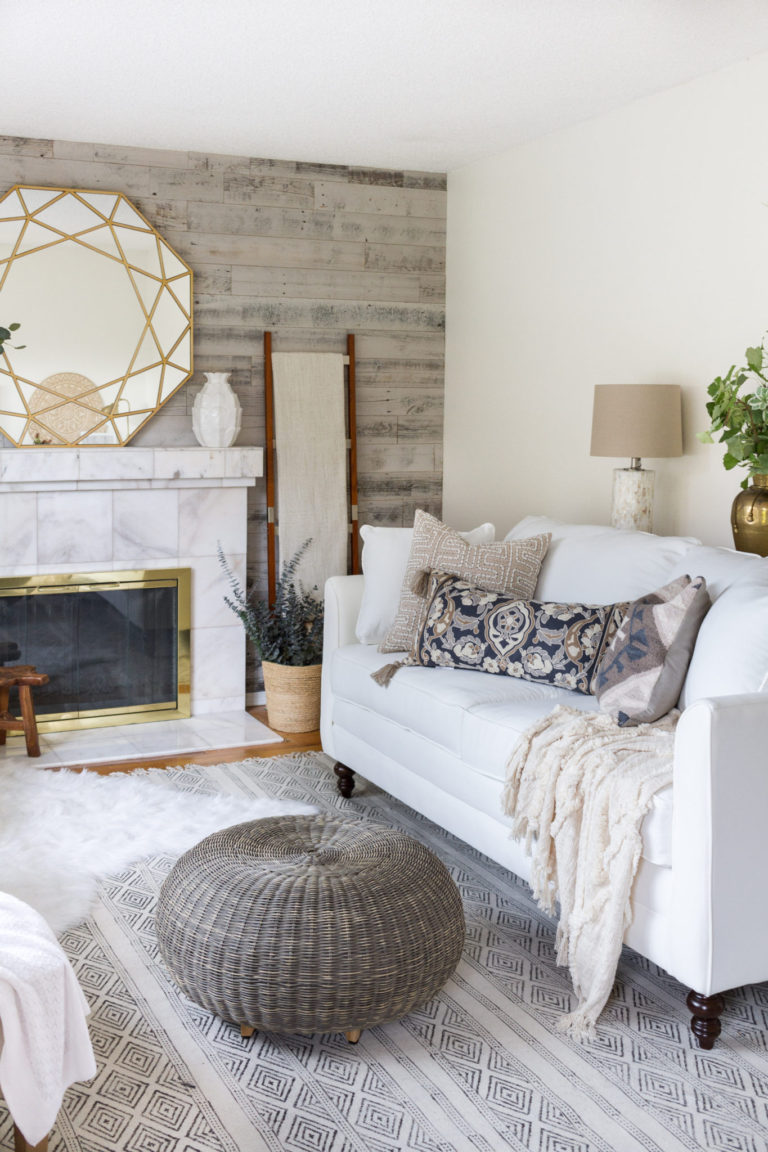
Now onto this sweet project… Earlier this year I came across this pillow at Urban Outfitters and I loved it. It had my favorites – texture + neutrals! It wasn’t in the budget, so I went to making my own version.
Here is how easily you can make one as well! You will need:

- Fringe Trim (amount will depend on what size pillow you use)
- Thread
- Sewing Machine (but you could do this by hand with needle and thread instead if you wanted)
- Sewing Pins
- Scissors
- Pillow Cover
Here is how you will make the cover…
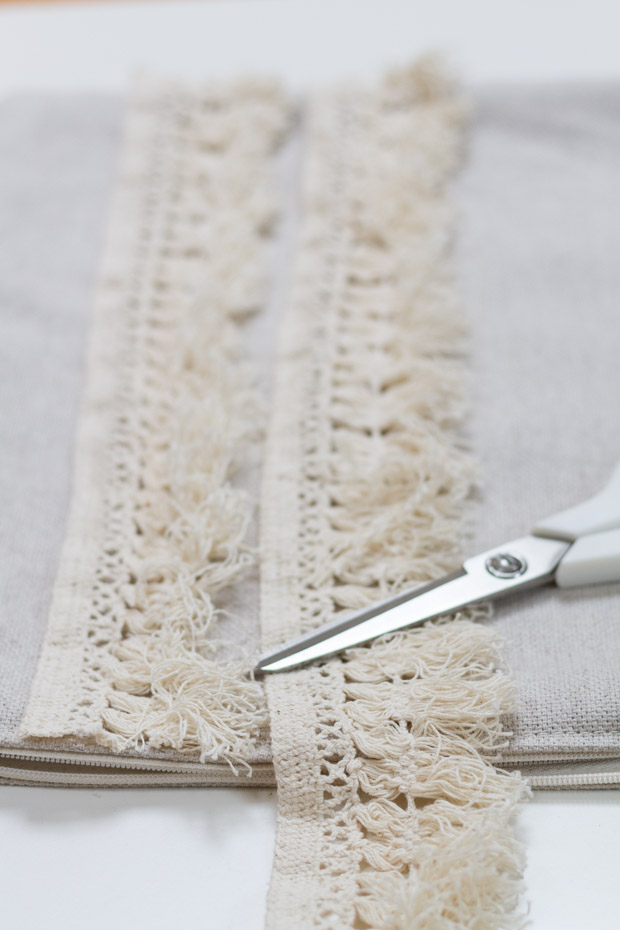
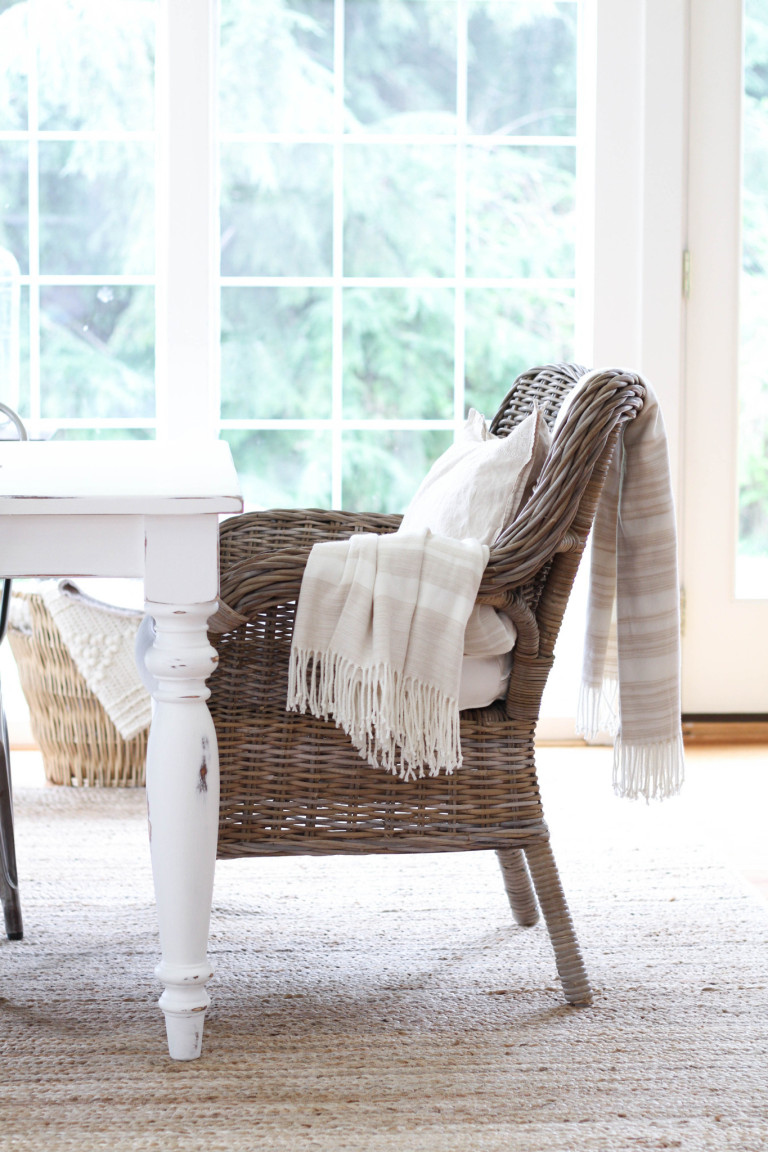
- Layout the fringed trim facing out. And then begin cutting to size…

- As you cut, make sure to also pin so that it stays in place. I separated the three rows of trim on each side about an inch from the beginning and end (as seen above).
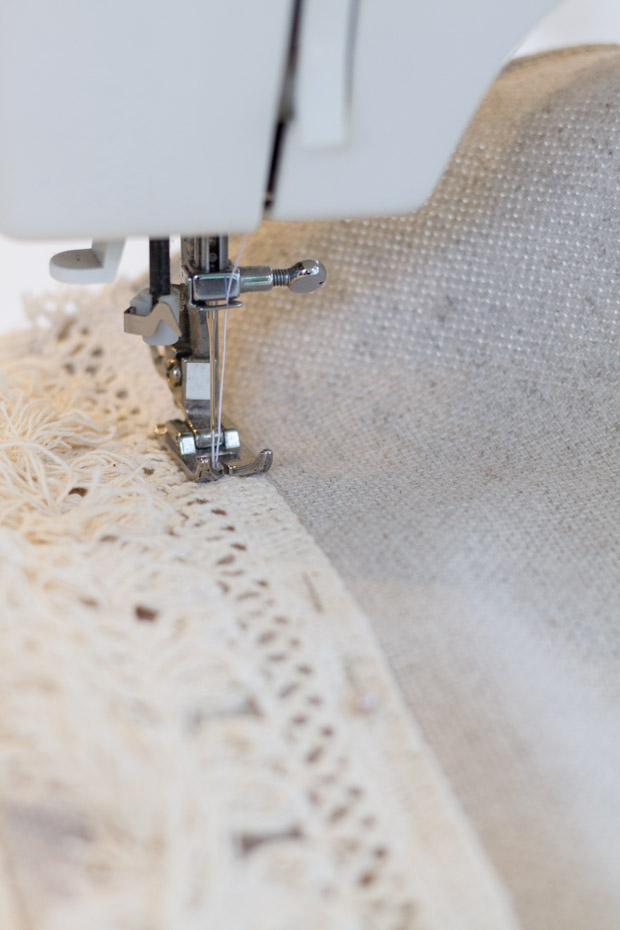
- Carefully sew down the edge of the trim (stitching and back stitching at the beginning and end).
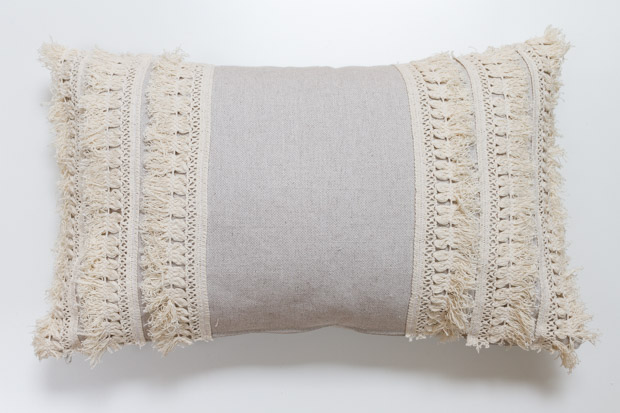
There you have it!

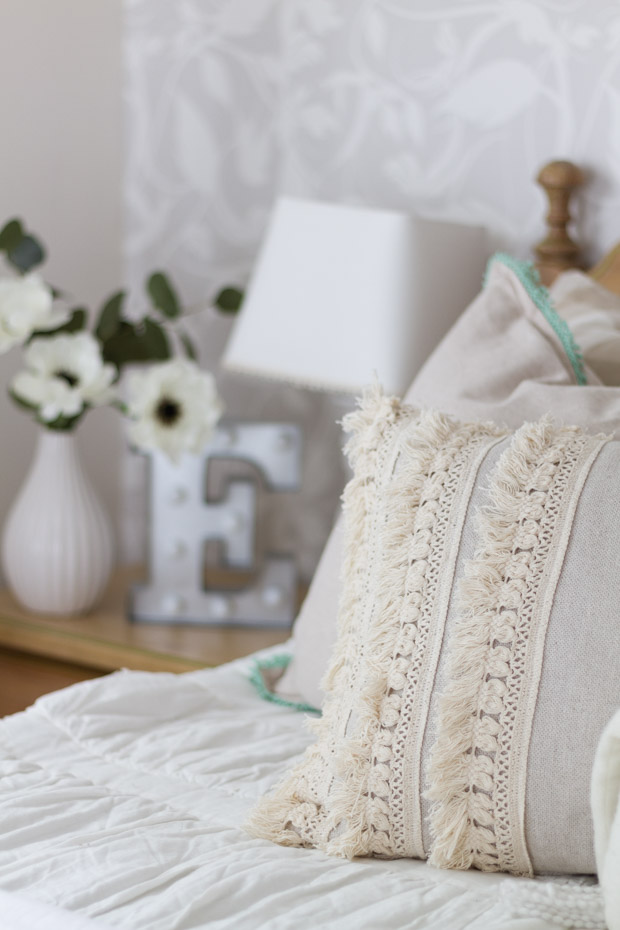
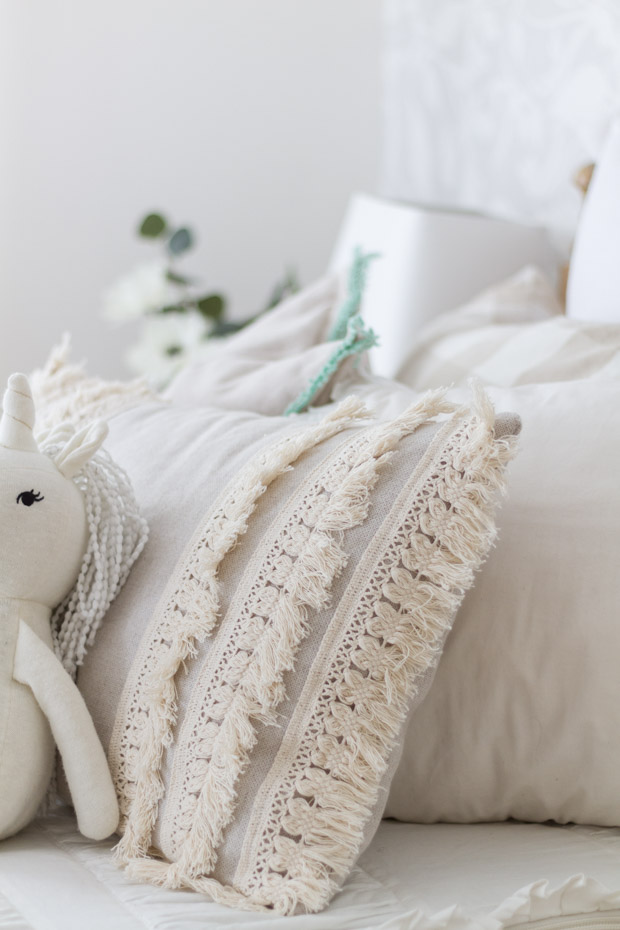
It makes such a fun statement for a low cost.
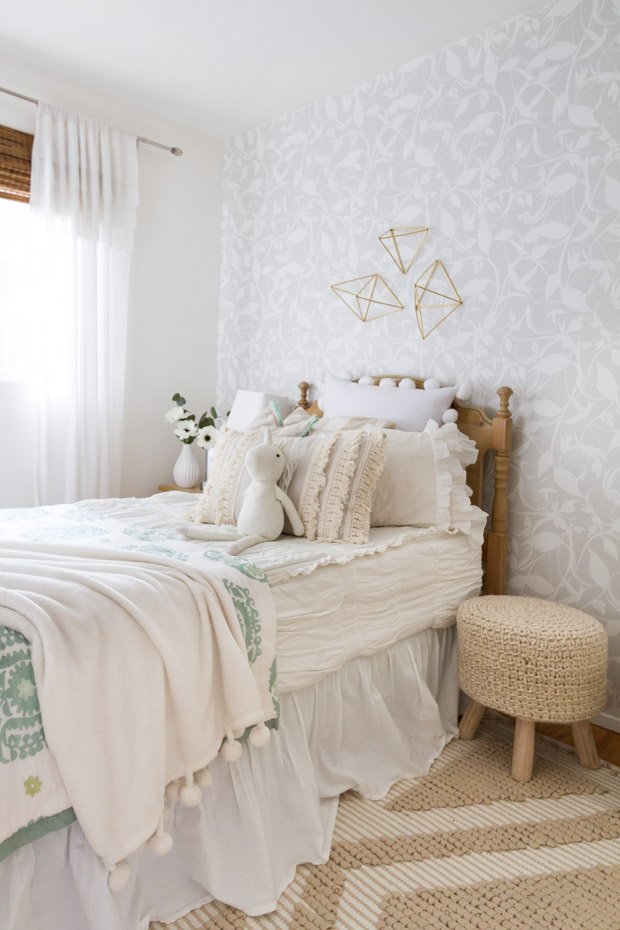
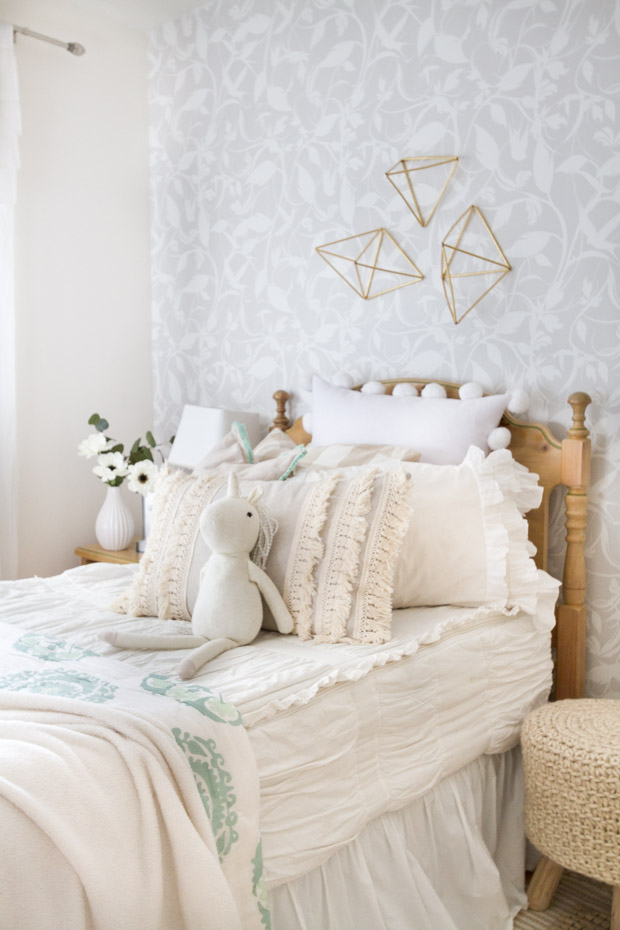
I have moved it all over our house but it has been my favorite in Everly’s room lately.
Mixing a little bit of delicate elegance with organic texture is always a good idea!
I hope you enjoyed this easy project and maybe you will try it out yourself one day too!
Thanks so much for stopping by today, I always appreciate it~

Think I would have to do this using the iron on tape since I’m not too good at the sewing stuff, lol. Might even try some hot glue! Sure do like this idea and plan on using it!
Linda thank you so much and iron tape and hot glue are perfect ideas!!! So glad you stopped by!
Lovely! Such a good idea. I’m off to buy some fringe for one of my pillows!
Kim thank you and hope you enjoy!!
So cute! I was curious where you found this cute fringe trim?
Hi Sonja thank you very much! I am pretty sure that this was from JoAnns =)…
I love it! Where did you find your pillow cover and trim?
Hi Angela, thank you so much! I’m pretty sure that this was from JoAnn Fabrics =)…
I love this Annie! I’m definitely going to make one of these! You always have the best ideas !
Marijean you are the sweetest, thank you! I am so glad you stopped by.
Delightful! I love the burst of texture this adds <3 I'm all about fringey pillows right now.
Oh my gosh, I love this! I know I’m late to the party…I’m still catching up on blog reading. It’s so funny because I saw the exact pillow at UO and have been waiting for it to be severely clearanced LOL! I’m so excited to do this instead!
Christina I am so glad to hera you liked it and hope you enjoy! Thank you for stopping by!
Where is the bed from? The room is sooo pretty!
HI! Where did you get that bed? <3