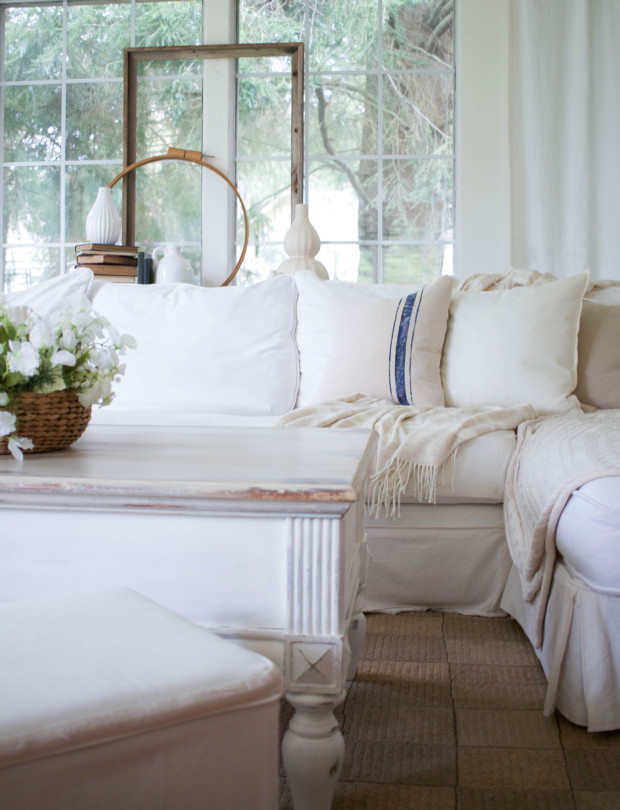
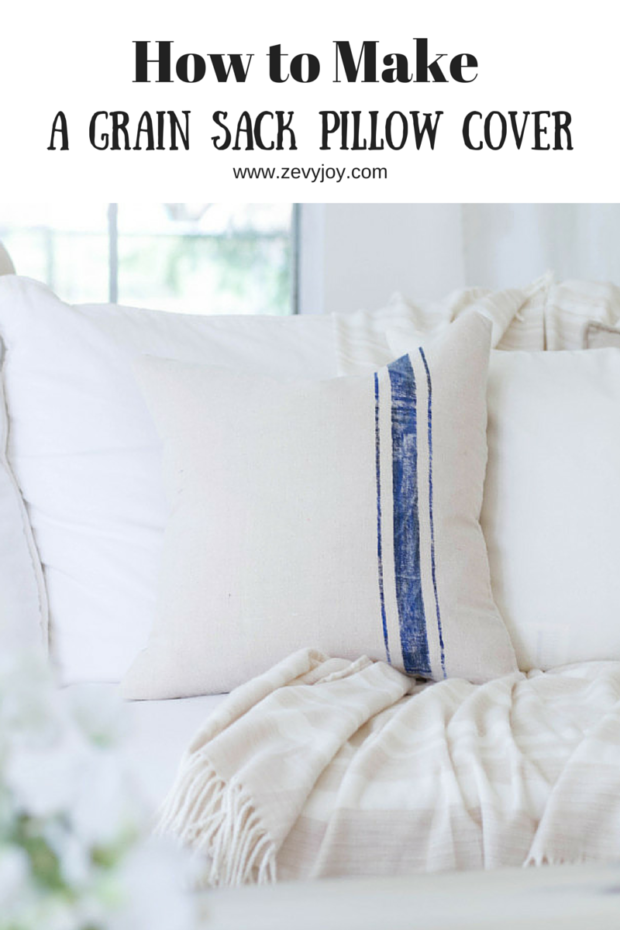
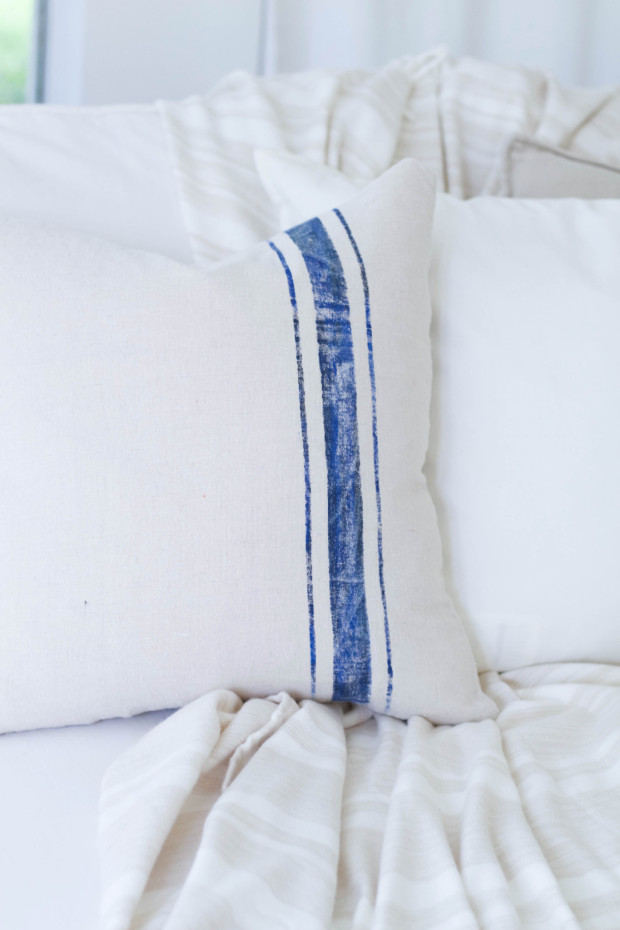
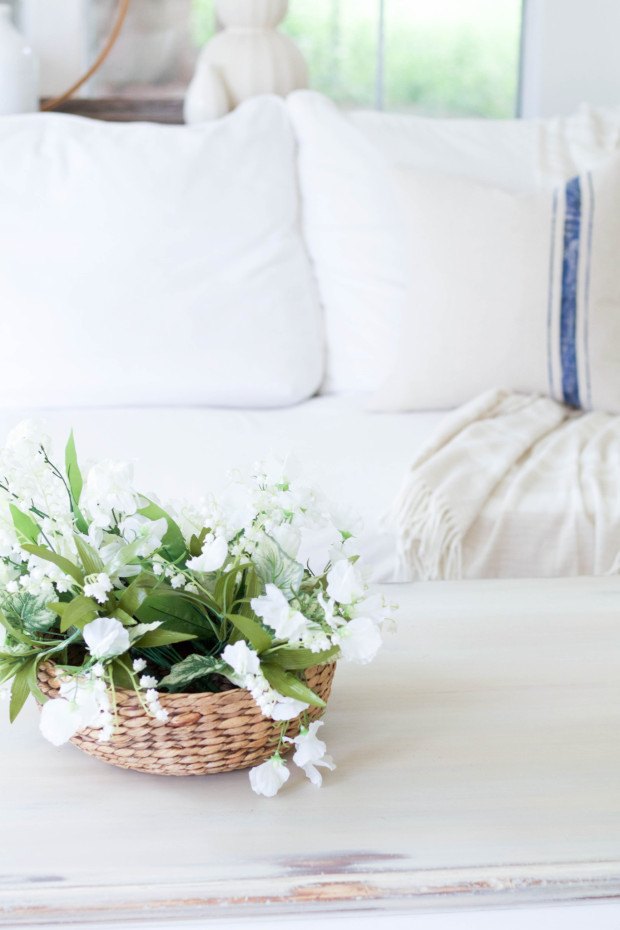
How To Make A Grain Sack Pillow Cover
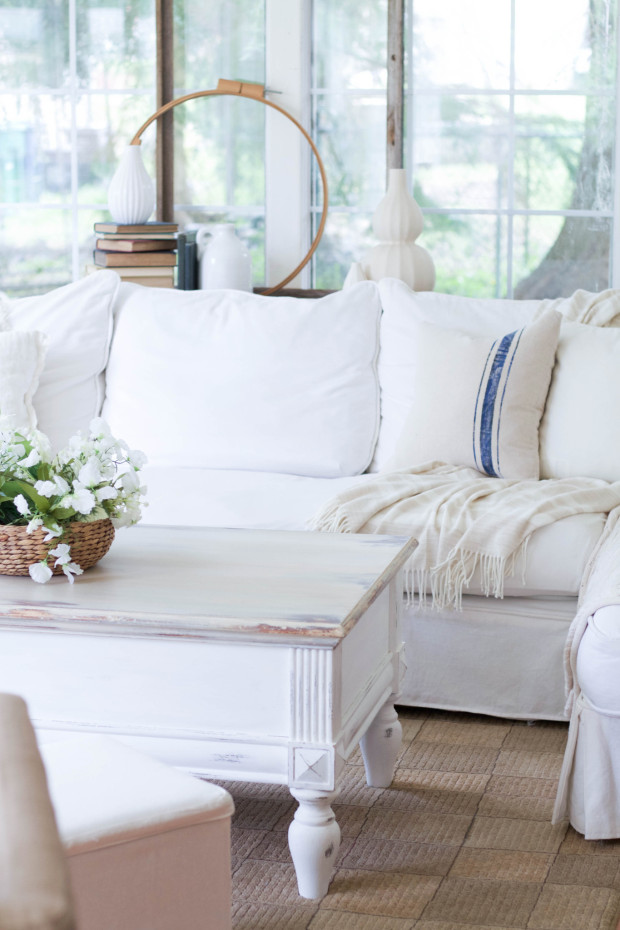
Happy Tuesday friends! I have a thing for pillows and I am sure you have heard me say it many times here, I think they are a perfect way to decorate affordably! Today’s tutorial is no exception… I was able to make this grain sack pillow cover for less than 10 dollars and therefore will be planning to make a few more now too =).
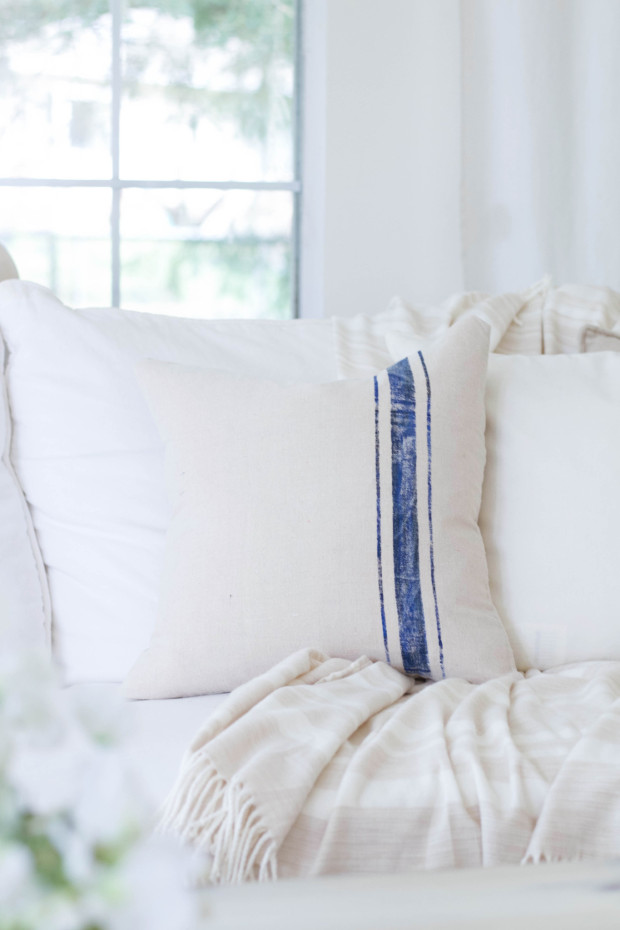
I was inspired by my Ikea pillow that you have seen here and thought it would be fun to make one of my own. I knew that I could use paint, but while perusing the craft store I cam across Tulip fabric crayons.
I wasn’t sure what to expect, but thankfully they worked the way I had hoped! The crayons made a worn and wrinkled look to the stripes giving them a vintage feel.
If you are thinking about trying this too, you will need…
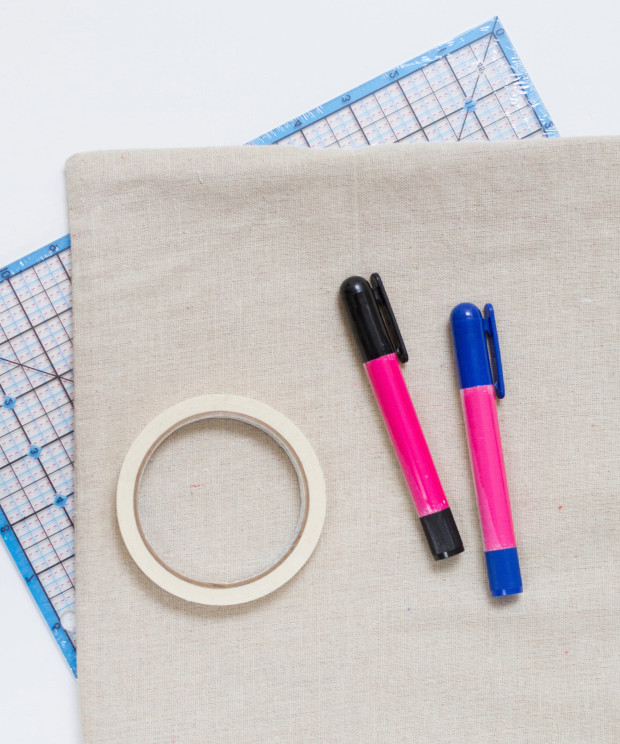
- A linen pillow cover (I found mine at Hobby Lobby).
- Fabric crayons (I used these).
- Masking tape (I used the thinnest I could find at home).
- Cardboard, plastic or tin foil. I have plastic shown in the photo, but actually used folded tin foil underneath and it gave the crayon that worn look I was thinking about making because you could see the wrinkles.
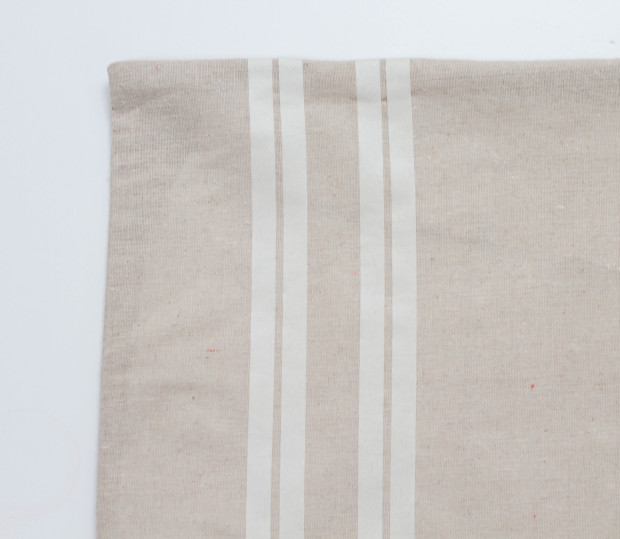
- Mark your pillow cover with the masking tape, lining it up how you would like the pattern.
- I kept mine to one side as I wanted this to look a bit different from anything I already have.
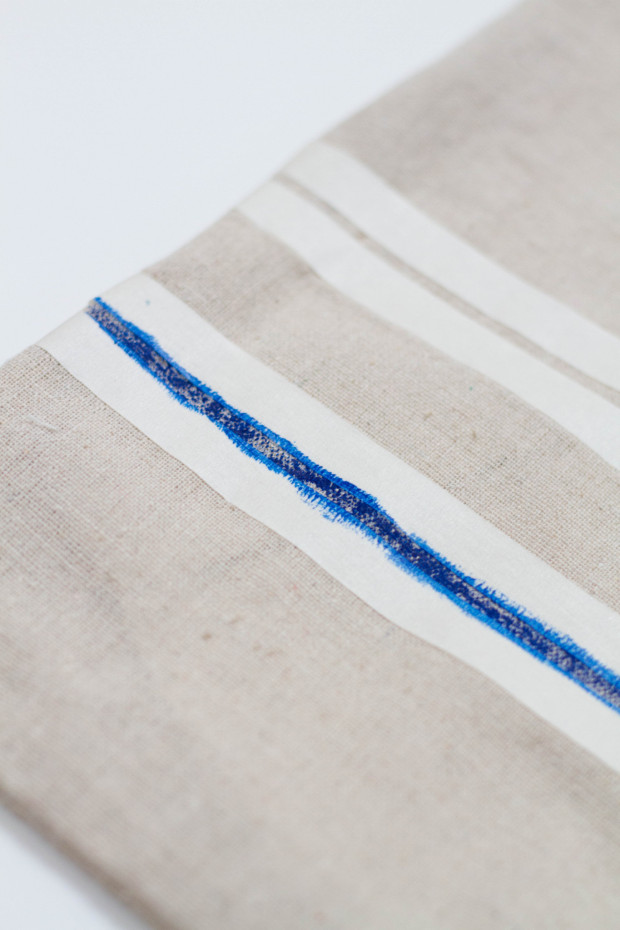
- Take your fabric crayon and begin coloring in between the lines. This was so easy! I just pushed a bit harder in some places more than others so that it looked vintage.
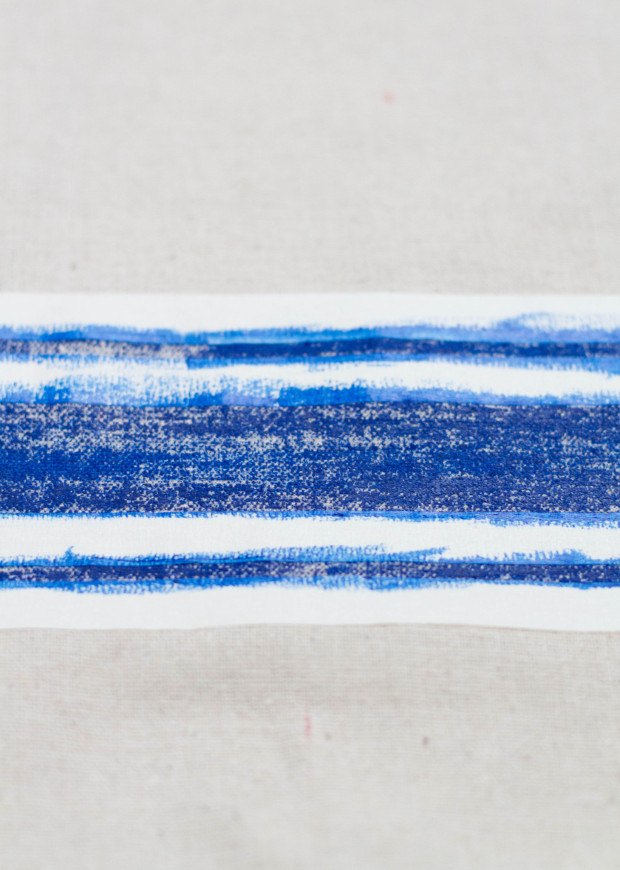
- I also added some darker lines with some black. Again, to give it that worn appeal.
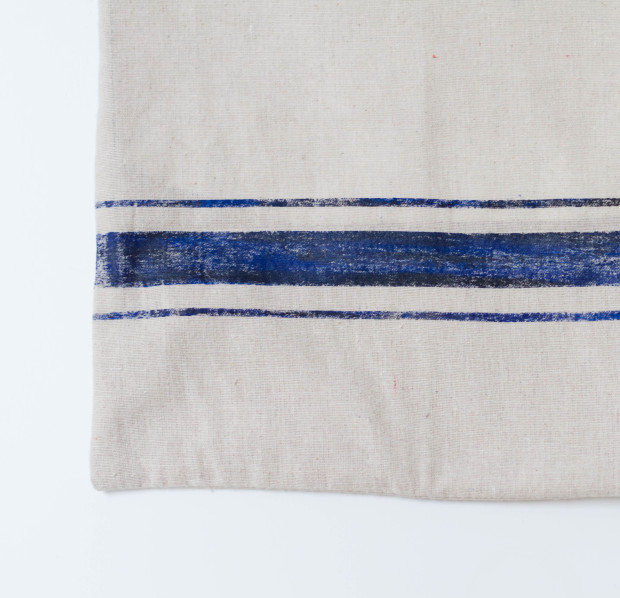
- Take the tape off and follow the packaging’s directions for completing the finish. Mine instructed you to iron with a cloth on top and then wash on a gentle cycle inside out. I washed my cover a couple times so that it really was washed out…
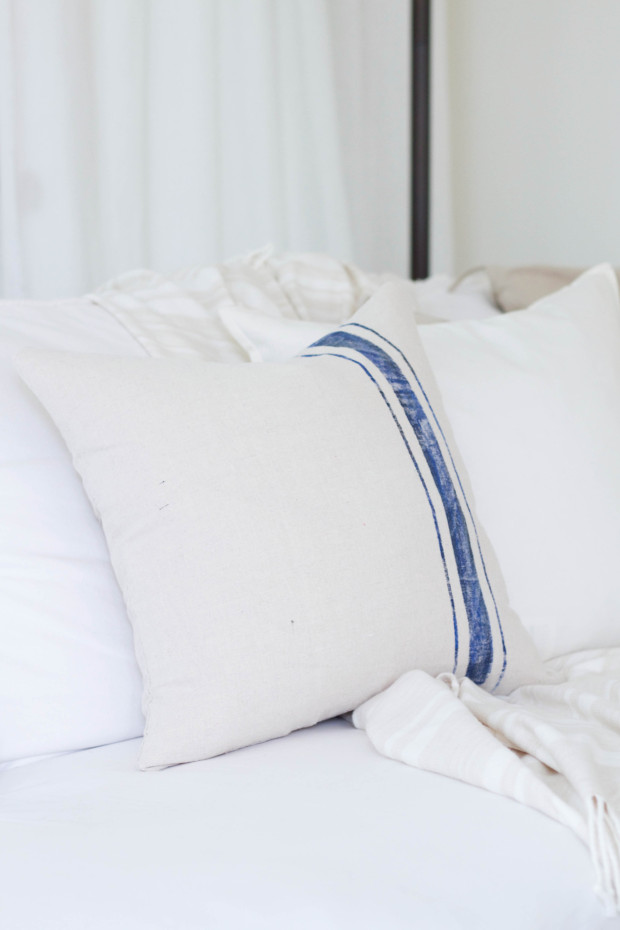
And that is the entire process; simple and cheap!
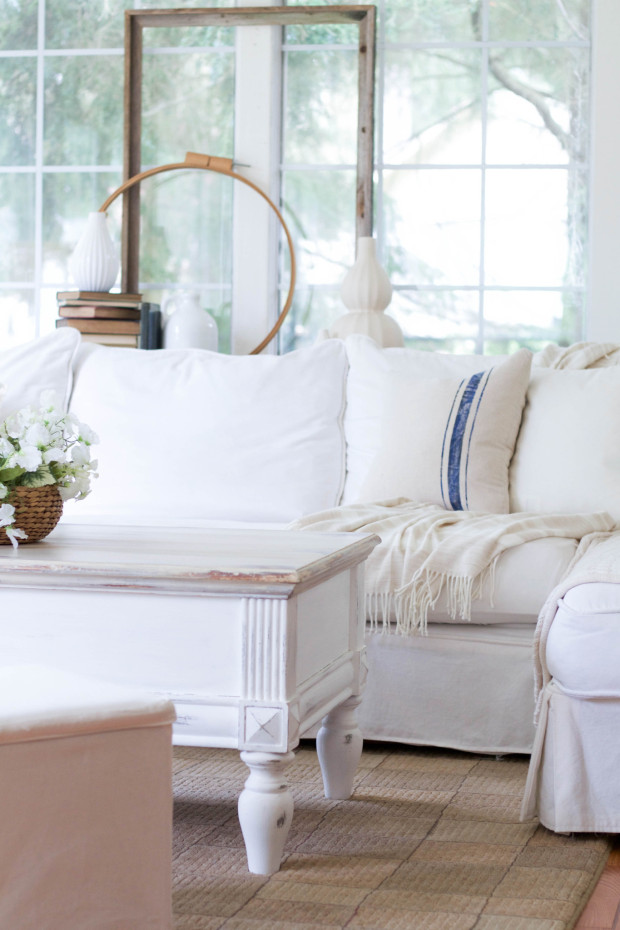
I have all kinds of ideas brewing for making more of these and how great would they be throughout the seasons?!
This could also be used for designs, on tote bags, t-shirts and so much more. I still have plenty of crayon to use for projects to come.
I hope you enjoyed this today and thanks so much for stopping by. Don’t forget to subscribe to my mailing list if you would like to get regular post updates! I’ll be back on Thursday sharing our kitchen in a fun, One Room Spring Tour hosted by Kathleen over at Lindsay Hill Interiors, see you then and make sure to head to her Instagram to catch all the details for this week’s tour.

Love this. I have seen this done with paint, but like this tulip crayon look better. Thanks so much for sharing.
Hi Cheryl, thank you! I am glad you enjoyed.
Hi Annie! What a fantastic idea! I love the look of feedsack, old french linens, this fits the bill without breaking the bank! So clever! I appreciate your ideas, thank you.
Dee @cottagecomforts instagram Pinterest
Dee thank you so much. I always appreciate these kind comments and am so happy to hear that you enjoyed it! Hope you are having a great week!
Love it! We are redecorating and this idea is super great. I am gona try it on burlap also. Now I can change out my pillow for the seasons as you mentioned. Thank you for the idea.
I am so glad to hear you think so and I appreciate you stopping by! Thanks so much!
I’m so glad that I found this!! I want to do this exact thing!!! Yours is beautiful!
Jessica thank you so much!