DIY Laurel Wreath
I will show you how to make this beautiful DIY laurel wreath .
Happy Tuesday friends! Can you believe Thanksgiving is right around the corner here? Truly, where does the time go?! Anyhow, with Christmas coming up quickly after Thanksgiving, wreaths and decor are being put to use already. That is why I am sharing this very simple but festive DIY Laurel Wreath with you…
I love using pretty wreaths throughout our home and I think they are a wonderful and inexpensive way to dress walls up through the seasons. What I really enjoy about this DIY laurel wreath is that it can be used for any time of year.

It can be perfect for summer, but also would be beautiful throughout the winter months when made with golden picks or snowy embellishments.
I have always admired the shape and the popularity of this simple decorative wreath, but have never really wrapped my brain around how I would actually go about making one…

Until, the other day I came across some wire floral wreaths…

I realized how this metal form would be the perfect shape to help hold a laurel wreath together on your wall and here is how you can make one too…

- First, you will need a floral wire wreath, 2 faux leafy branches (any kind will do), scissors, floral wire, a wire cutter, pliers and some brown floral tape (which is not pictured).
- Now take your pliers and pull back all the metal tabs holding the wire floral wreath together. There are typically 3 wire hoops that make up one wreath.
- Carefully pull apart the hoops once the tabs are loose.
- Snip one of the singular wire hoops into two half circle pieces using your wire cutters (one half is shown above). This will be the shape/form for the new laurel wreath.

- Take one leafy branch on each side and bend it to the shape of the wire half circles.
- Next, use small pieces of floral wire to affix the branches to the half circle wires (I spaced each tie about 3-4 inches apart).
- Use another section of floral wire to connect the two ends of the branches and finish it off with the brown floral tape so that the wire is covered.
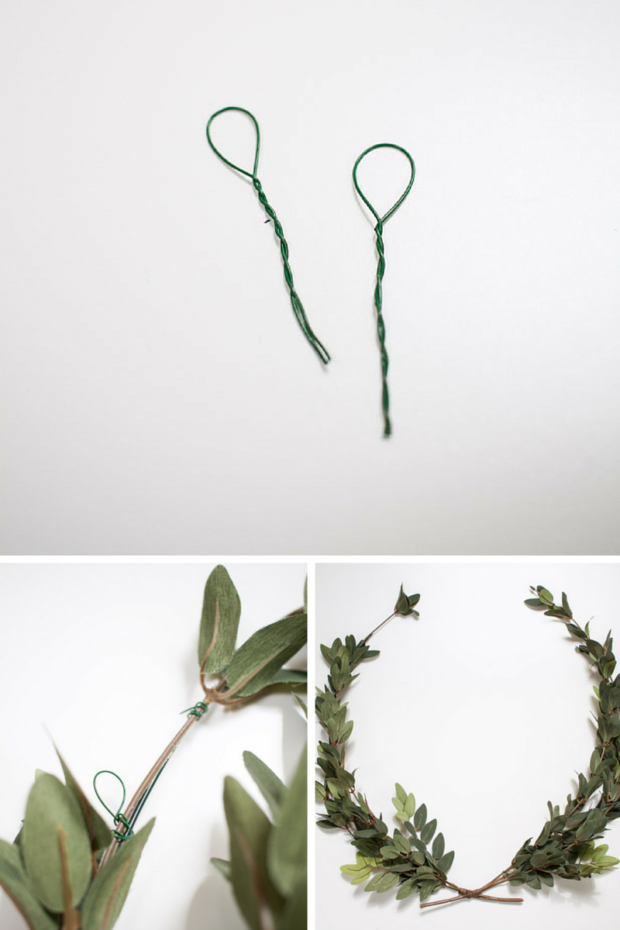
- Make two eye hooks with your floral wire and twist the bottom secure as shown above. I made these a couple inches in length from loop to end.
- Wrap these eye hooks a few inches from the top of the laurel wreath ends – as this will be how you can hang your new wreath.
- You are now ready to decorate with your new wreath =)
*As always, any time you are using tools practice safety….

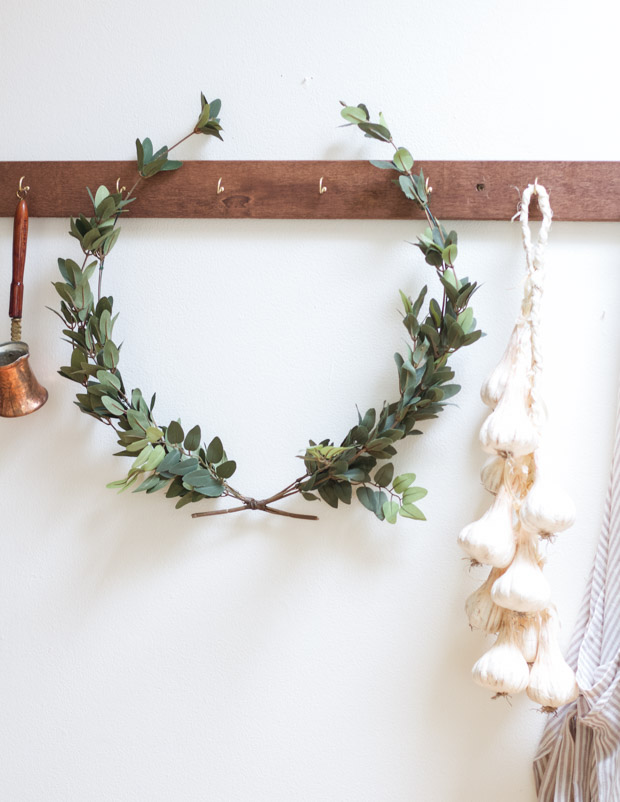
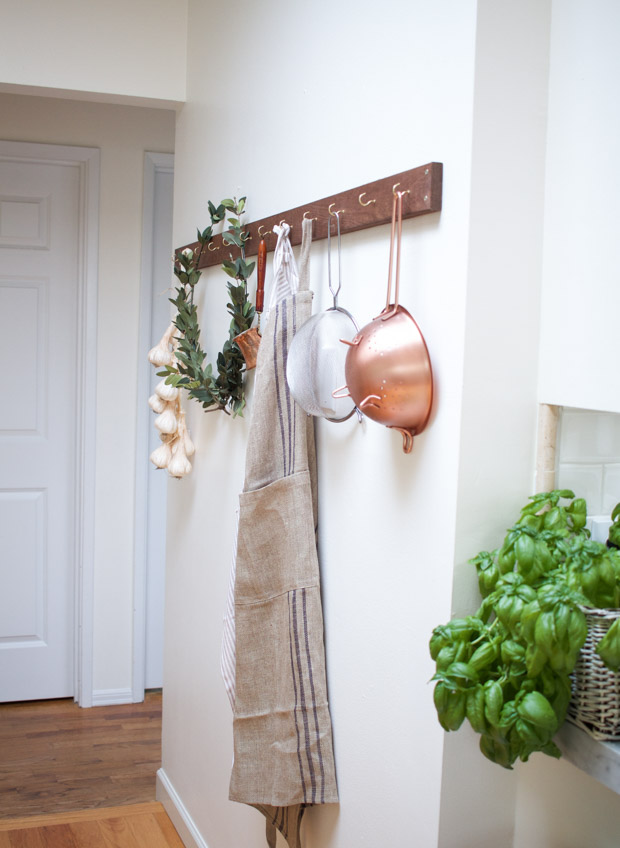
I showed you how we hung ours in the kitchen, but I also wanted to give you another fun way to use this popular simple wreath.

There are so many pretty stamps or stationary that use a laurel wreath with an initial and you can do the very same thing in your home.

I took a distressed wooden letter and simply hung it in the center of the branches.

This is just a fun spin on something simple, but for a few dollars more it gives this piece an entirely different look.

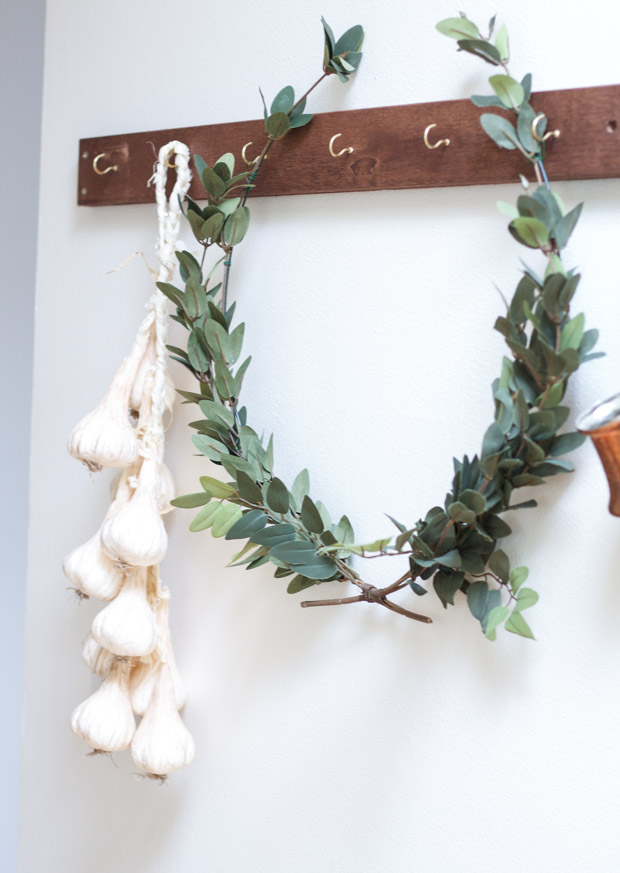
Here is the most recent picture of it being used in the kitchen with winter yard clippings…

Thanks so much for stopping by and stay tuned for next week as I’ll begin to share some of our spaces decorated for the season!
This “DIY Laurel Wreath” post was also shared on Craftberry Bush June 14, 2016


Breathtaking! I really like the greenery you chose. Will you share a link to your floral pick or tell what kind of leaf it is?
Hi Angela! Thank you so much! This greenery is from Michaels and I am not certain what type but just saw it there on my last visit. Hope that helps and thank you again ~
Love this amazing DIY! It’s simply beautiful and can’t wait to give it a try!
Thank you so much Emmahlyn!
Where did you find your letter?