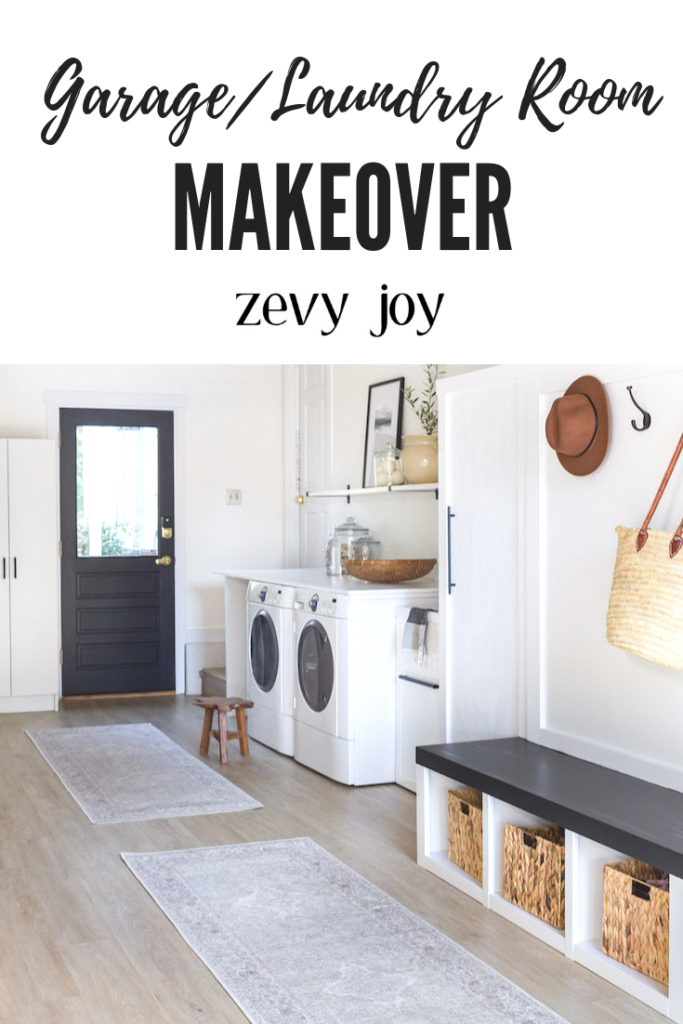
Garage/Laundry Room Makeover Part 1
Garage/Laundry Room Made Over!
*Lumber Liquidators and Ruggable both sponsored this post.
A Fun Before/After Makeover of a Laundry Room!
Oh goodness you all… I can’t believe I am going to say this, but this may be one of my favorite makeover to date. Well, it makes the top of the list, haha! You may remember me saying that we have been working on making over our laundry room that sits in one of our 2 small garages. And it is finally close enough to done for sharing! This will be part 1 of the makeover as we have a second part on the way and I will be sharing that sometime later in the next couple months.
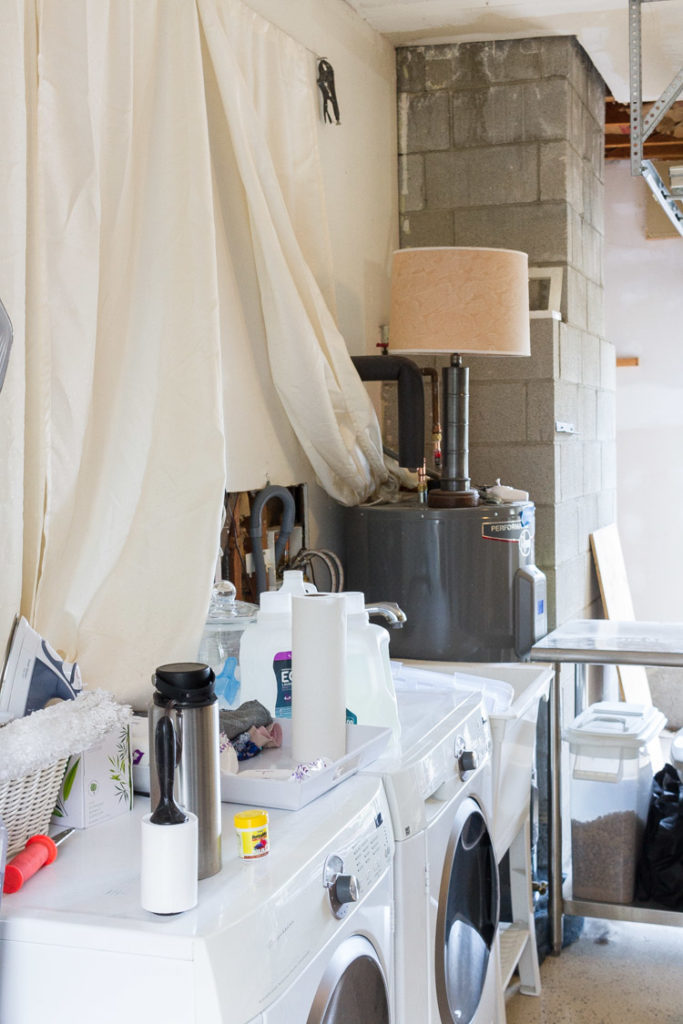
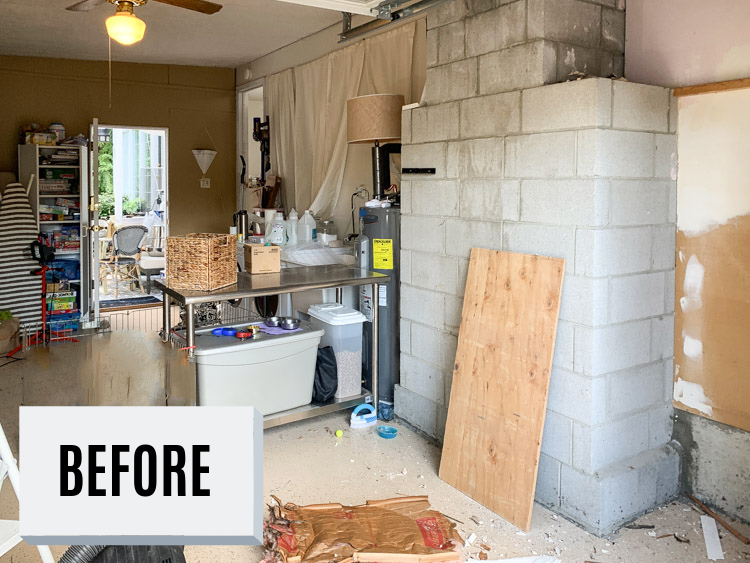
Let me start by saying, that this is actually hard for me to let you see the behind the scenes here as it is so bad… We kept things as clean and organized as possible, but this space was always the dumping ground for things that didn’t have a place and needed somewhere to go. When we first moved in I did paint the walls a golden beige and the floors but that was nearly ten years ago. The wall that our washer and dryer sits on was the worst. In a budget friendly attempt, I hung these curtains to hide all the ugly piping that just stuck out from the wall. We weren’t ready to tackle on too much construction at the time, so curtains it was, lol!
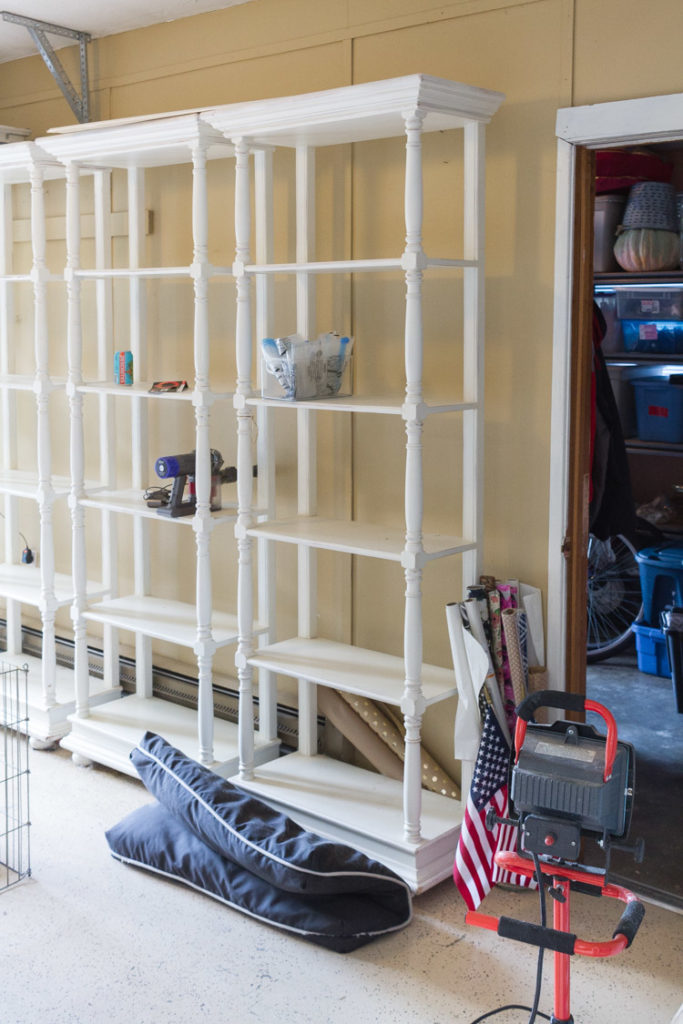
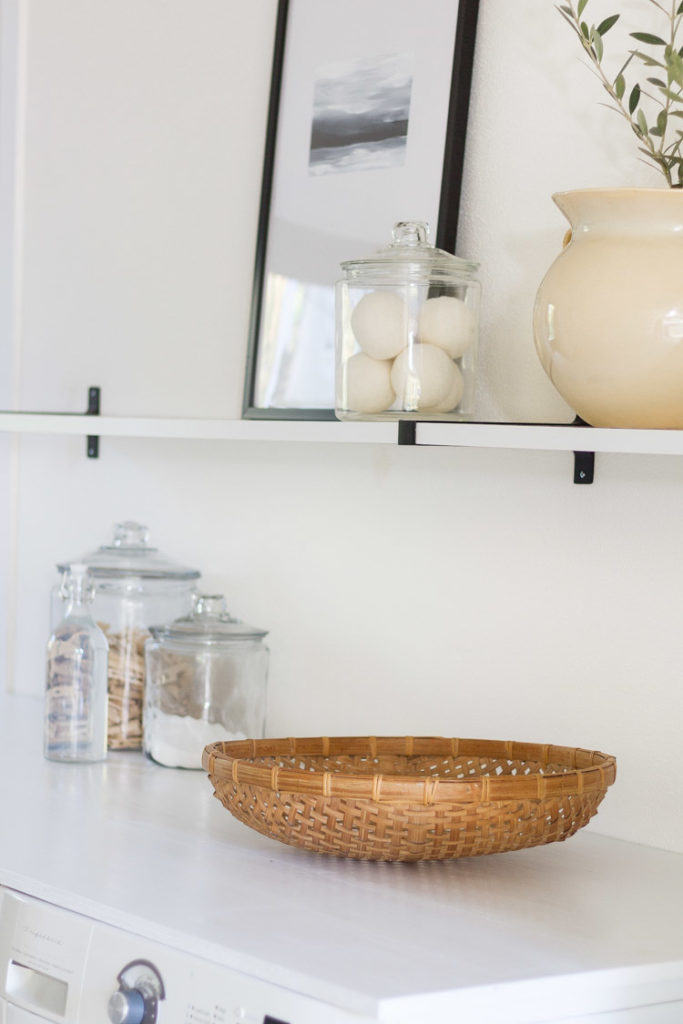
Across the way we had this pretty shelving, but it was stuffed with things in a haphazard way. Most of it was decor that I typically trade in and out from the house at different times. Extra plates, dishware, glasses were sitting there. It was somewhat similar to a butlers pantry.
I know… it was pretty chaotic in here, dark/dingy, cluttered and this great amount of space really wasn’t being used well. So you can imagine our excitement when we finally decided take the plunge and give this space a good redo!
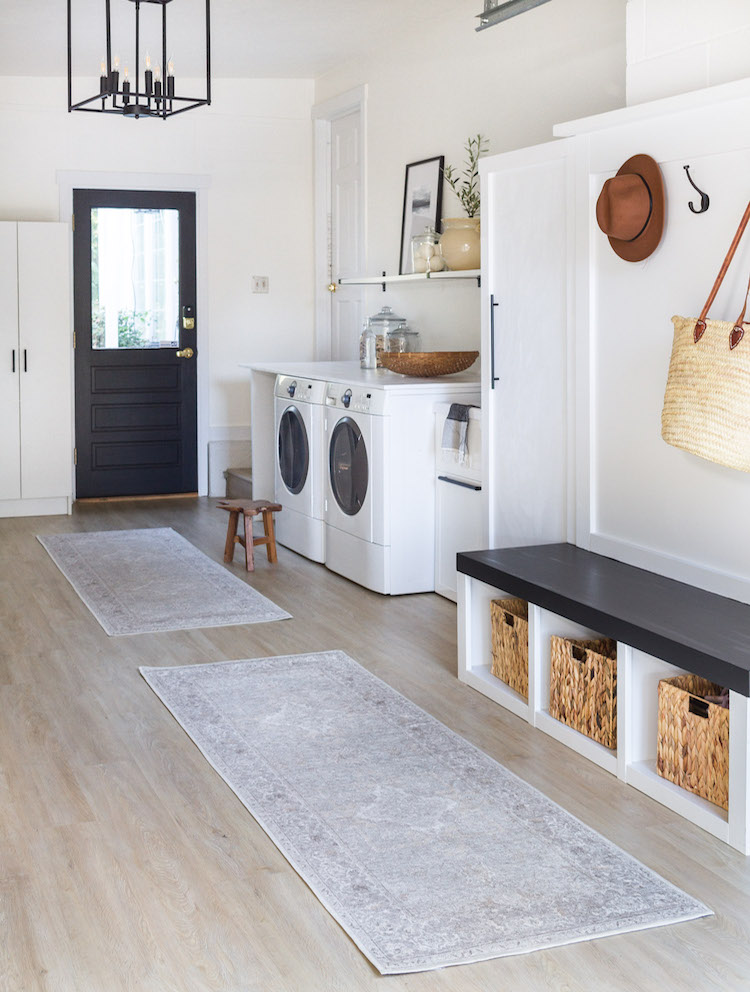
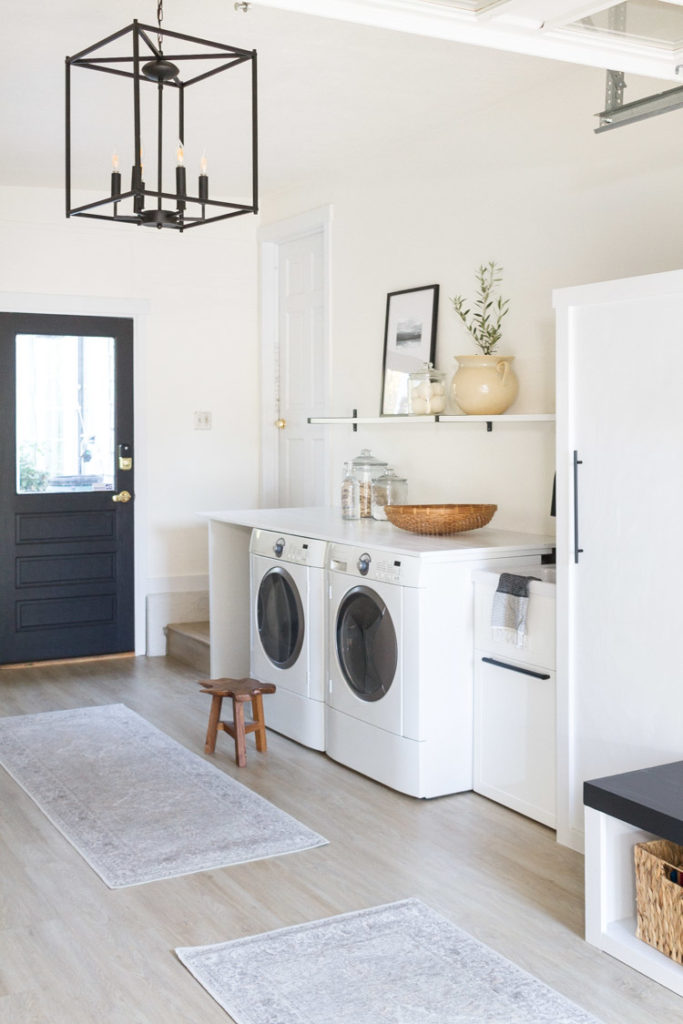
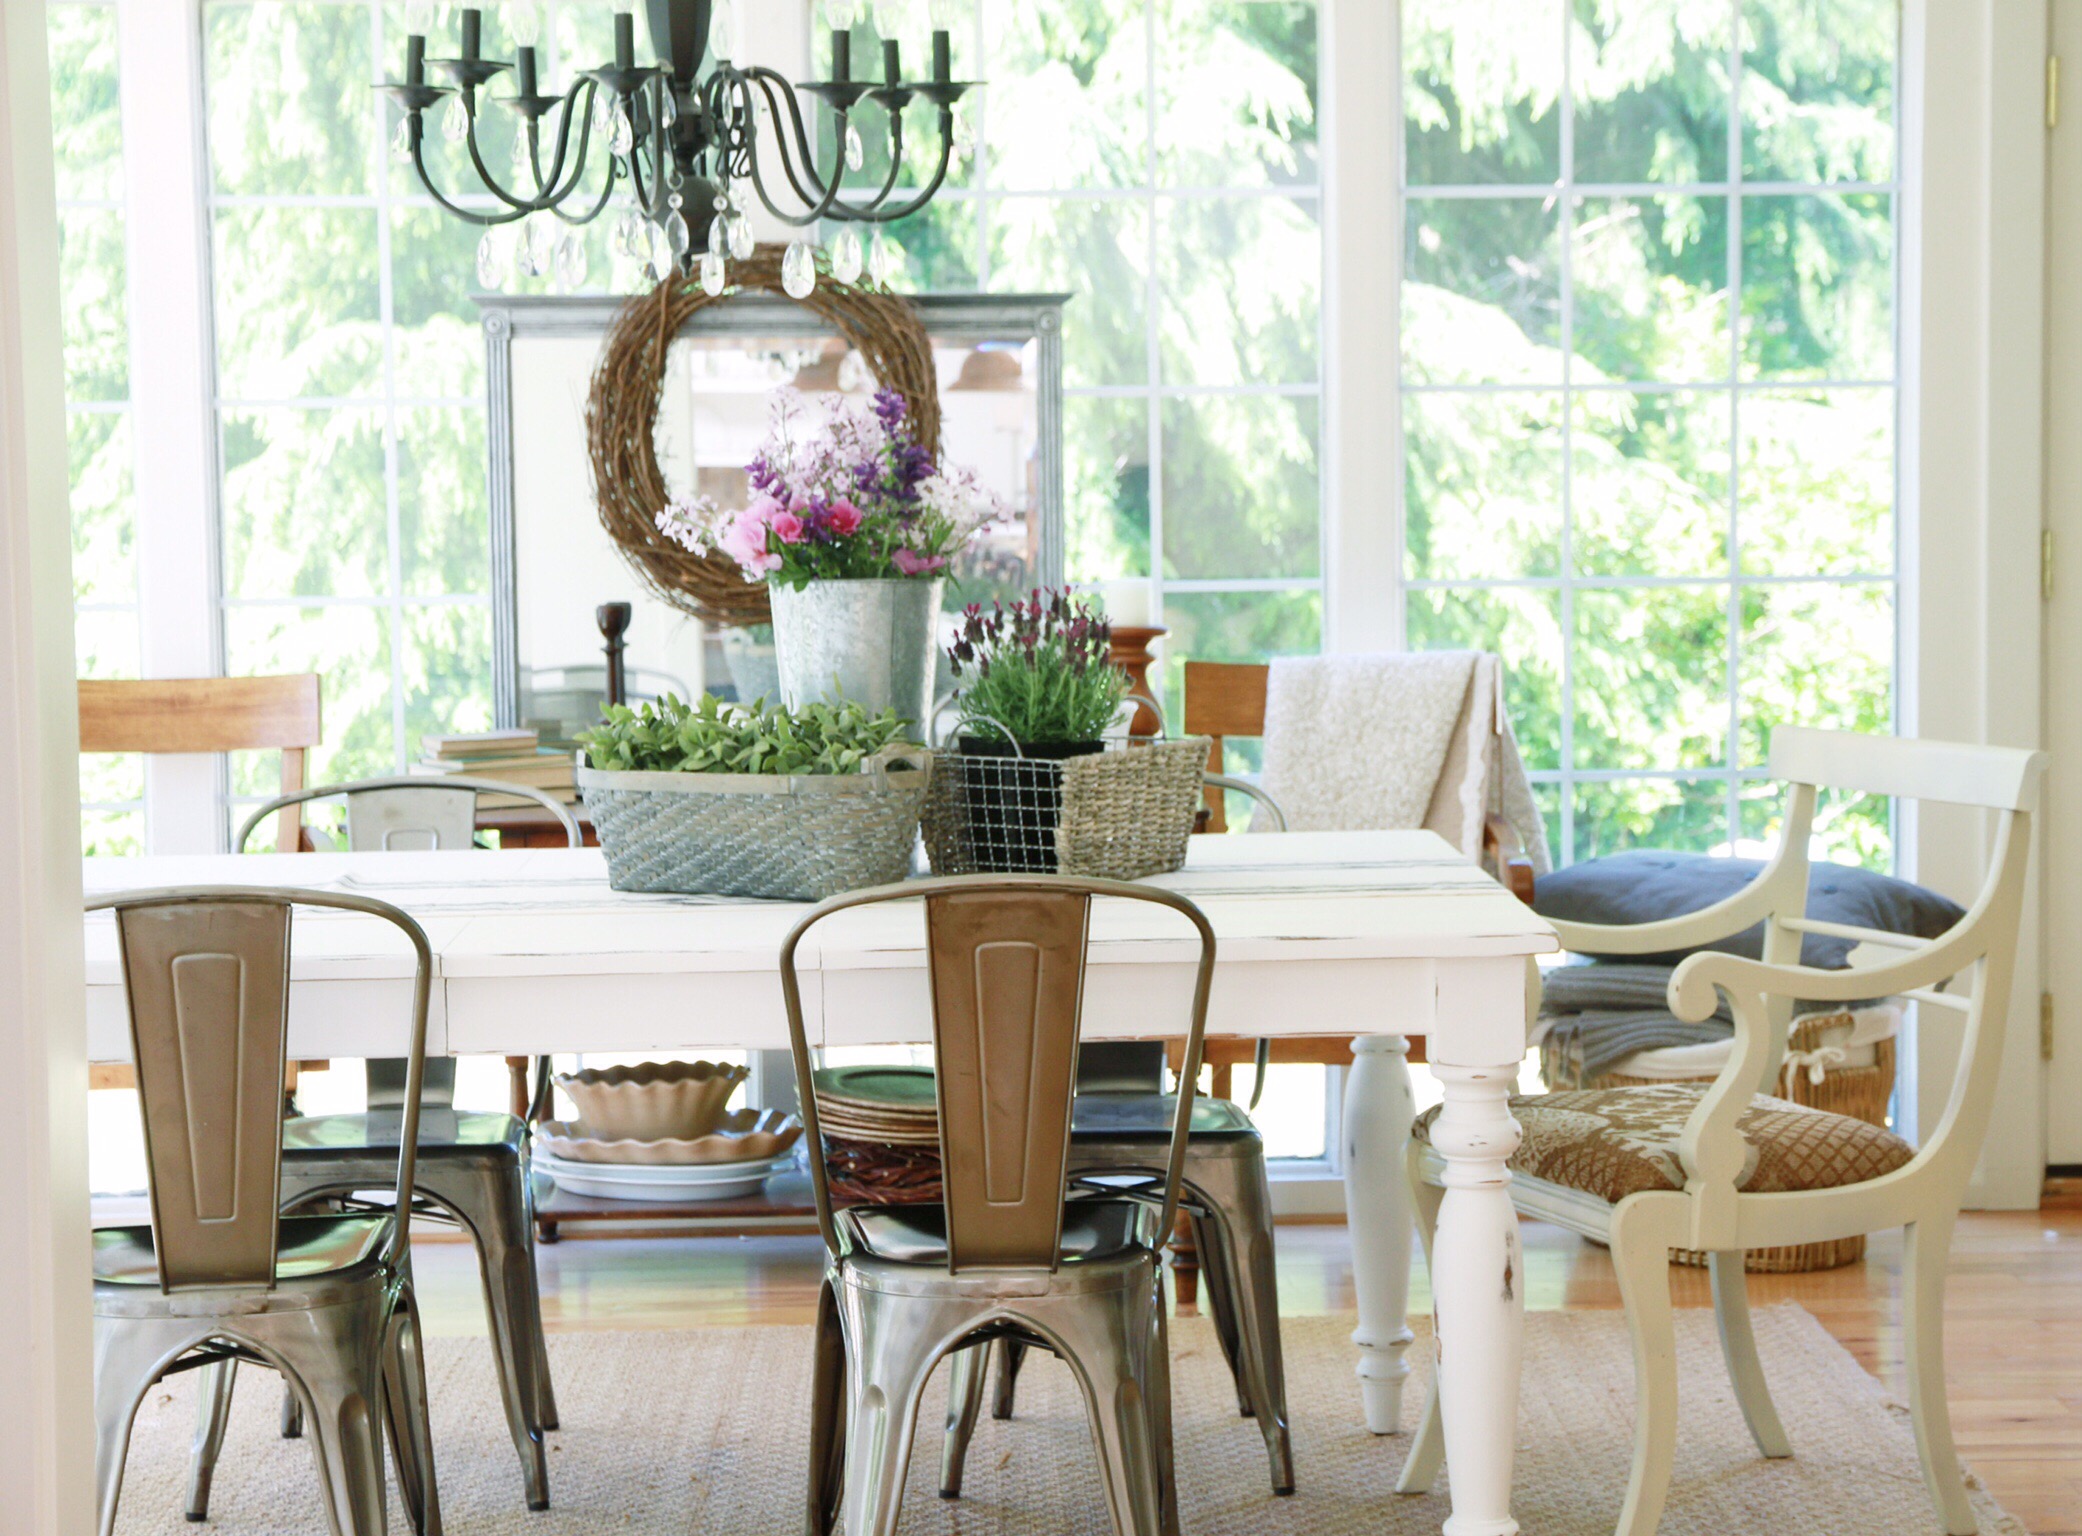
Here is a look at the after! You can see we made some small changes and some bigger ones too. The first being we continued on the flooring we have in our main living spaces. It is from Lumber Liquidators and it is the EVP CoreLuxe, colored Sandbridge Oak. This flooring was perfect for this space because of its special features. It is water proof, has a durable top coat and it is Green Guard or FloorScore certified. They are floating floors so we were able to install them on top of our existing floors. I love how they resemble wood floors too. I will reinforce though, that we would NOT use these if we were using this garage to park cars. I would not recommend parking a car on top of them.
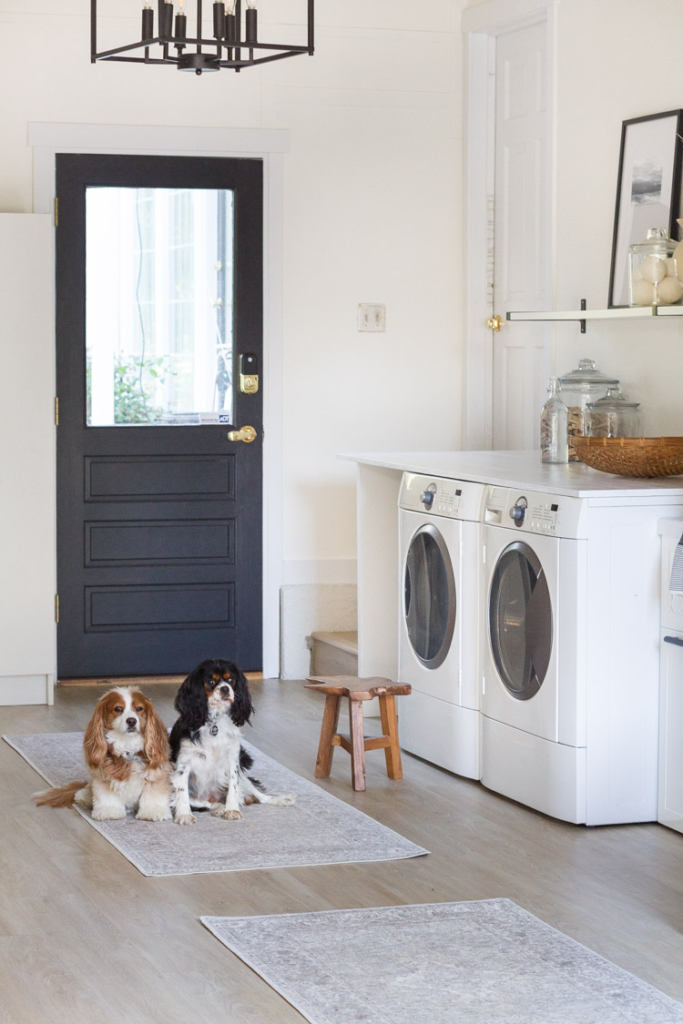
Next, we laid out these pretty rugs from Ruggable. We chose the runner sizes of the Maral Heriz Creme design. I love the subtle colors and neutral tones of these rugs. Ruggable is especially neat because these rugs are non toxic, stain resistant and best of all… They can be washed! So you can see why having them in a high traffic space like our laundry room/garage would be ideal. They are a rug cover with a rug pad that goes underneath. The cover part is the piece that can be removed and thrown into the washing machine, genius!
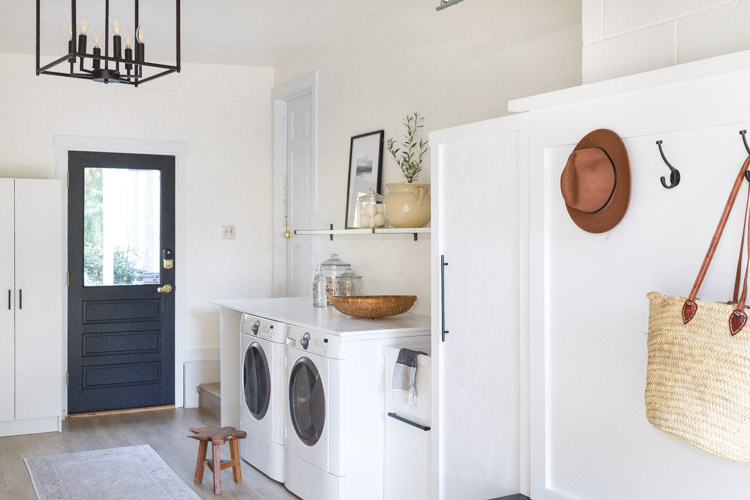
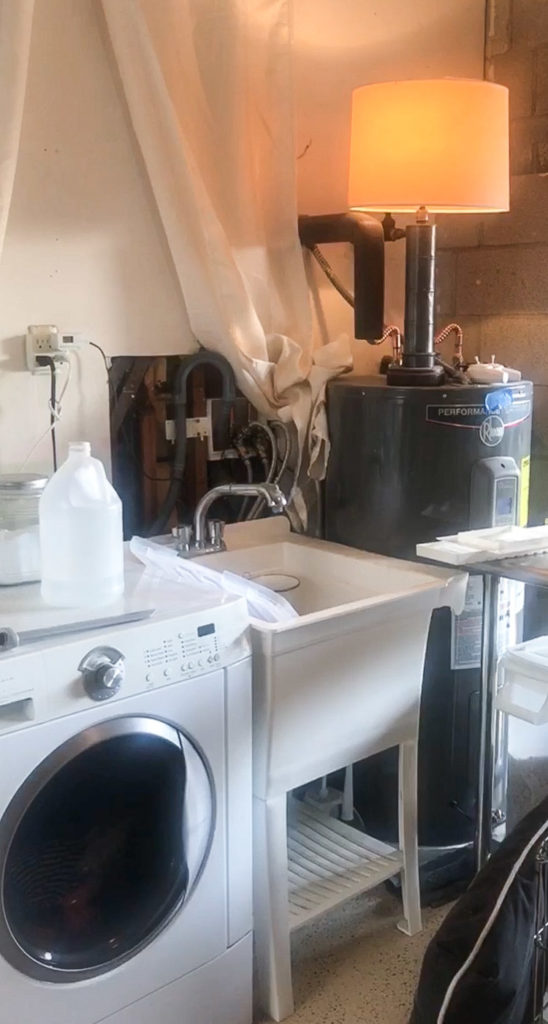
The next big change was to cover up some of the unsightly things such as piping and our water heater. My hubby and generous father-in-law did all the construction in this space themselves. They built the boxes, the bench and all the finish work in this space. We chose to have the water heater closed off and wanted the box to look more like cabinetry. So we put this faux handle on it.

We found a new utility sink on craigslist for a steal of a deal and changed out the faucet for a matte black one so it would be cohesive with the rest of the hardware.

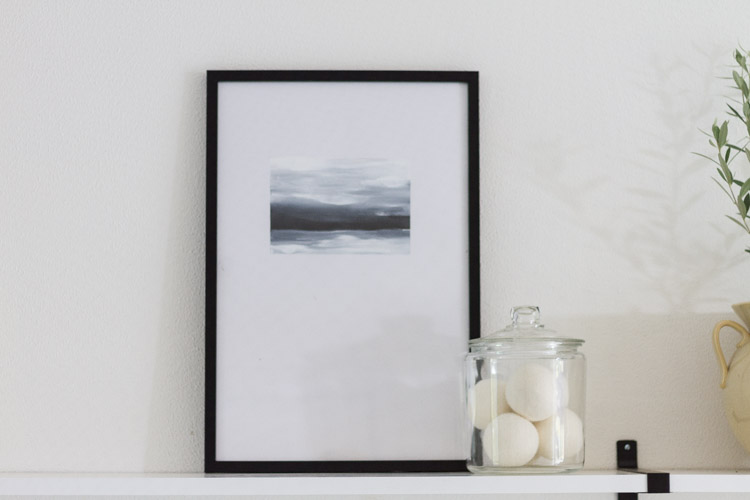
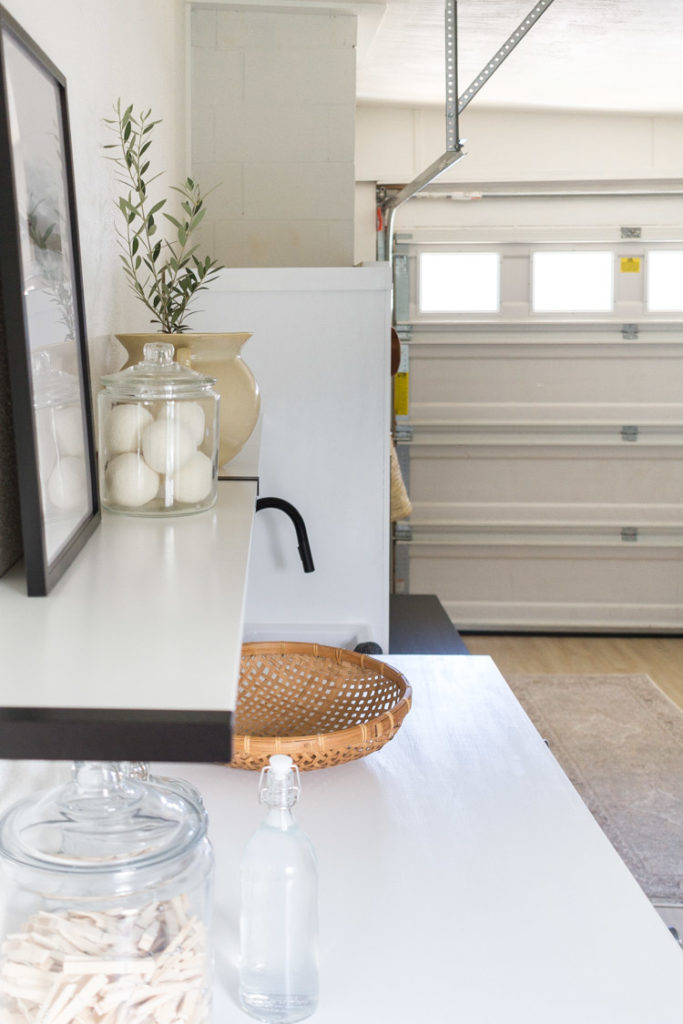
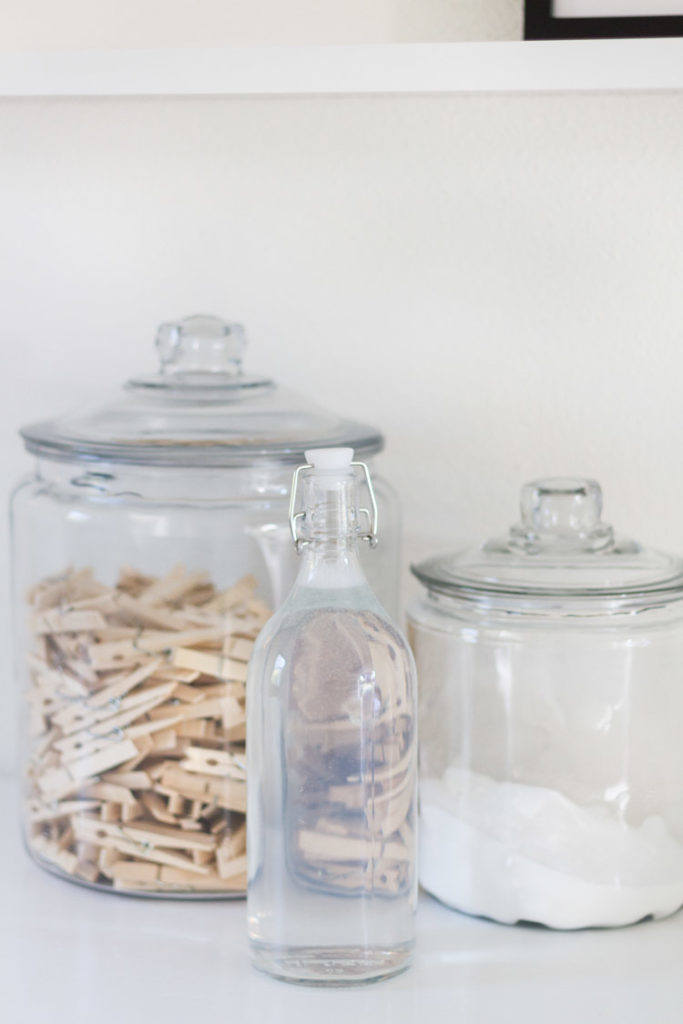
We threw up a simple extended shelf to hold the laundry necessities and have fun with the decorating side of things. I put together this quickly painted landscape art to fill the negative space a bit. It took about 10 minutes!
We are still in the middle of building out the box encasement for our washer/dryer so that will be coming in part 2 of my makeover posts.
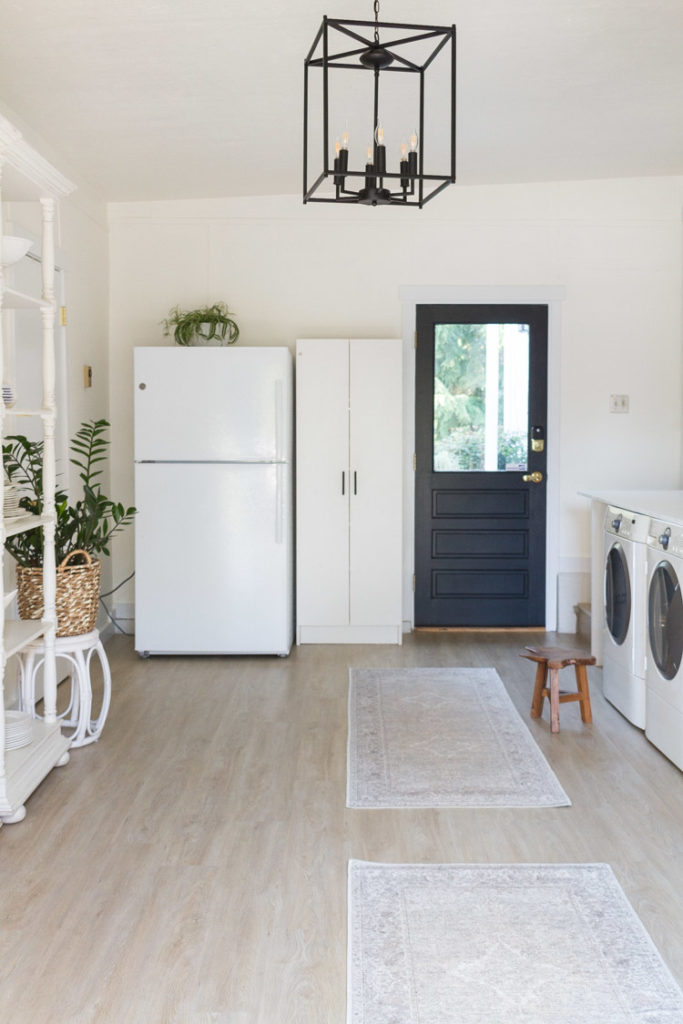
We kept the fridge in here as we use it as a storage fridge often. The game closets sits here too. Eventually we will trim it out as well to make it look more custom. For now, I changed the hardware to match. I love having this closet as it holds all our games and we are a big game family ;).
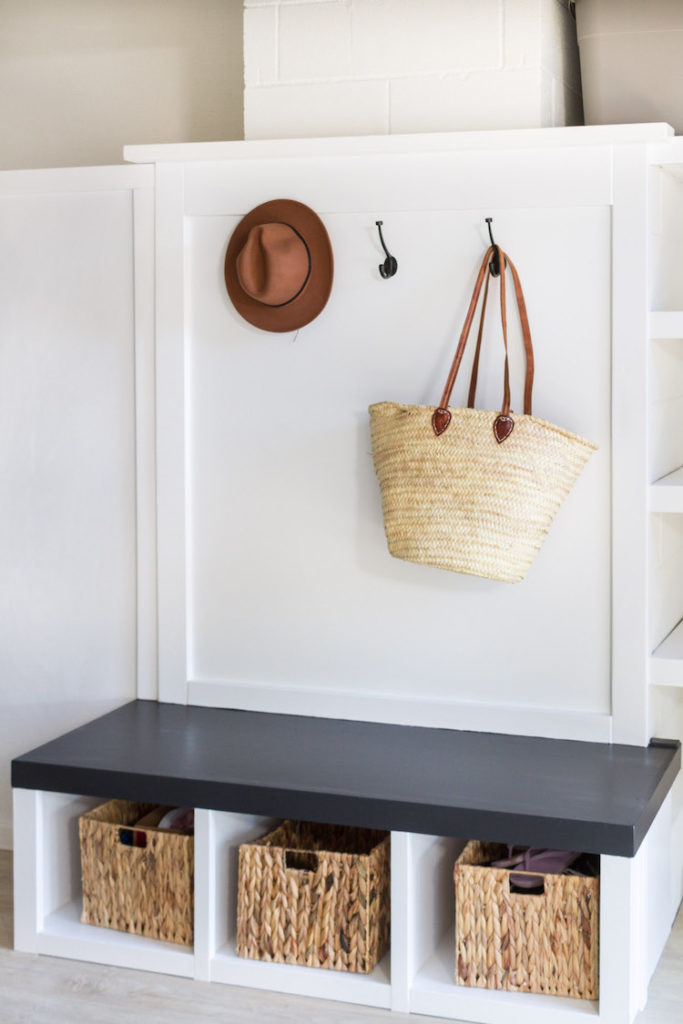
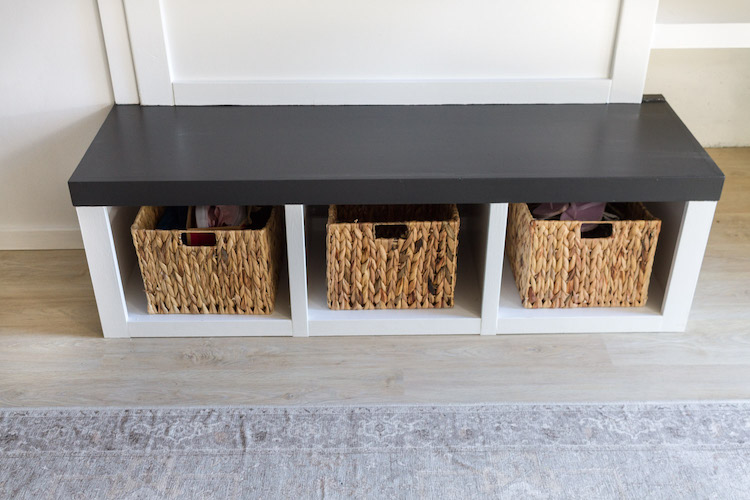
Next to the washer and dryer sits this beautiful bench Tyler and my father-in-law built. I wanted it to help with storage and to resemble the feeling of a mudroom. I guess you could say that was sorta my vision in general that this would be more of a mudroom than a garage.
This is where we have a fireplace inside of our front room and this is the back of the chimney.
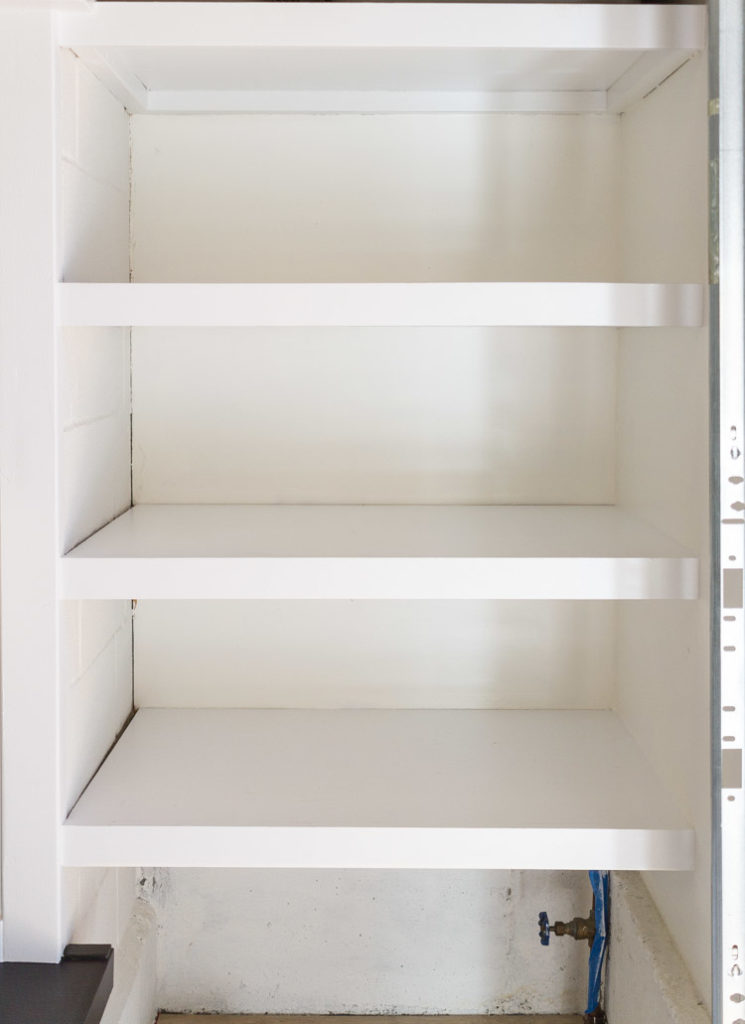
We also built some custom shelves inside this area so we could store extra paper towels, toilet paper etc… Up above, we store off-season clothing, shoes and miscellaneous things.
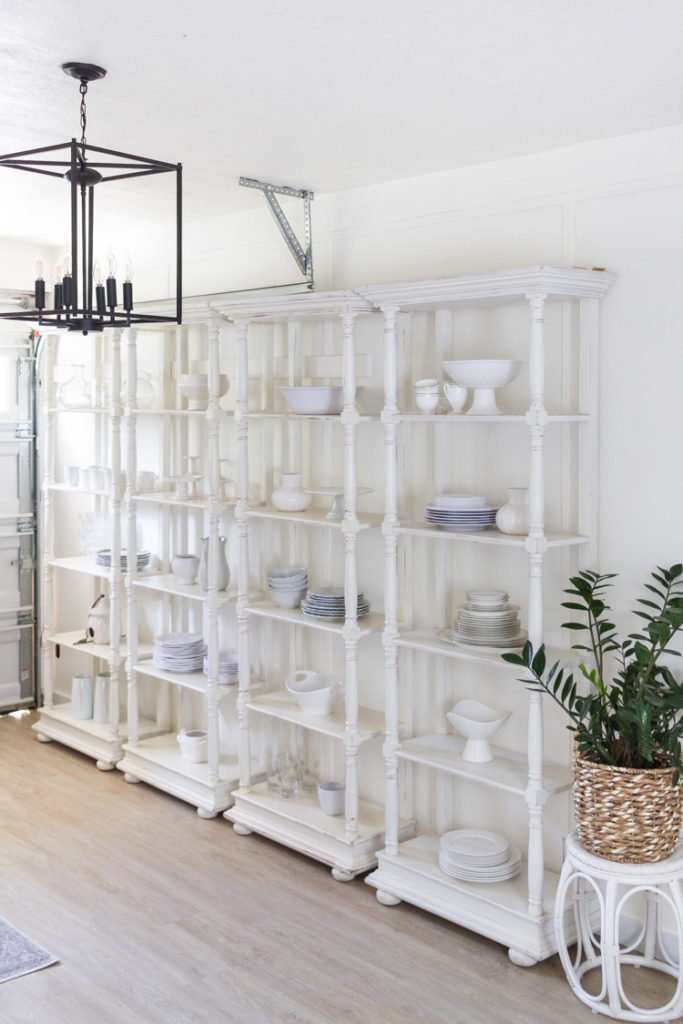
Lastly, there is the wall of shelves that we kept. I worked diligently to get rid of clutter and things were no longer serving a purpose. I donated loads and loads of clothing, decor and more.
Now I just have a monochromatic look of extra dishware and vases that I change out regularly or need for entertaining.
Of course I didn’t talk much about the things we fixed like drywall, walls with holes and the little things that aren’t as much fun to discuss ;).
And there you have it! For now at least… Make sure to check back in the next couple months as I share part 2.

Thanks so much for sharing in the joy and excitement with me about a space that really was untouched and unloved for so long. This has made the idea of laundry so much more bearable!
A big thank you to our sponsors, Lumber Liquidators and Ruggable for helping make this post possible as well.


It’s all simply beautiful! It would be a pleasure to do laundry in this space!
Wow! Amazing job! You would never know you are in a garage. Love how you kept access to the water heater and yet hid it. It all blends so well. I am inspired to make some improvements to my laundry/mud room when we move back.
Great job! It really looks amazing!
Wow!!! What a beautiful transformation! You obviously live somewhere warm and don’t need to worry about frozen pipes! It’s a great space. You have inspired me!!! I’m tackling my garage on Wednesday. You can check it all out on my blog. :).
So beautiful! You really made it a beautiful space.
The space is absolutely beautiful and you’ve made wonderful use of every inch! I love the bright and white- it’s cheerful and so clean looking. Bravo!
That’s one more good looking laundry room. I really like the flooring.
Well….I like all of it.
BRAVO!! What an amazing transformation. I know how good those big projects feel to knock off your to-do list. You must be absolutely loving this! What a fabulous space it is now.
Love the flooring, the light fixture, those cute rugs, all the storage, and the great mud room feel (you nailed it!)
Enjoy your gorgeous new space Annie!!
Incredible. I would sleep in here!!!
What a gorgeous transformation! Do you love doing laundry now? After I redid my laundry room, it stopped becoming such a chore.
Absolutely beautiful! You’ve inspired me as my laundry area / room is also in the garage but we also have to park our cars in that same garage. I’ve been wanting to tackle the area for some time …. thank you for the inspiration!
I love this design! What color is on the walls?
How are you finding the rugs from Ruggable holding up? Curious- especially with the light colours! Thanks!
Just beautiful! I just finished doing mine too. It’s so rewarding.
Good job.
Just beautiful! I just finished doing mine too. It’s so rewarding.
Good job.
This is exactly what I want to do my garage and we have similar layout issues with that back of the fireplace sticking out and the small utility sink next to the washer and dryer. Would you be able to share what paint color you used for the wall and trim? And did you have to do new sheetrock all around the walls?
Hi, the transformation is so very pretty! All should be very proud of your work!
Is the garage “ducted” for AC/HEAT since it’s used as an interior room? Is the garage door insulated and insulated on the edges against outside weather elements and do you ever raise the garage door?
Nice, very amazed with your page, please come to visit my site BELALANG4D
I absolutely love the transformation you’ve started in your garage/laundry room! The color choices are beautiful, and I can’t wait to see how it all comes together. Thanks for sharing your process—it’s so inspiring!
I absolutely love the transformation you’re starting in the garage/laundry room! The color choices are so fresh and inviting. I can’t wait to see how you incorporate more storage solutions in Part 2. Keep up the great work!
I absolutely love the transformation you’ve started! The color choices are so fresh and inviting. Can’t wait to see how it all comes together in Part 2!