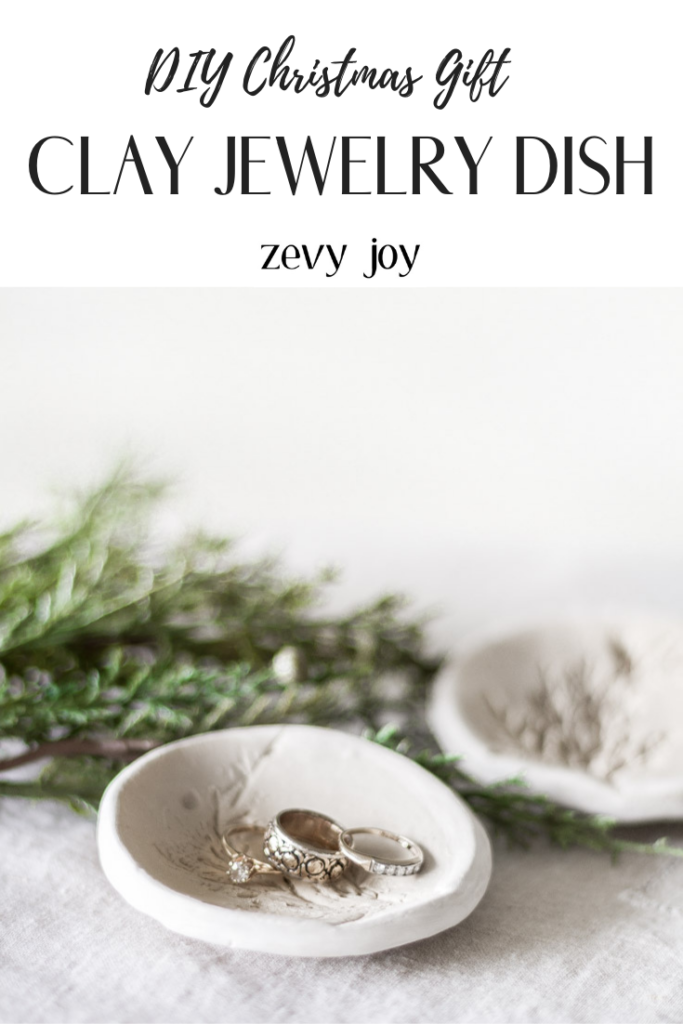
DIY Christmas Gift – Clay Jewelry Dish
A Sweet DIY Christmas Gift!
How To Make A Clay Jewelry Dish!
I have another sweet and easy DIY Christmas craft, but this time it is a gift! It is a clay jewelry dish and is perfect for someone special in your life. What I especially like about this is that it is something that you can make with kiddos but looks like it could have been bought at a boutique. I absolutely love the simplicity of it all! I am joining Ashley at Modern Glam, Janine at Happy Happy Nester and Leslie at My 100 Year Old Home to share these ideas.
To make these little dishes you will need:
- Air dry clay
- Rolling Pin
- Plastic Place Mat
- Large round cookie cutter or a large rimmed glass
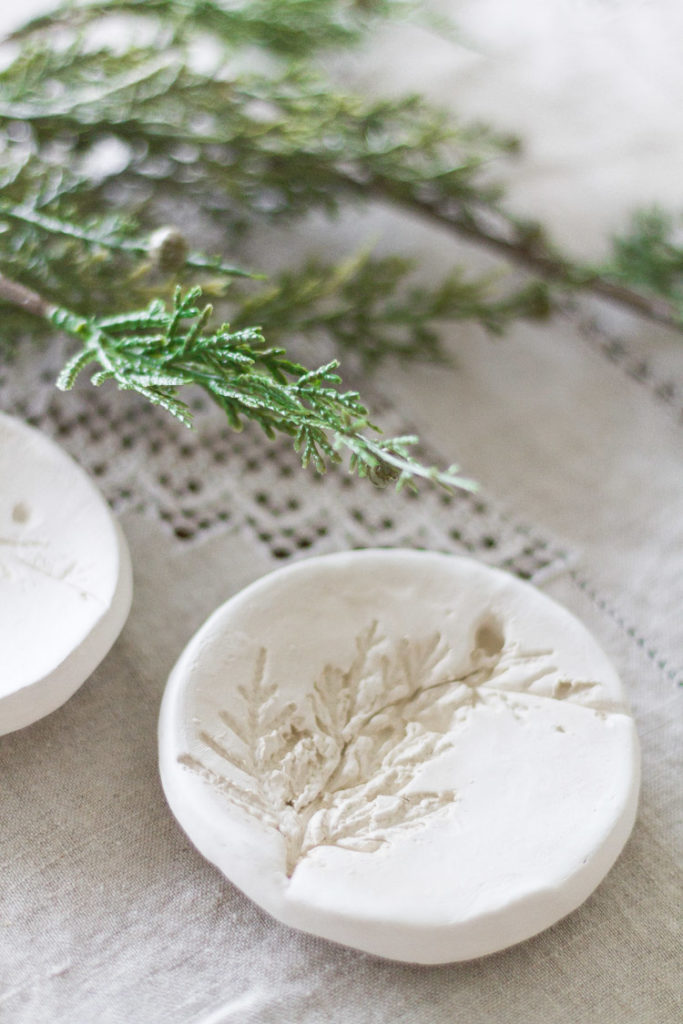
- Small faux branch for imprinting
- Cooking Spray
- Muffin Pan
Here is how I put these little dishes together…
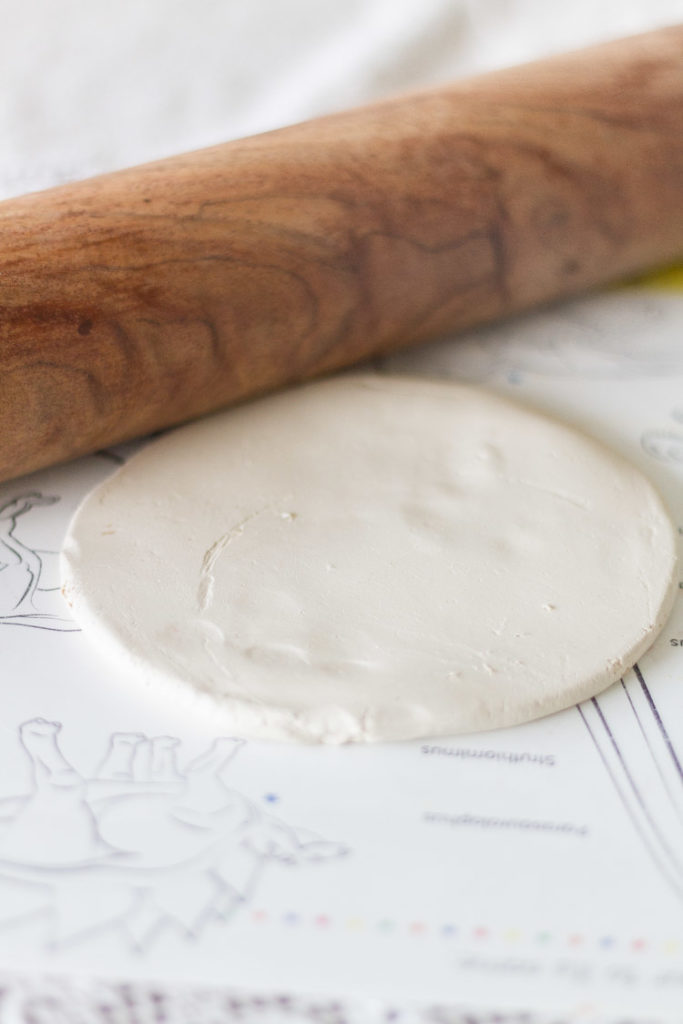
Simply grab a plum sized amount of clay and roll it into a smooth ball.

Then roll it out flat until you get the thickness you want. I did about 1/4 -1/2 an inch. The fatter it is the longer it will take to dry.
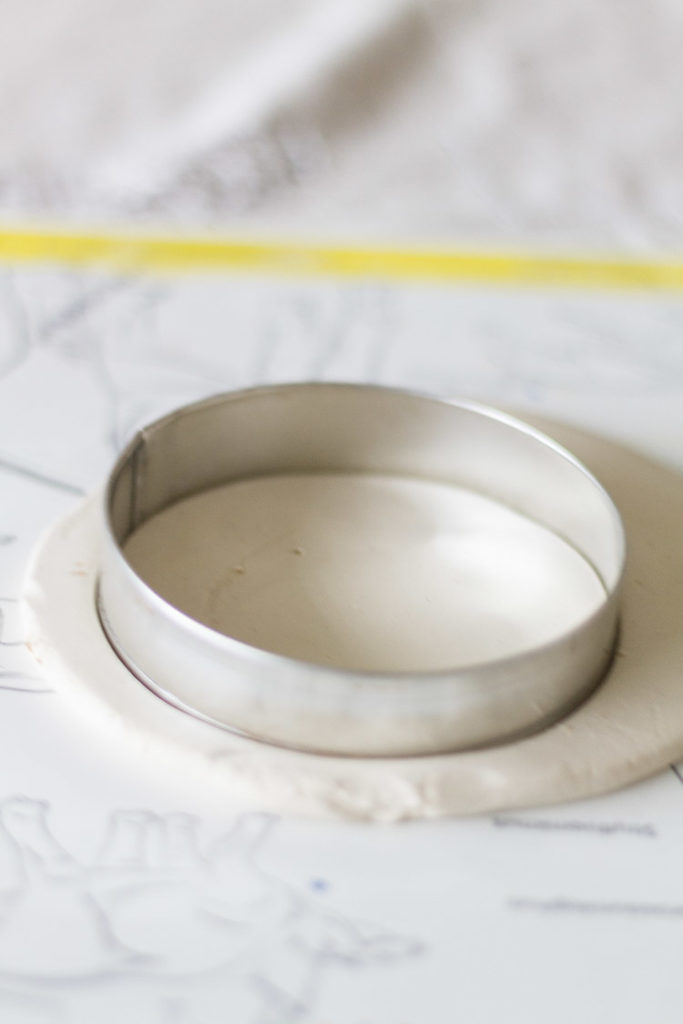
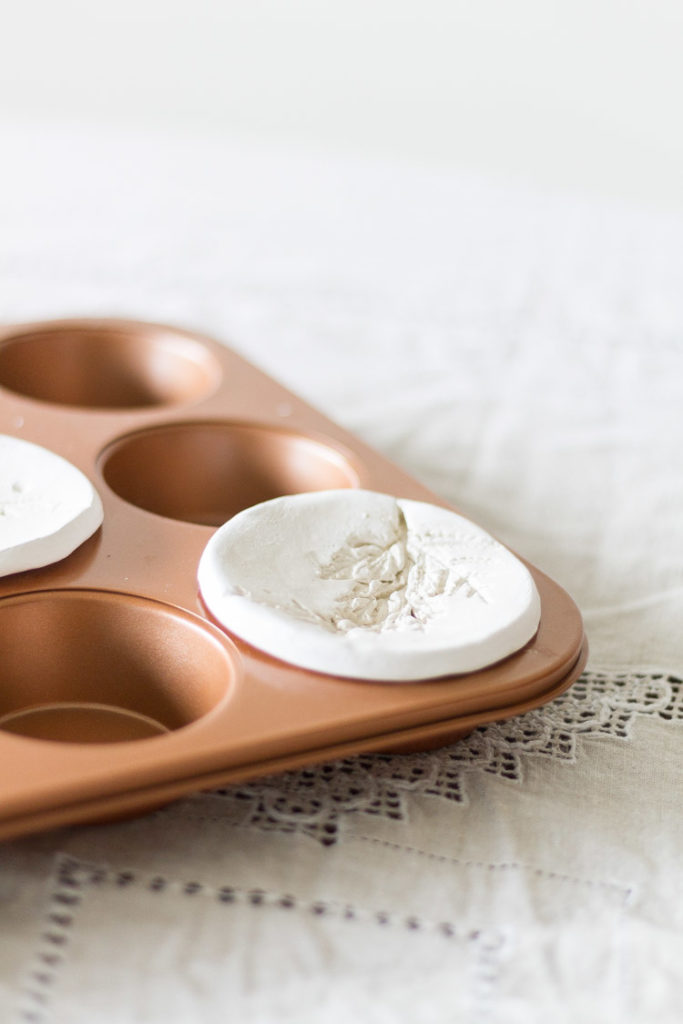
Now use your cookie cutter to make the circle shape.
Carefully press the branch into the clay form. I turned mine upside down and lightly rolled the rolling pin on it so it really made an imprint.
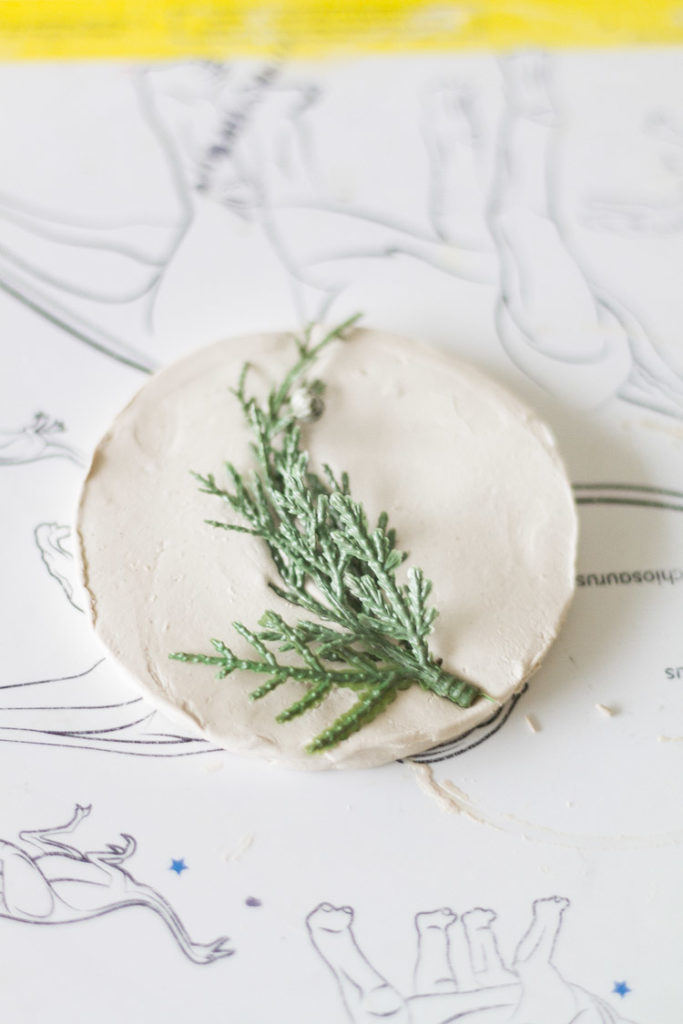
Slowly remove the branch… And then I sprayed some oil onto a muffin pan. Place the dishes lightly atop the muffin pan to give the dishes a slight upward curve shape. You can dip your finger in water and very lightly brush the edges of the dish to smooth them out with your finger.
Let them dry for the amount of time specified on your clay. I will say I put mine into the oven at 200 degrees for about 20 minutes. It does seem to change the coloring a bit but I was ok with it! I can’t recommend this as I don’t know how it affects the clay but wanted to mention I did it in an attempt to get things going quicker and it helped shape the clay form better.
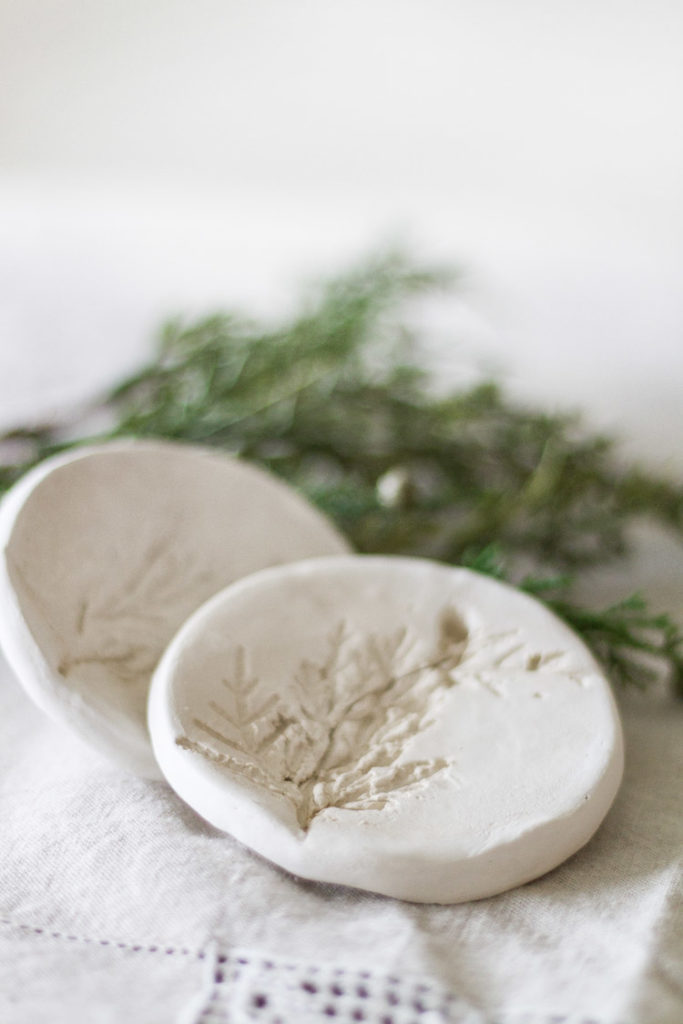
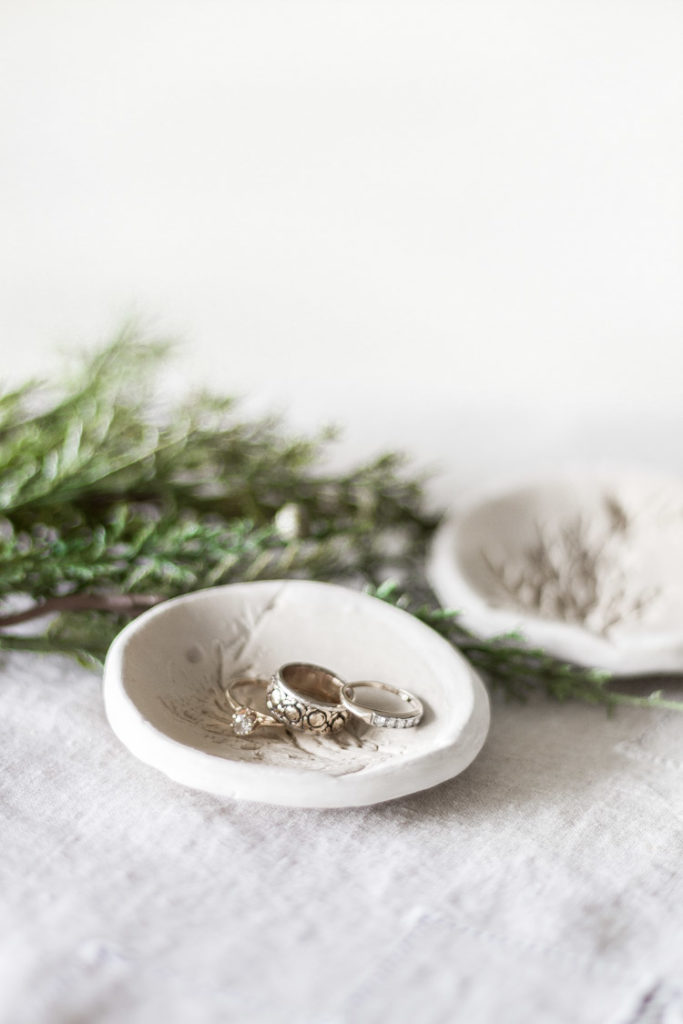
And there you have it! You could always paint these too, I was liking the more natural look though.
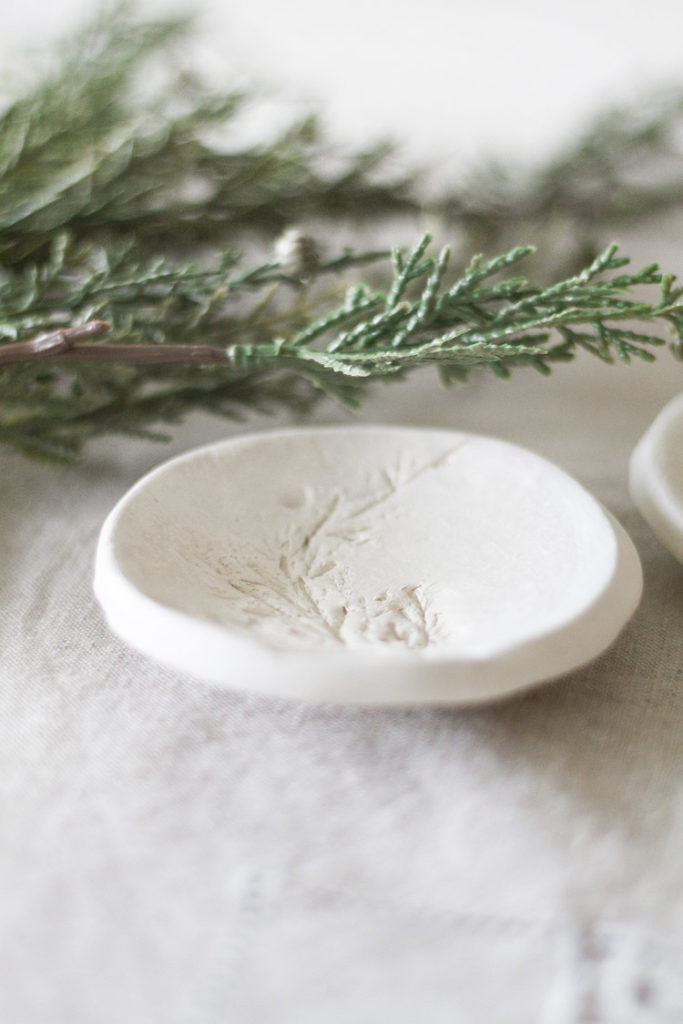
I couldn’t believe how well these turned out and what a precious gift they could make.
I love the idea of handprints or initials too… I hope this inspires you this gift giving season!
DIY Christmas Gift Tags | My 100 Year Old Home
DIY Christmas Gift – Clay Jewelry Dish | Zevy Joy
Handmade Holiday Gift Ideas for Friends | Happy Happy Nester
DIY Christmas Tree Scented Air Fresheners | My Sweet Savannah
DIY Holiday Gifts Using Essential Oils | Most Lovely Things

DIY Soap Gift Idea | Hallstrom Home
Fun and Creative Neighbor Christmas Gift Ideas | Twelve on Main
Stove Top Holiday Potpourri | Lemon Grove Lane
DIY Hand-Twisted Taper Candles | Jennifer Rizzo
Boho Beaded Keychain Holiday Gift Toppers | Tater Tots and Jello
Homemade Seasoning Salt Gifts | Finding Lovely
Toasted Marshmallow Mocha Creamer | Satori Design for Living
Flower Arrangement For Gift Card | Craftberry Bush
DIY Gift Basket Ideas Using Dollar Store Items | The DIY Mommy

This is so pretty!
thank you for this great idea for a gift ….i haven’t made anything with the clay so i think i can do this …again thank you …
I love your beautiful clay project. Thanks so much for joining us. I’ve pinned your post as well!
I love the idea! and I don’t have much patience so I’m sure I’ll try putting it in the oven hahaha
Can clay be dyed?
Easy to do and modern!