DIY Stenciled Patio
Hello friends, hope you had a good weekend. The hubby and I celebrated our anniversary and had such a relaxing/refreshing time. It is amazing how necessary those getaways are and how grateful we were to get some time together. It was especially wonderful after all the work we just spent updating our patio – you may have seen the fun Bloggers Patio Party here. Today I wanted to share the simple tutorial for our DIY Stenciled Patio. Please note that the process is simple but the time is extensive, haha….
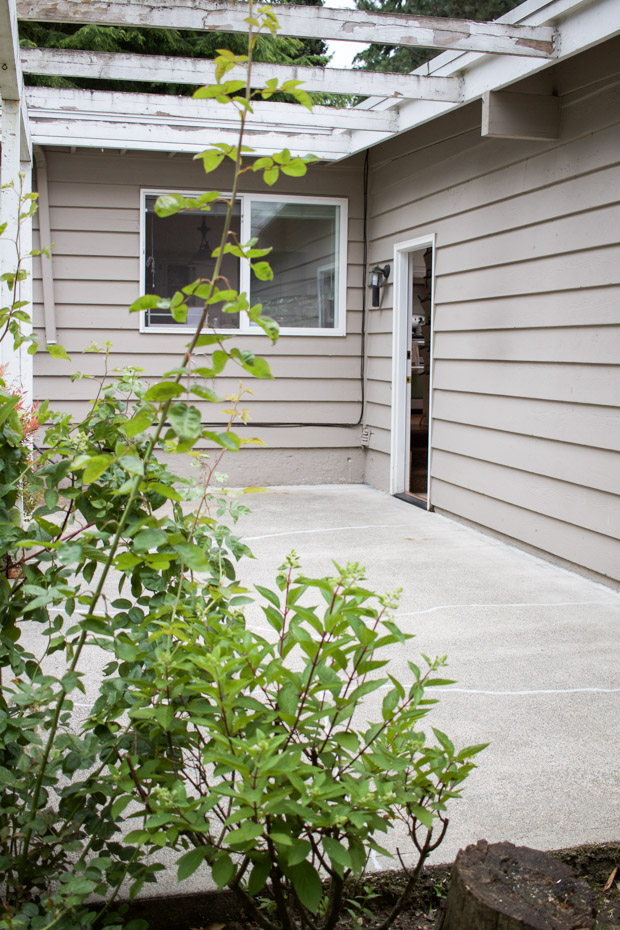
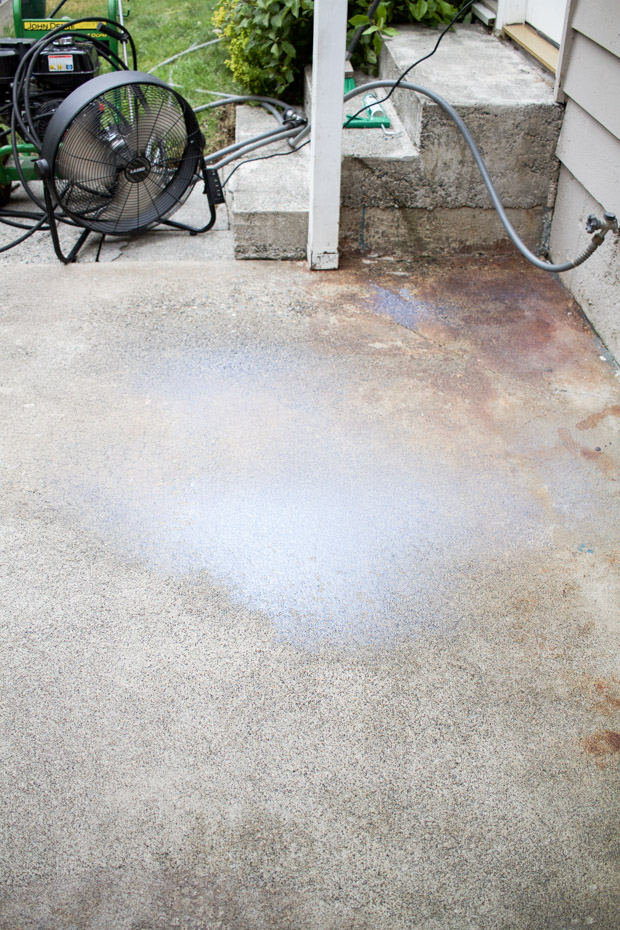
Before we dive in, I wanted to share a before. When I was gathering photos, I couldn’t believe I didn’t grab a good before shot of this messy little spot! So the best I could do was show you all the stuff piled out as we prepped for the paint… So her you go =)
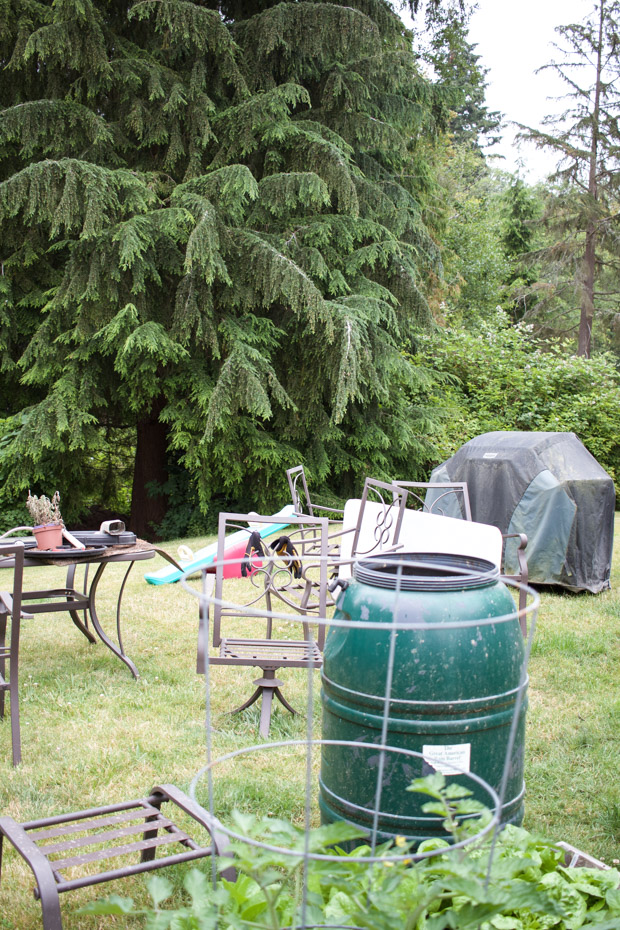
As you can see we pulled everything off of the patio and onto the lawn.
We only needed a handful of materials and with projects like this make sure to factor in drying and application times. I had mentioned before that the tile design was inspired by my very talented friend, Brooke at Nesting with Grace and her beautiful kitchen/home. The tile stencil I picked out was from Cutting Edge Stencils in the large size.
- First I filled all the cracks with this DAP concrete filler and sealant.
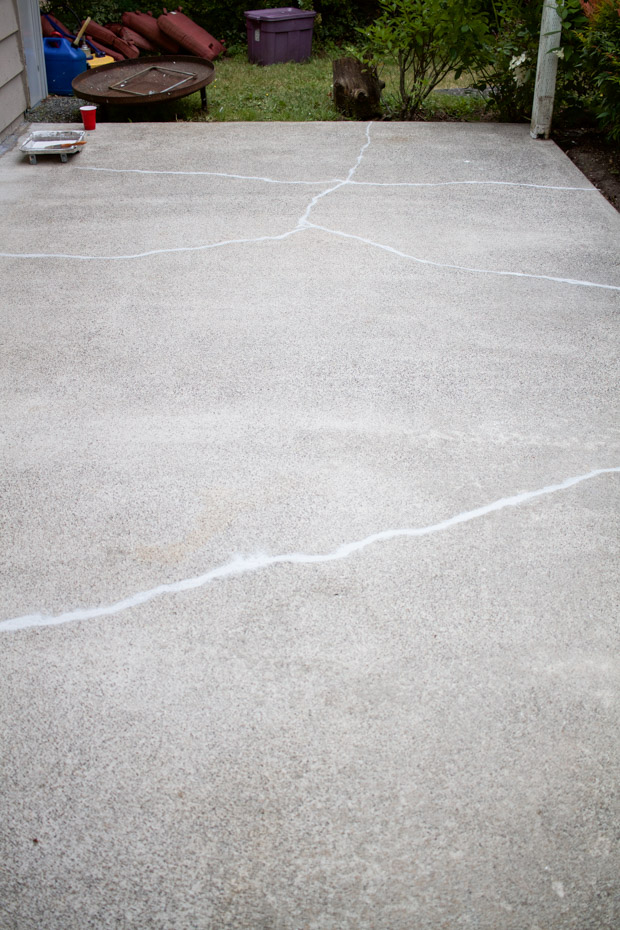
There were quite a few cracks and this really helped prep the surface. I was amazed at how hidden the cracks became with the new stenciled pattern.
- Next we primed the surface with this BEHR concert bonding primer. Again, this was just another helpful step in really getting the patio ready for pretty paint.
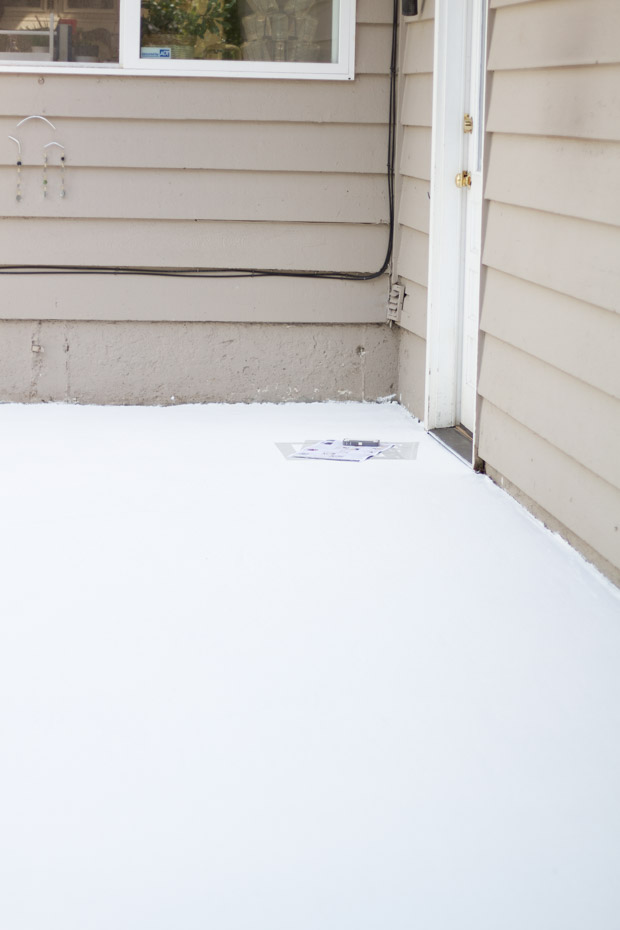
- Then came the fun as I rolled on two separate coats of this ultra BEHR white porch and patio paint .
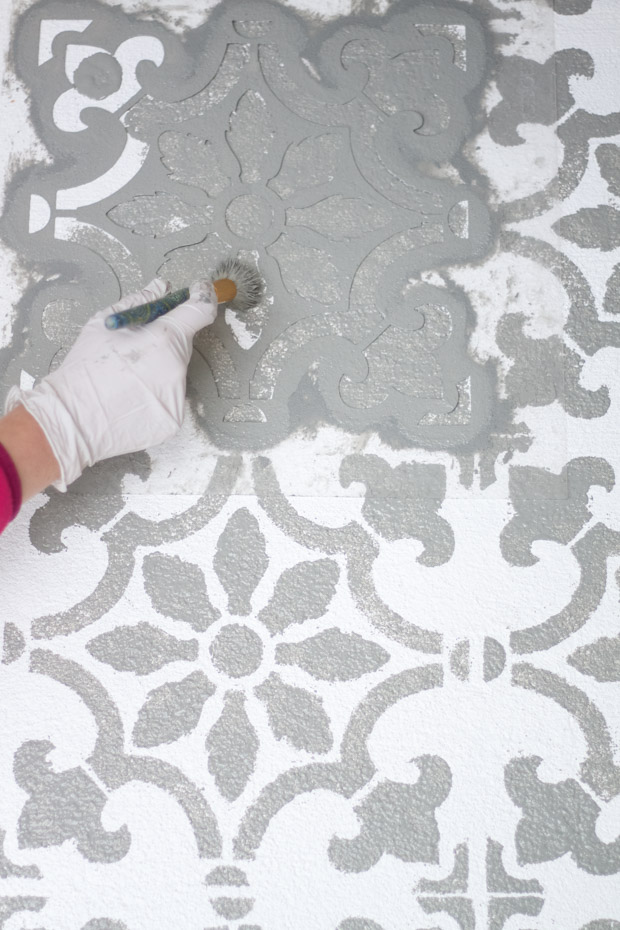
- Lastly, I picked up this driftwood gray Cabot DeckCorrect paint and started the stenciling. This step was easy, but each row took about a half hour to complete. I found using a stencil brush was better and more controlled than rolling on the paint. Our surface was not completely flat because of the style concrete we have, so the brush helped in that aspect too. The paint is really thick and was nice for stenciling as it did not seep or spread easily. As pictured above, you can see that it is not perfect and some paint found it’s way out at times… I am ok with that, in the scheme of things it really isn’t obvious and the space looks a 100 times better (at least I think so =)).
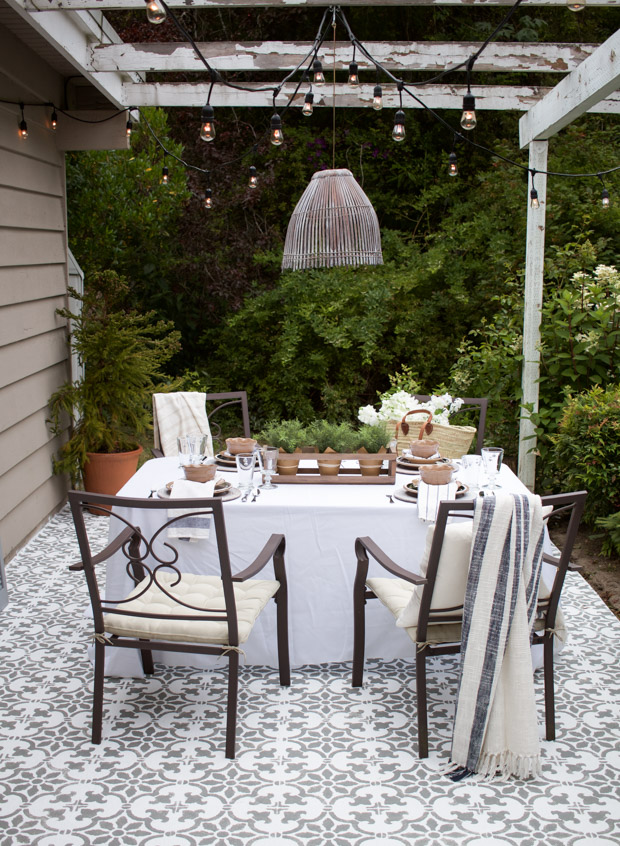
So there you have it! Some basic steps, lots of time and a new patio! I will be checking in with you over time to see how it is holding up and will be crossing my fingers that it lasts well over time. I am excited to see how it will age because real tile will do the same. So in this case, I am actually hoping for some dirt, moss, etc…
Thanks so much for stopping by and I hope this inspires you to enjoy your spaces even on a budget – so much can be done with paint!


Incredible!!!!! Such a genius idea!!! I hope that I can convince my husband that we really need that makeover!!
He was against painting it white but this here…..far better!!!
Thank you for sharing:o)
xx Kirsten
http://www.thedressbakery.blogspot.de
Kirsten, I am so glad you enjoyed and good luck convincing =). We have plenty of that around here, lol. Hope you will share how it goes if so! I appreciate you stopping by!
So cute! I love it!!
Thank you Tricia! Hope summer has been wonderful for you and your sweet family! See you in the fall!
It looks beautiful! Did you seal it with anything?
Tania
Hi Tania, thank you! We did not because all the paint I used was intended to be used without. That is a great question as I thought about it, but am hoping this all hold up. Thanks again for stopping by!
Chalk Paint decorative paint by Annie Sloan would be great to use as it loves to bond to concrete and stand up well to the outside elements. I am going to have to do this!!
SUCH an incredible transformation!!! It turned out beautifully!
Kristi thank you friend! Hope you are enjoying summer!
This looks amazing! And it’ll only get better with wear, well done!x
Helen thank you so much – Have a great day!
You are so right. We don’t have to spend a fortune to get a fabulous look. This is so beautiful, total transformation of space I love it. It looks like an old Italian Villa (with new flooring) but it just looks like it was always there..
Marie thank you so much! I really appreciate that!
I love how this turned out. So pretty.
Mary thank you so much for that, I really appreciate it!
What section under shop stencils is the one you used under. Can’t find.
Hi Kelly – here is the link to the stencil I used: http://www.cuttingedgestencils.com/fabiola-tile-stencil-spanish-portugese-tiles-stencils.html
Thanks so much!
I rent and have an ugly balcony patio. Carpet, artificial grass all looks odd since it opens out right from the living room. Our ONLY window. Can you think of anything I could lay down. On top and stencil? Since I don’t own. This is just gorgeous and the look I have been wanting.
Hi Elle, thank you so much and I am so glad you enjoyed it! Maybe you could get an outdoor rug similar to the plastic ones they have at Ikea and use something like a chalk paint with a varnish on top (I believe Annie Sloan sells a coordinating floor varnish). Something that wouldn’t react harshly or ruin the plastic would be important – but maybe you could see what the paint stores would recommend (as I am not certain). That way it could still be rinsed and wear well. Not sure, just a thought but hope it helps =)!
Hi! This space is absolutely gorgeous!! I have just bought the supplies to do on our back porch. I’m both excited and nervous! I saw that you have concrete stairs going into your house, we do as well. I was wondering what you did with them? Painted solid or stenciled?
This is stunning! We have a large, ugly, and rather beat up patio which is the “centerpiece” of our backyard :0. We completely remodeled an older home so not much left in the budget for a new patio. This idea is inspirational and, more importantly, doable! Thank you so much for sharing!
would love to know how it’s holding up…we have a bare concrete porch that i was just about to paint with concrete paint (just a solid color). But i just saw your cute patio and would love to know your thoughts !
This is amazing! Where did you find the cabot deck correct? I am having a hard time finding this product
Kathie thank you so much! I believe it was Home Depot or Ace Hardware maybe!
Love your patio Annie! What size stencil did you use?
I would also love to know what size of stencil you used
In her blog she mentioned she used the large size which according to the website is 12×12
If your patio was “cut” would u have filled those spaces where the cut cement before u painted?
I love it and want to do this on our front porch! Did you have to wait for each stencil to dry before you can lay the stencil next to it and do the next one? Also how did you make each row straight? Did you tape it off?
I just found this post and LOOOOOVE your patio and totally want to copy you!! Can you please tell me how it is holding up? I
live in Houston and am concerned about the heat/rain. Thanks so much.
Also, it was so funny to be searching for patio ideas and find this post and realize I already followed you on IG and your feed in amazing!!
Hello Zevy! I am a new follower and LOVE this post. Really looking forward to give it a try!!!
I also have one more question. Where did you find the chandelier?
Do you have a link for the stencil you used?