Linen Pumpkin – Fall DIY Decor

I don’t really have that many fall decorations out – a few pumpkins here and there. So I decided to make a linen pumpkin. I might even add a few more in different kinds of fabrics. A pumpkin made out of an old sweater would be nice!
Here is what you will need…

- a 15 X15 inch square of fabric (this is the size I used for my pumpkin but you could do larger is you would like).
- a 5 inch (circumference) piece of fabric
- embroidery thread
- long doll needle – I use Dritz (if you don’t have an doll needle I will explain how to use a regular sewing needle)
- glue sticks – I use Aleene’s
- glue gun
- polyester stuffing (about two large handfuls)
- twine (optional)
Start by folding your 15 X 15 inch square piece of fabric and fold in half (to make a triangle), in half again, and in half again (that is a total of 3 folds).


Go to the tip of the folded corner and cut off about an inch.

Open your fabric up and you should have a circle.

Take your glue gun and and start gluing around the cut circle.

Glue your fabric circle on top of the cut-out. This will create a base for your pumpkin.

Turn your glued piece of fabric over so that the circle of fabric is on the outside. Take the couple handfuls of stuffing and put them in the center of the fabric.

Begin to gather up the fabric around the ball of stuffing.

Tie the fabric together with embroidery thread to hold it in place.

Snip off the uneven excess of fabric so that it is more even.

Thread/knot your long doll needle.

Run the needle through the center bottom of the pumpkin, through the middle and up the top. Do this in and out sewing about 7 times around the pumpkin to create the puffed ridges of a pumpkin. If you do not have a doll needle you could just sew the thread from the center of the bottom to the top about 7 times – cutting and tying it off each time (you just wouldn’t be pulling the needle through the center of the pumpkin).

Keep the pumpkin tied at the top. Secure the top of the pumpkin by gluing the stem closed (in between creases).

Finish your pumpkin with a bow of twine or wrap twine around the top to make it look more like a stem. And you are done! To make the pumpkin larger just increase the size of fabric and quantity of stuffing. Lots of possibilities with this one!

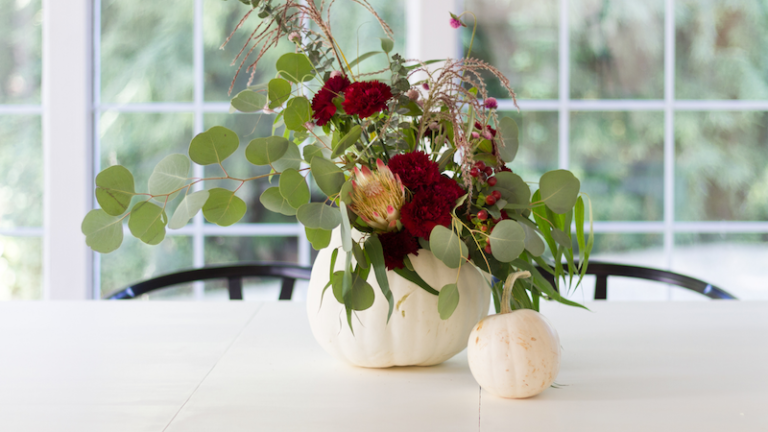
Speaking of pumpkins, I can’t help but share a picture of these two!


Love the earthy simplicity of this. Great instructions as well. Thank you!
Thank you so much Denise, I appreciate it!