The Repurpose Design Series – Project Reveal #3
I have had so much fun with The Repurpose Design Series and loved putting love back into some unwanted pieces. I was inspired by all the declarative clocks that I have seen everywhere lately, so I decided to take this $20.00 antique table…
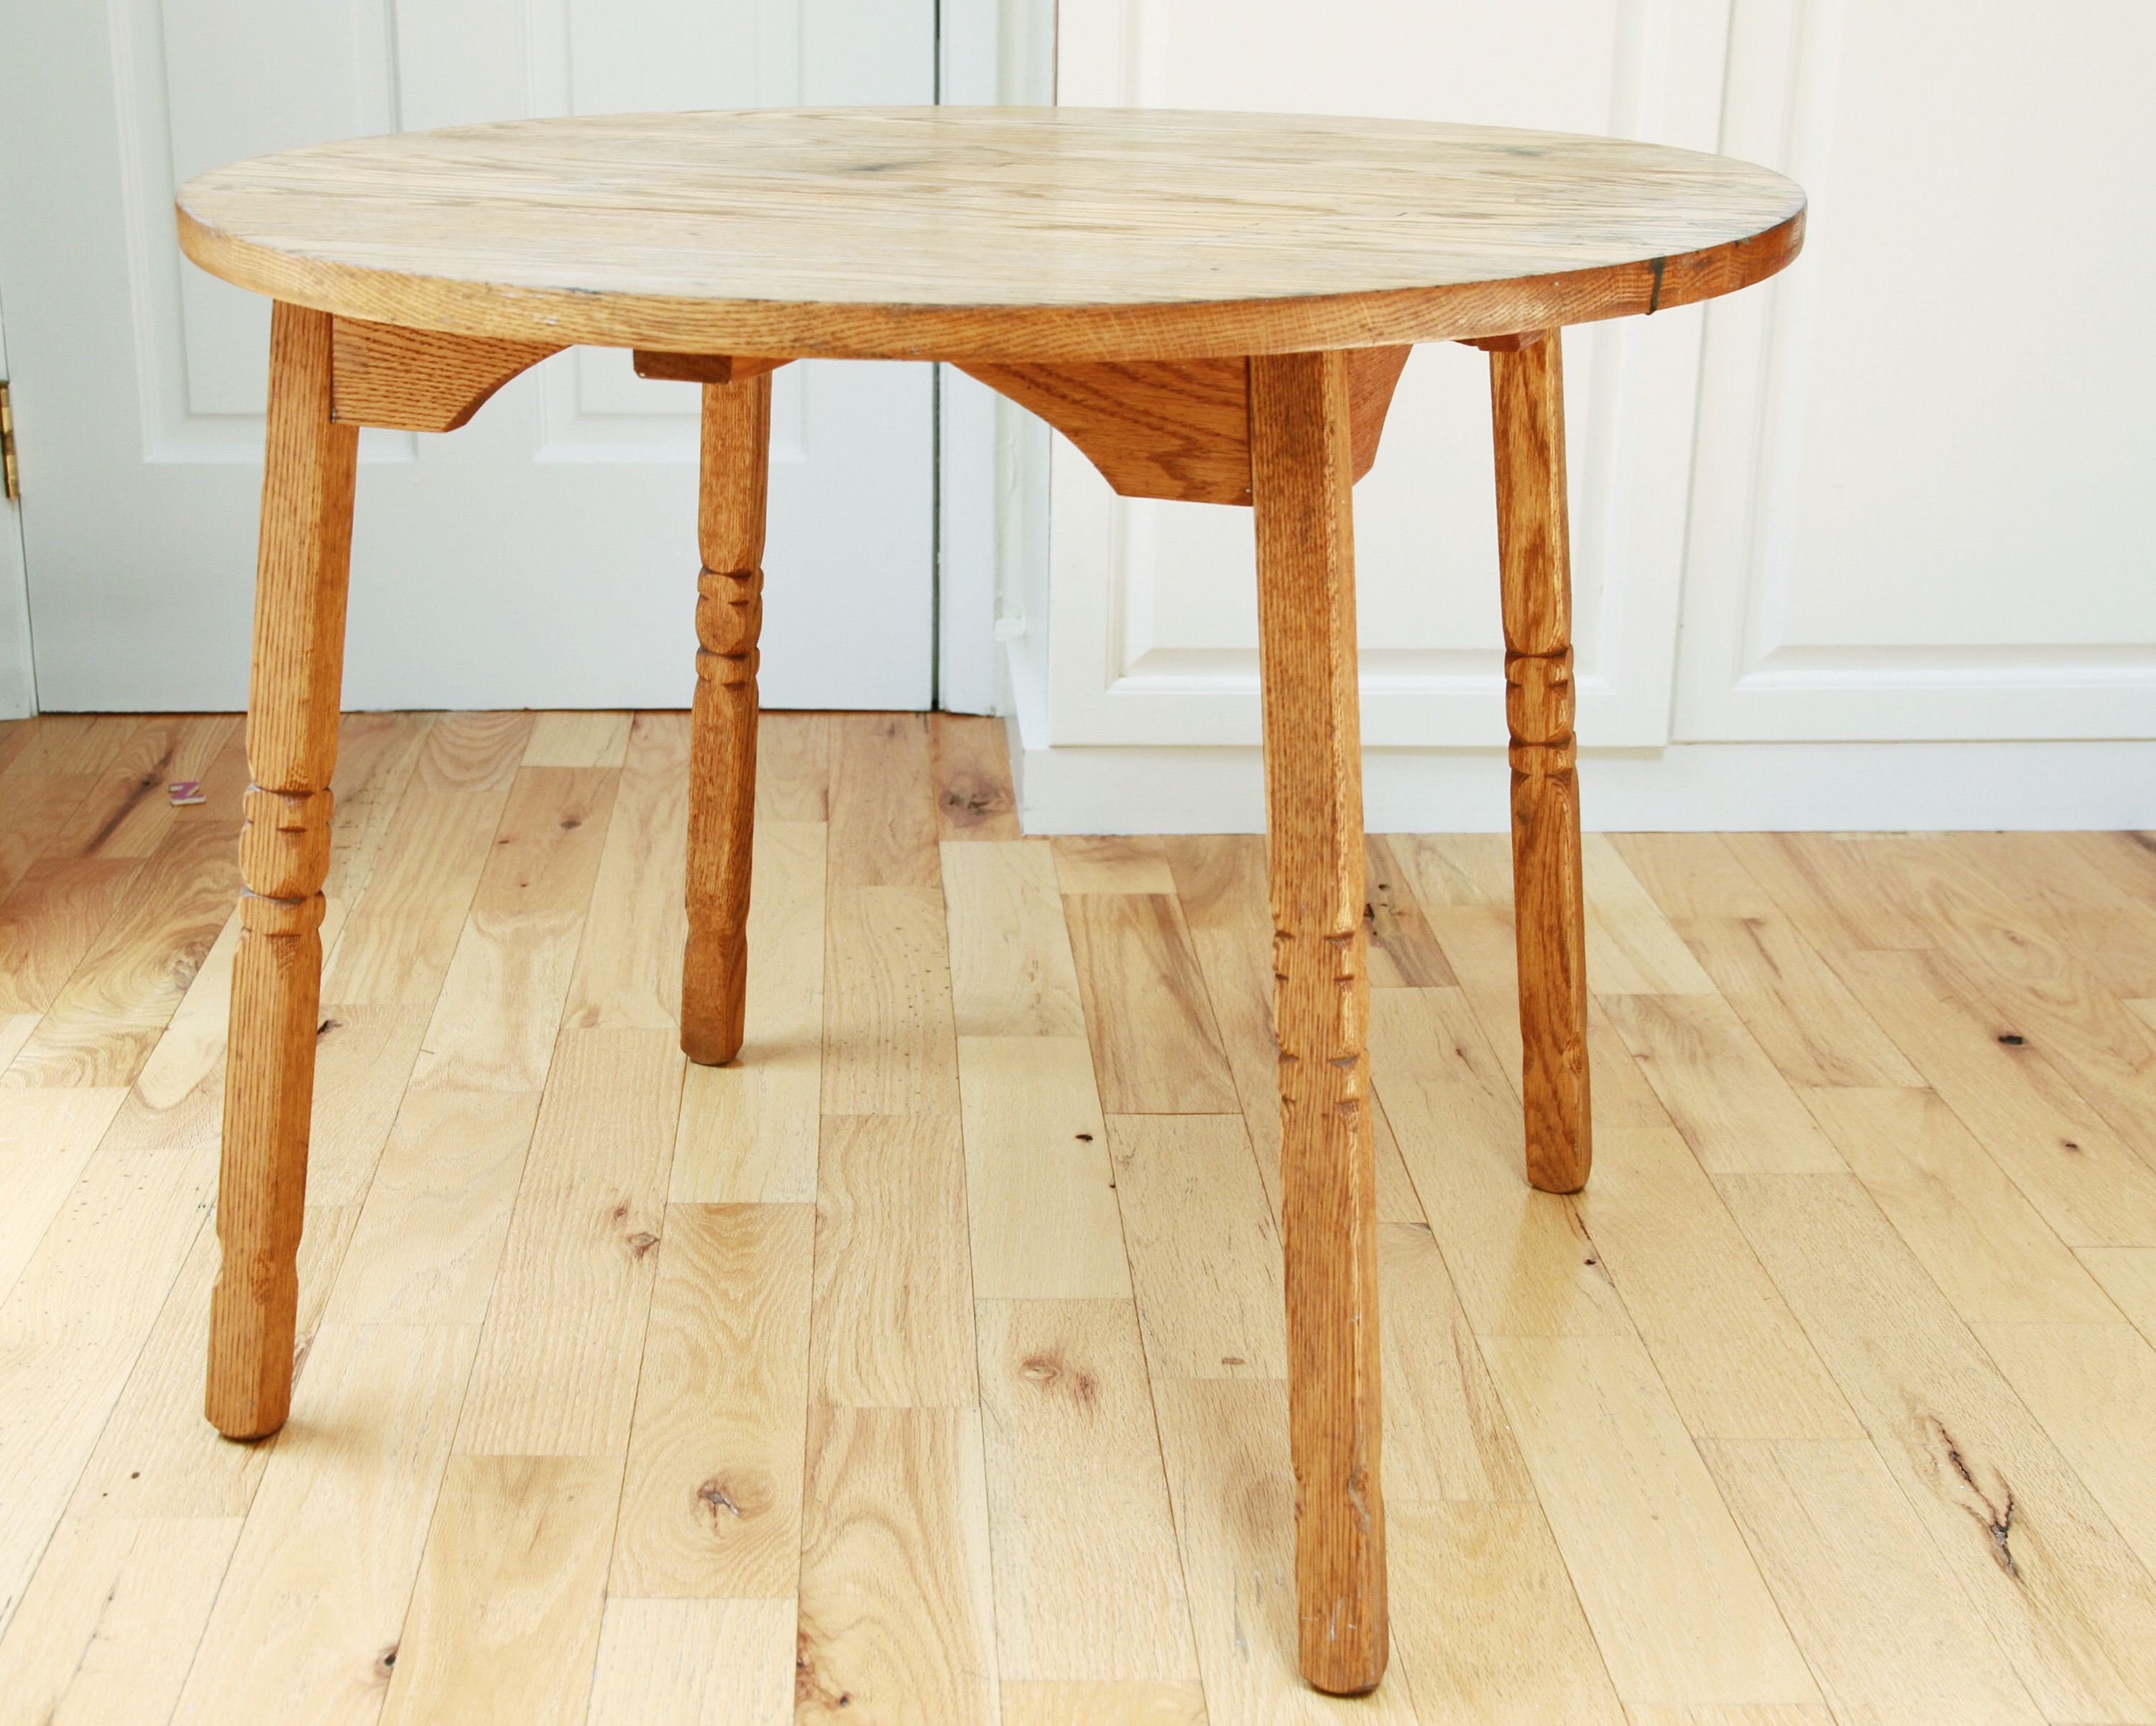
And transform it into this…
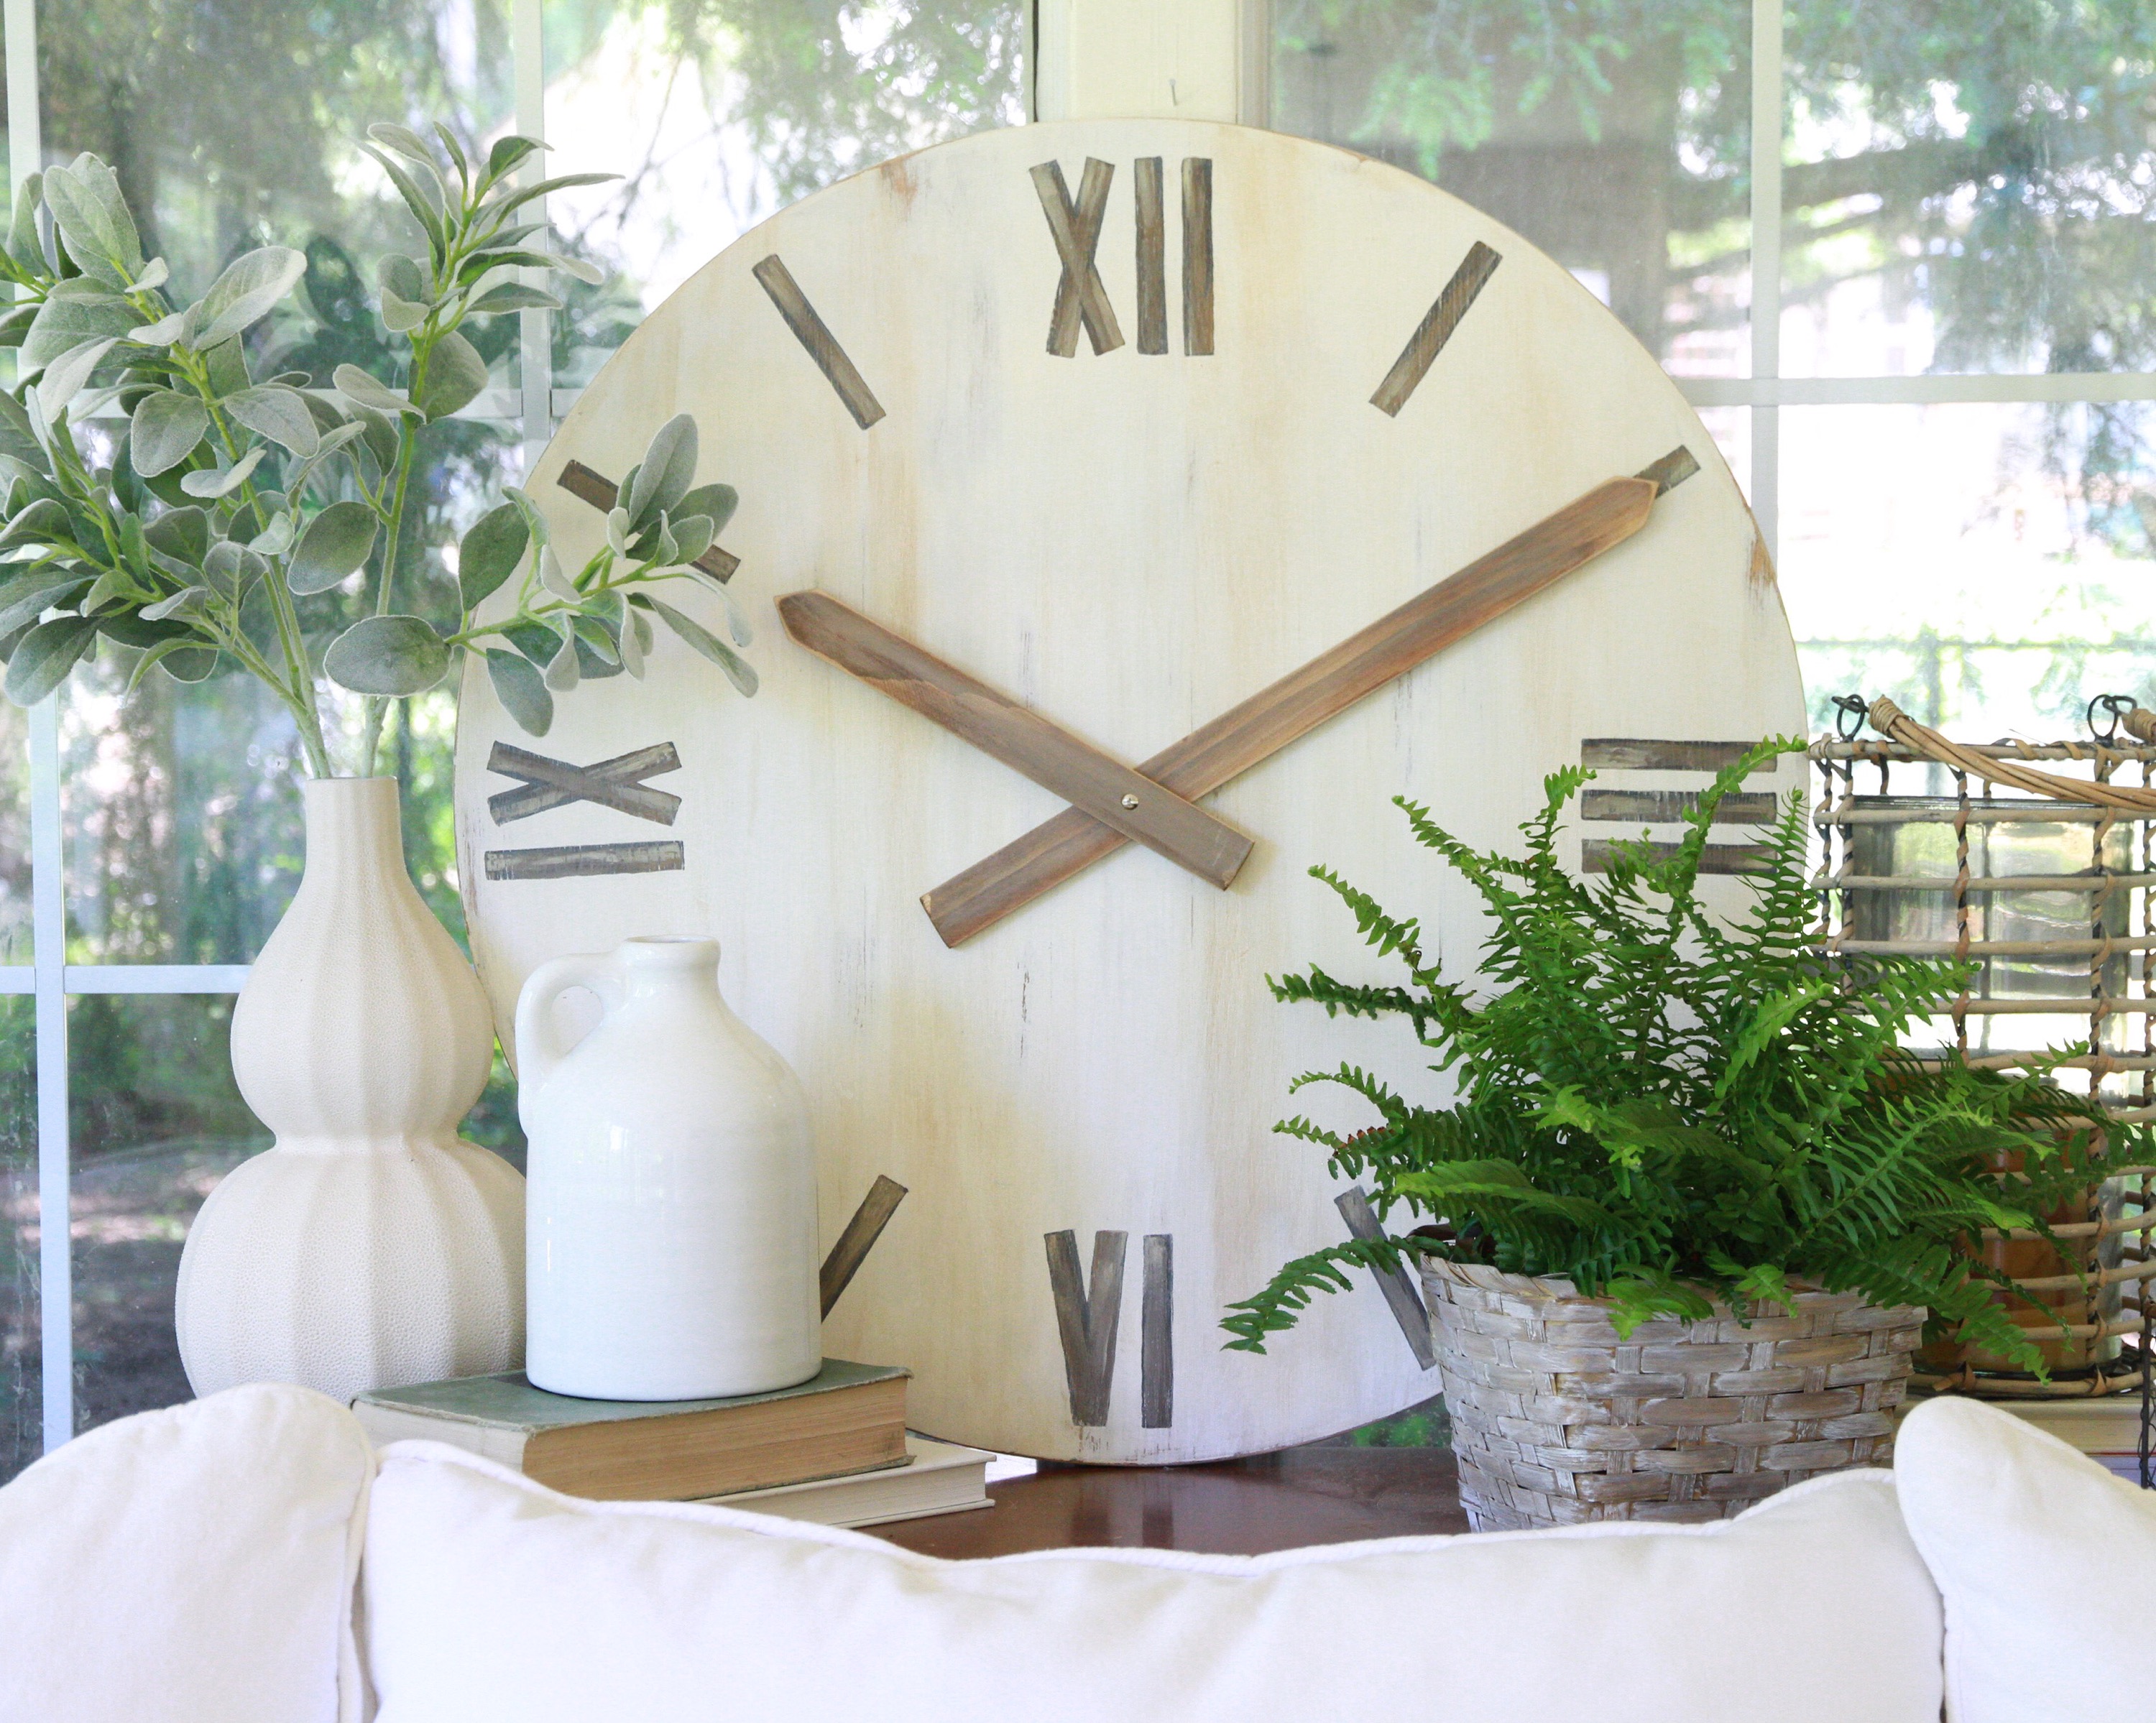
This was a straight forward and simple project that has room for so much creativity. I am still learning to use power tools and am not completely confident so most of my projects do not include them. This clock requires basic tools and some paint.
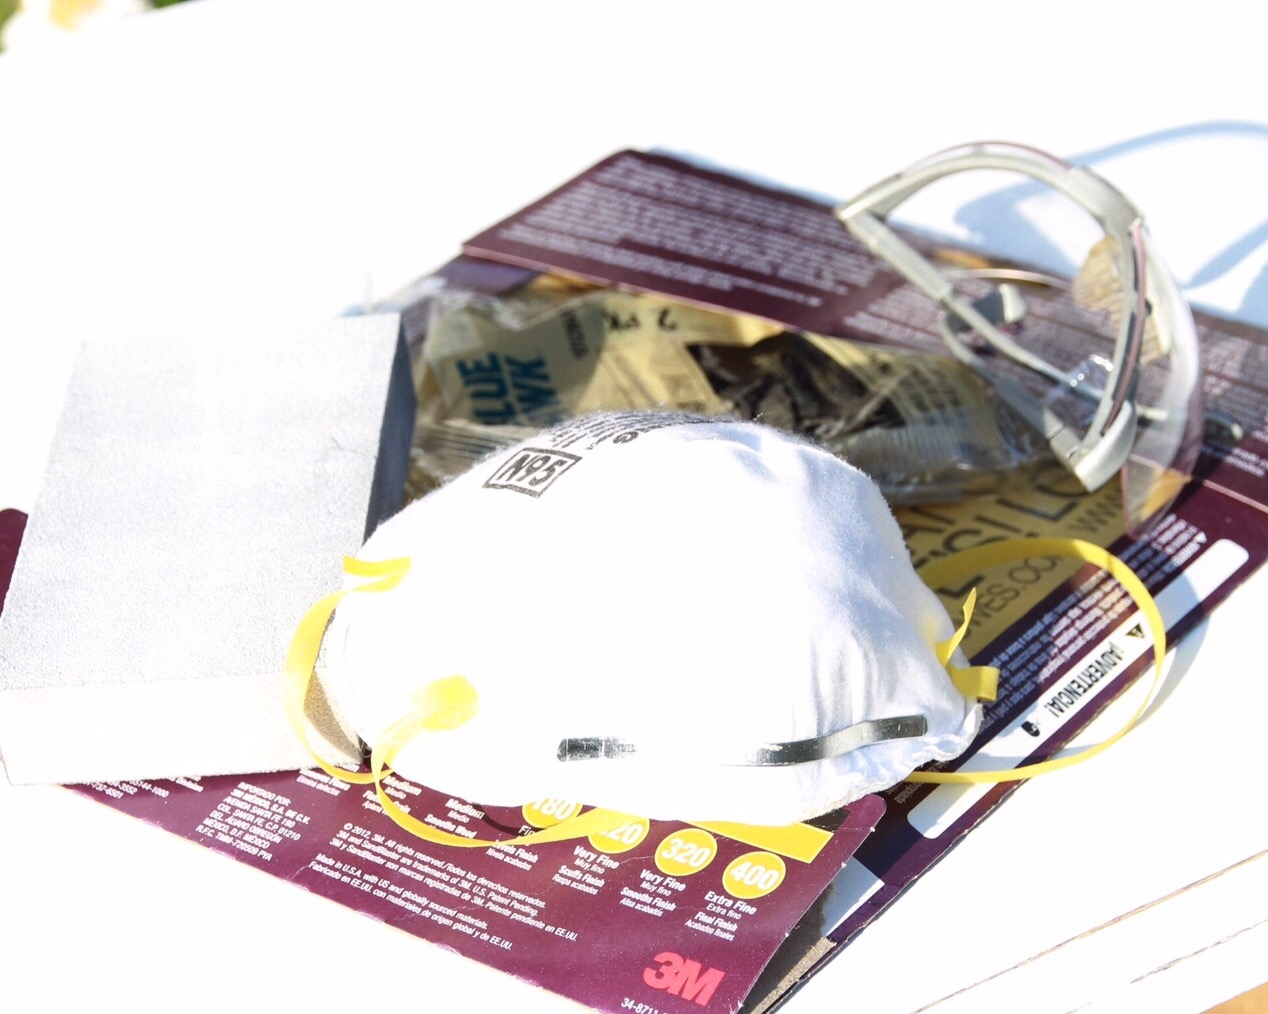
Here is what you will need for the the face of the clock…

- A round table top
- A paint brush (any size will do)
- Chalk paint (I used my left over Folk Art paint from my previous project)
- Scrap Paper for placing and tracing numbers (Not pictured)
- Ruler (not pictured)
- Scissors (not pictured)
- 100 grit Sandpaper (here)
- Sanding Sponge (here)
- Mask
- Protective eye gear
- Tack cloth (here)
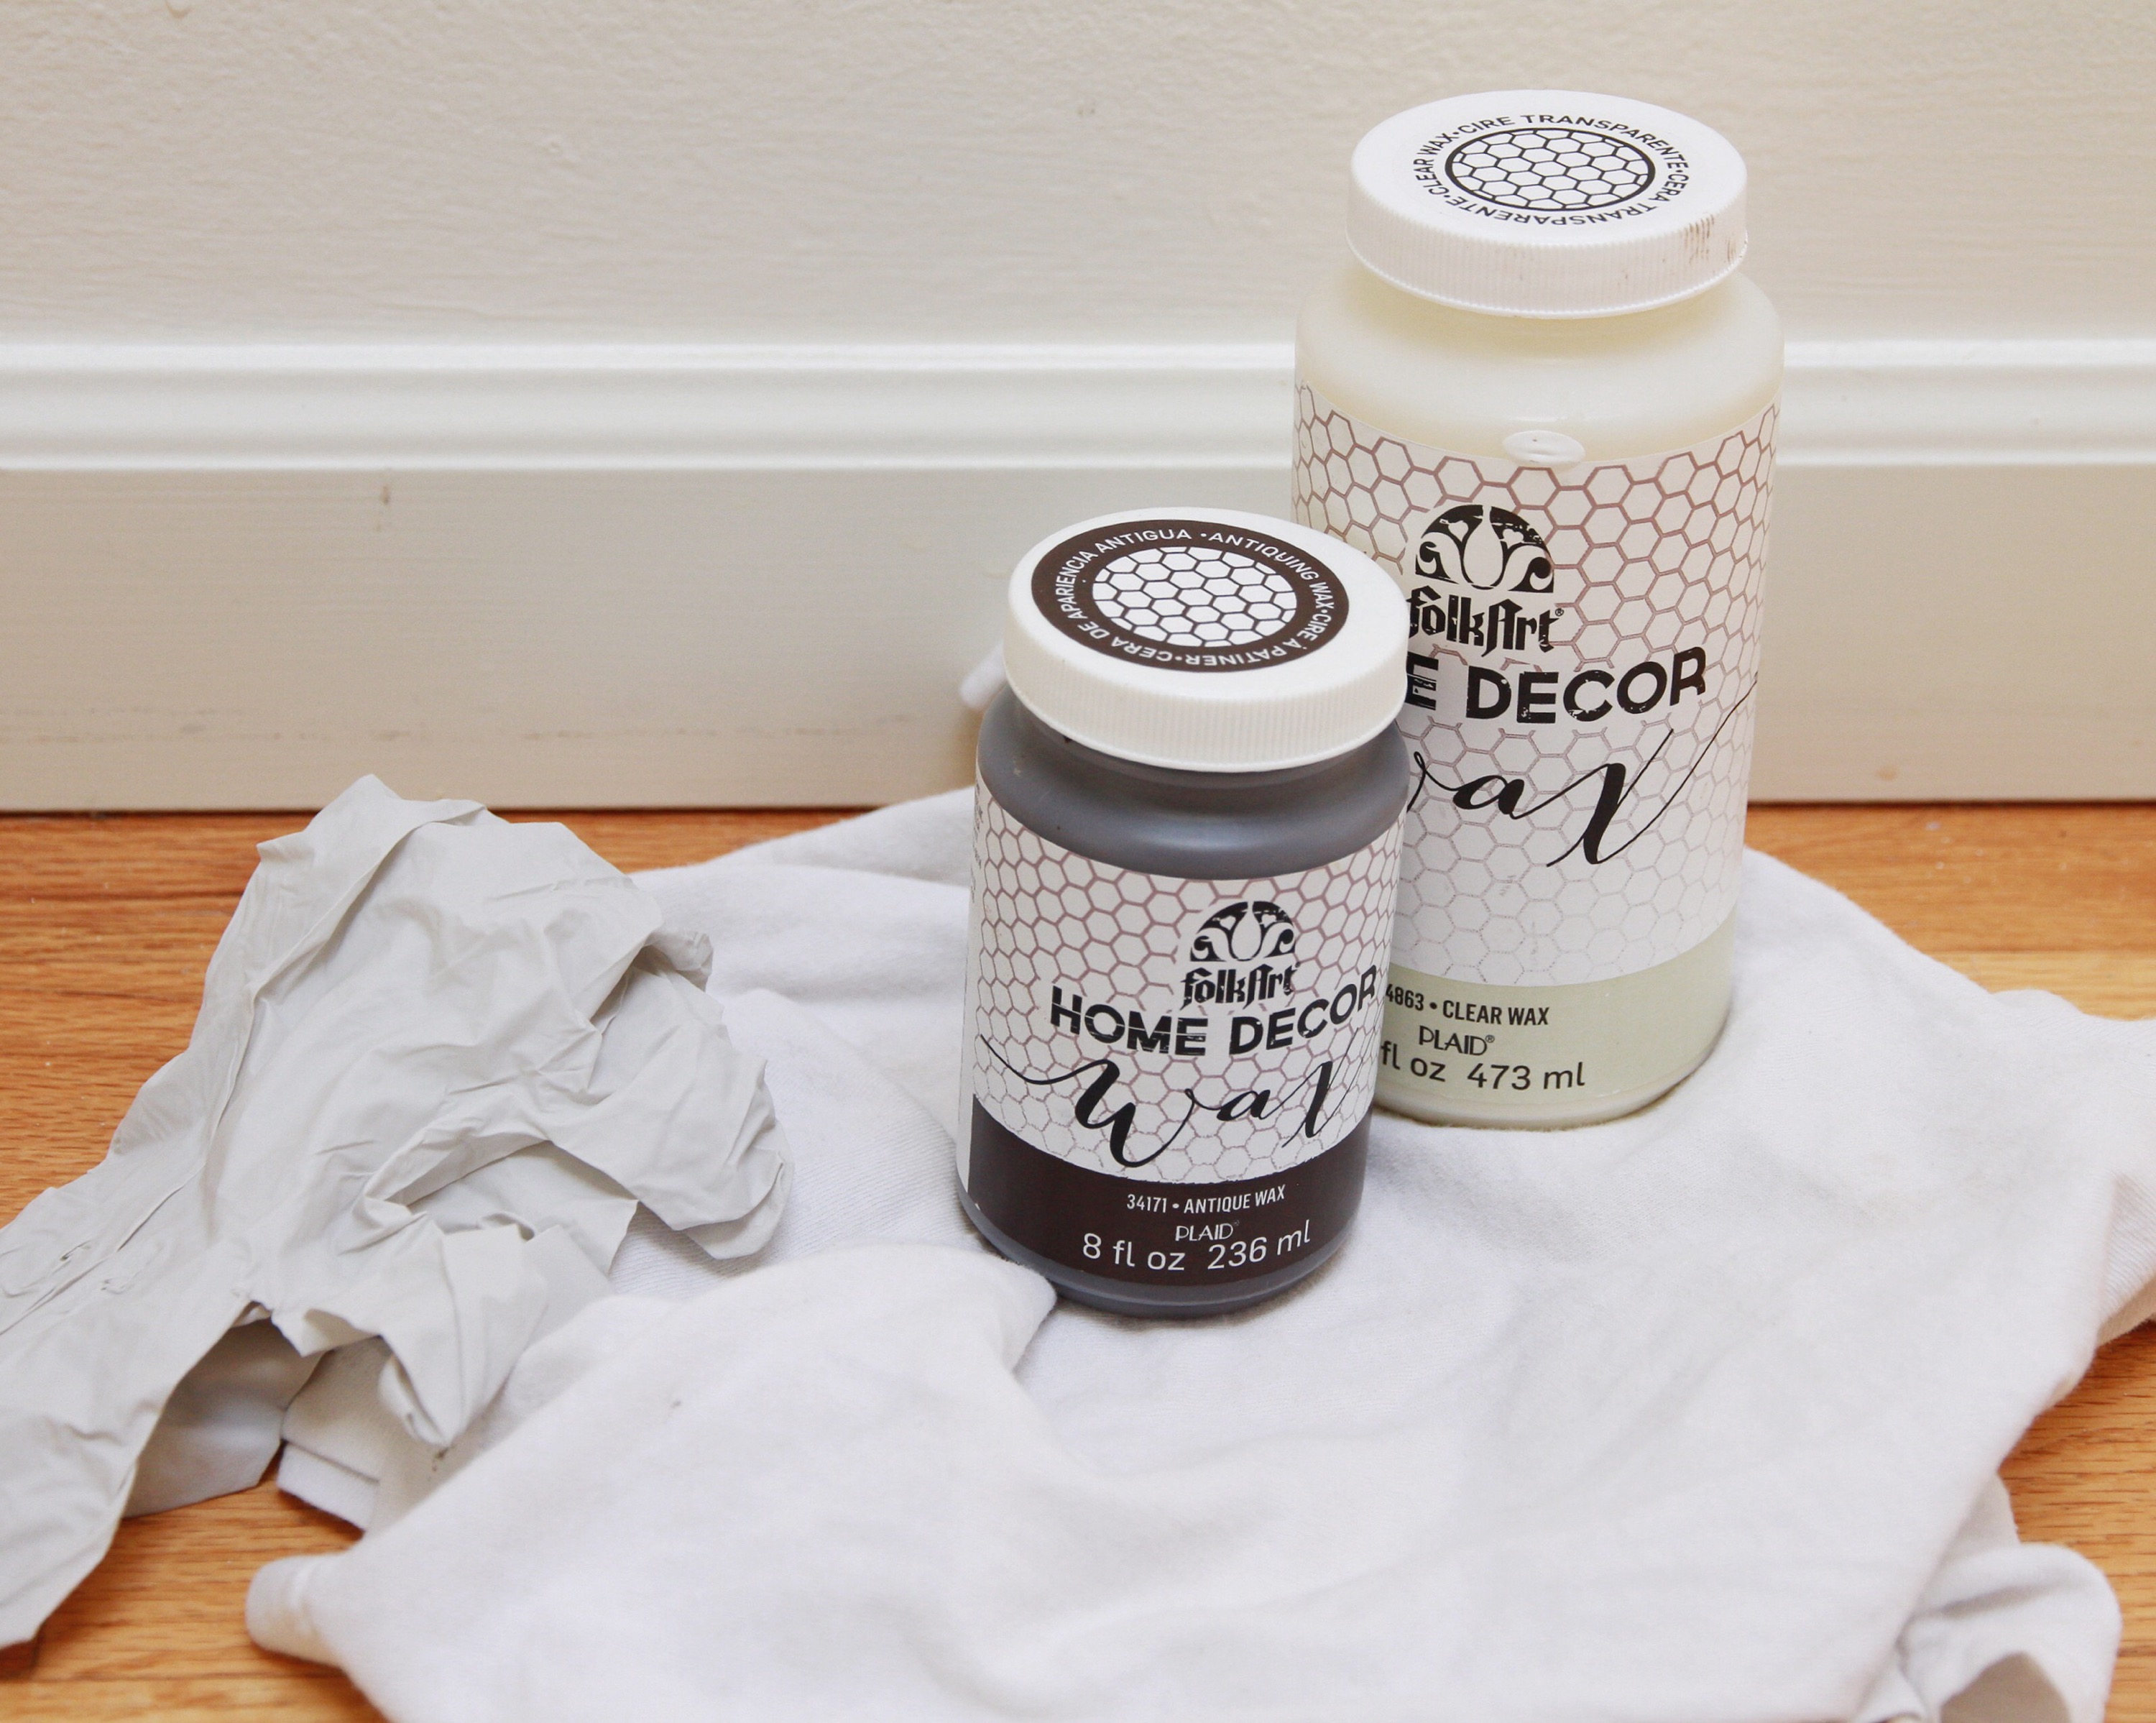
- Wax or varnish (I used both clear and antique wax from Folk Art)
- Gloves
- A lint free cloth (t-shirt worked great for me)
- Drill (not pictured)
- Screw (for securing clock arms – other options are listed below – not pictured).
Here is how I painted the face…
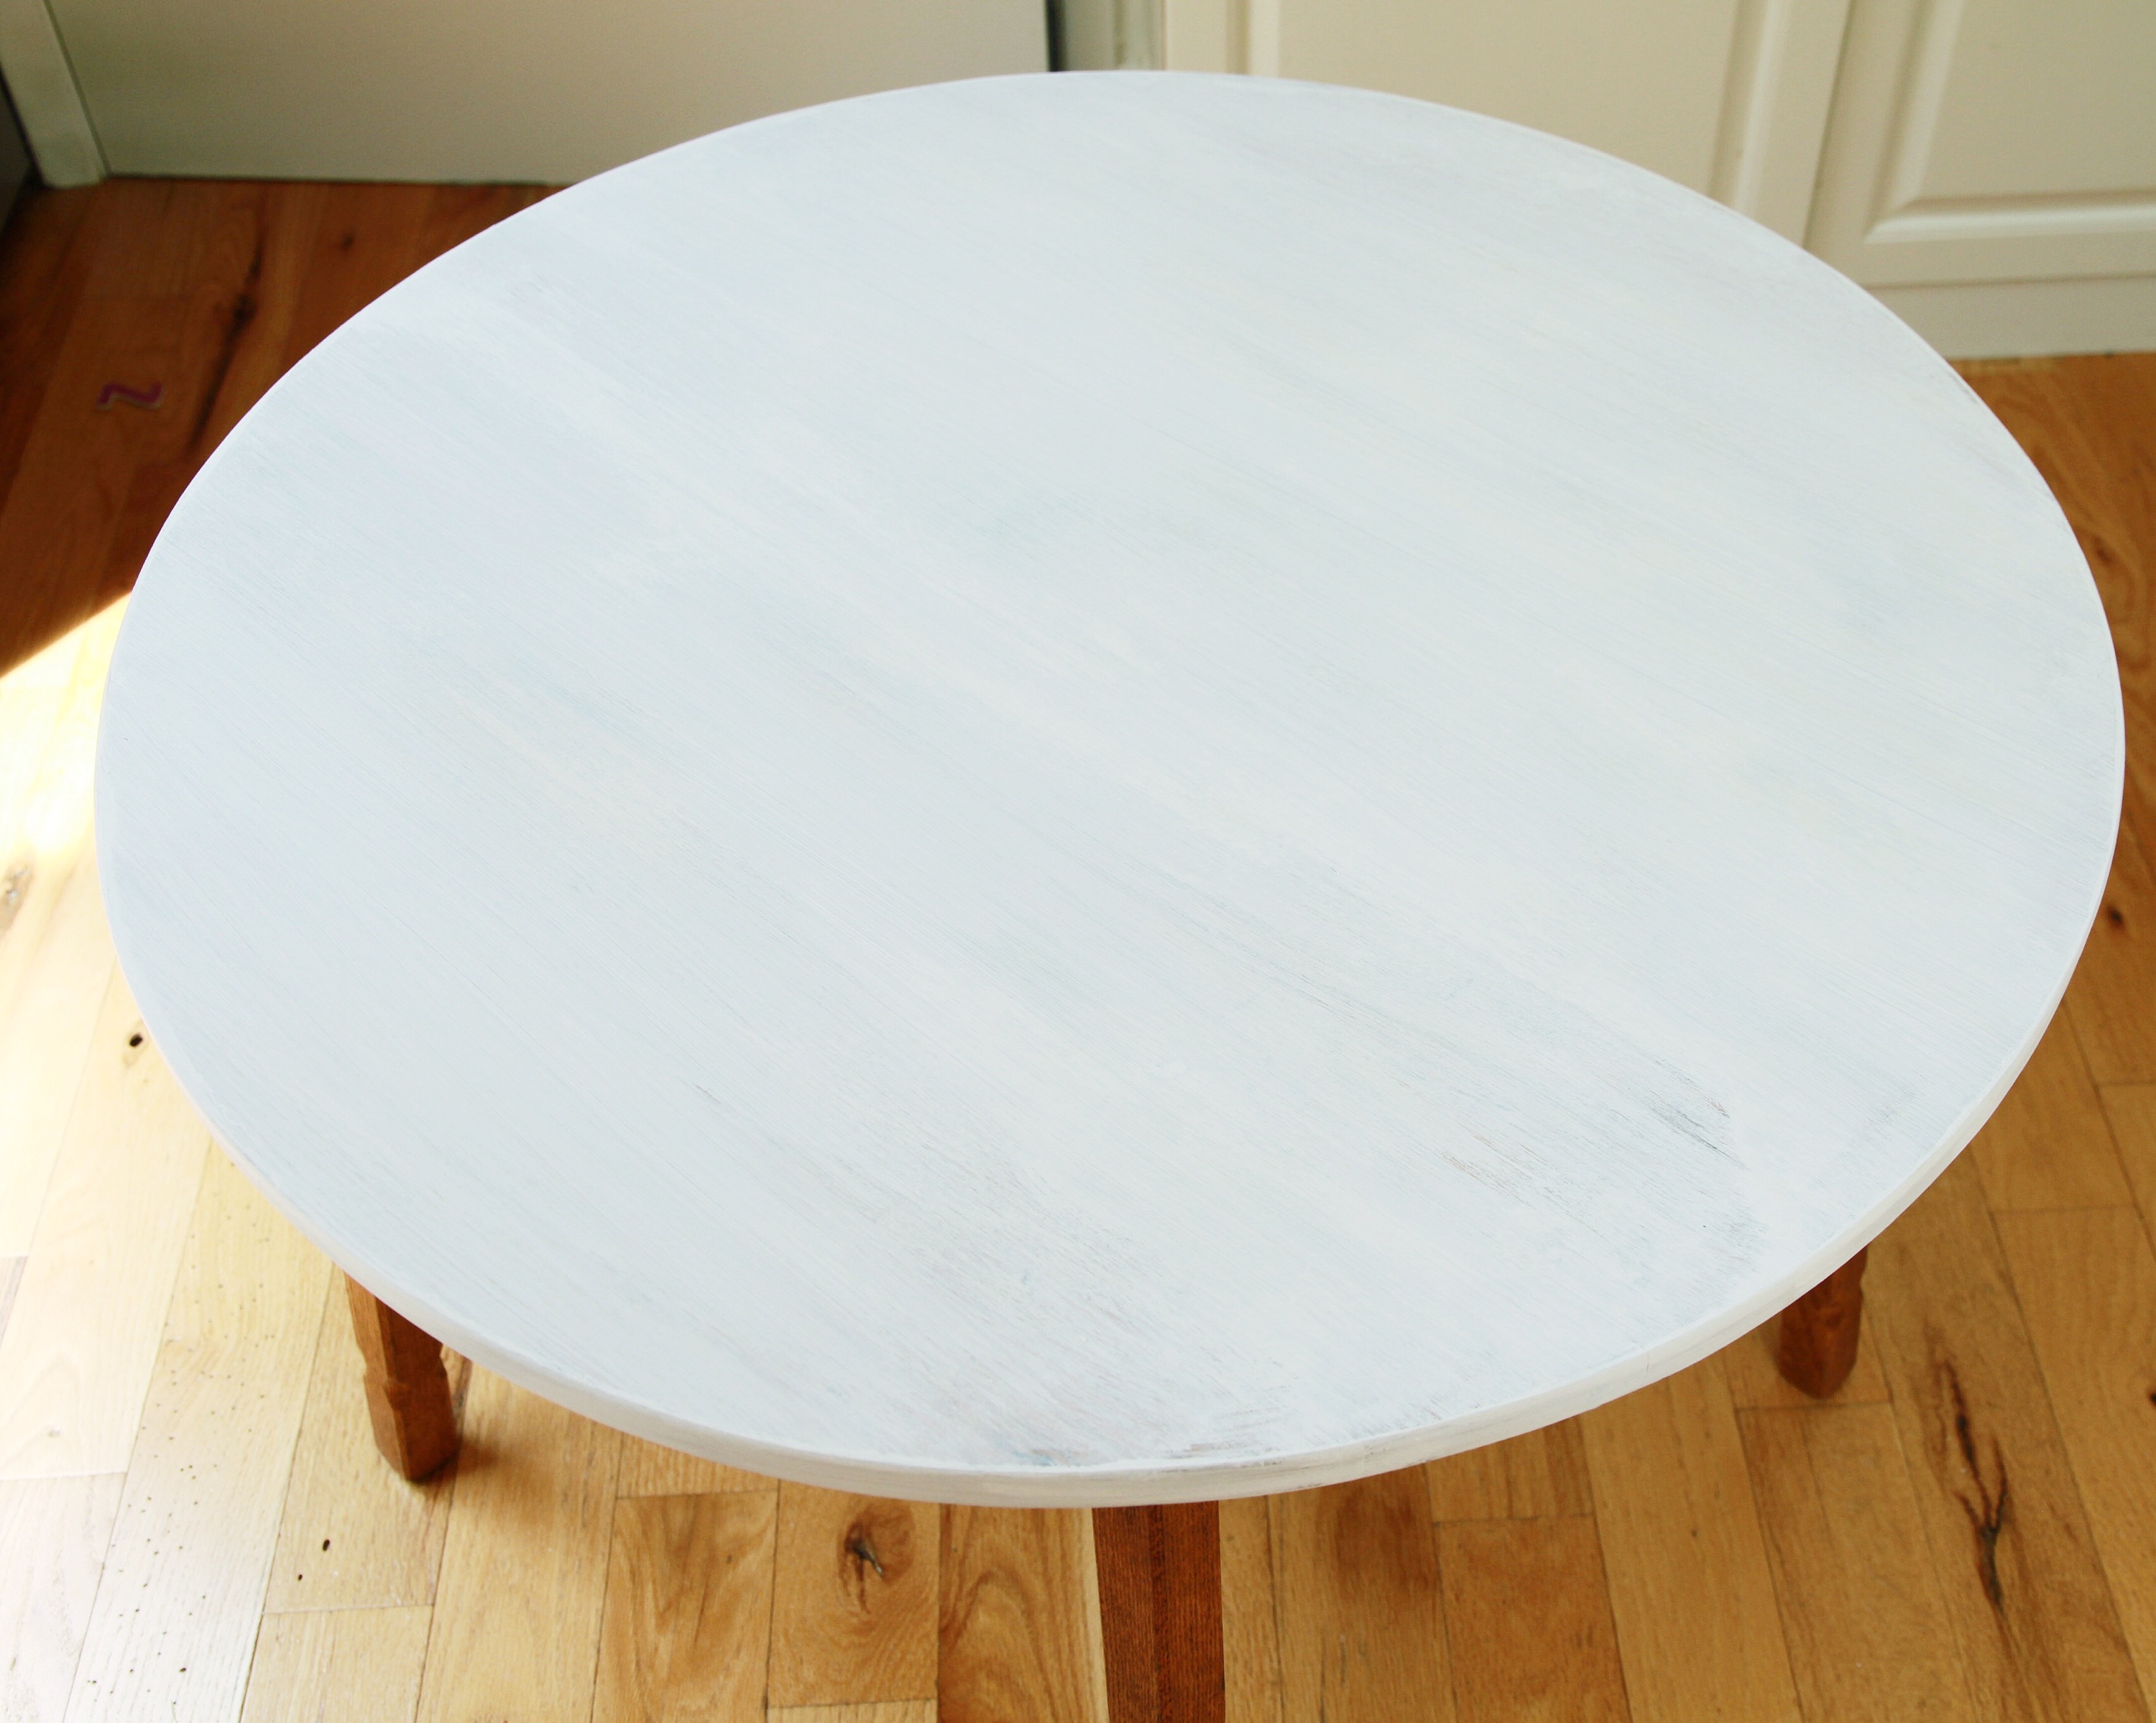
- I gave the table top 2 coats of chalk paint. I wanted this to have more brush strokes than my other pieces that I have done. So I wasn’t picky about the imperfections.
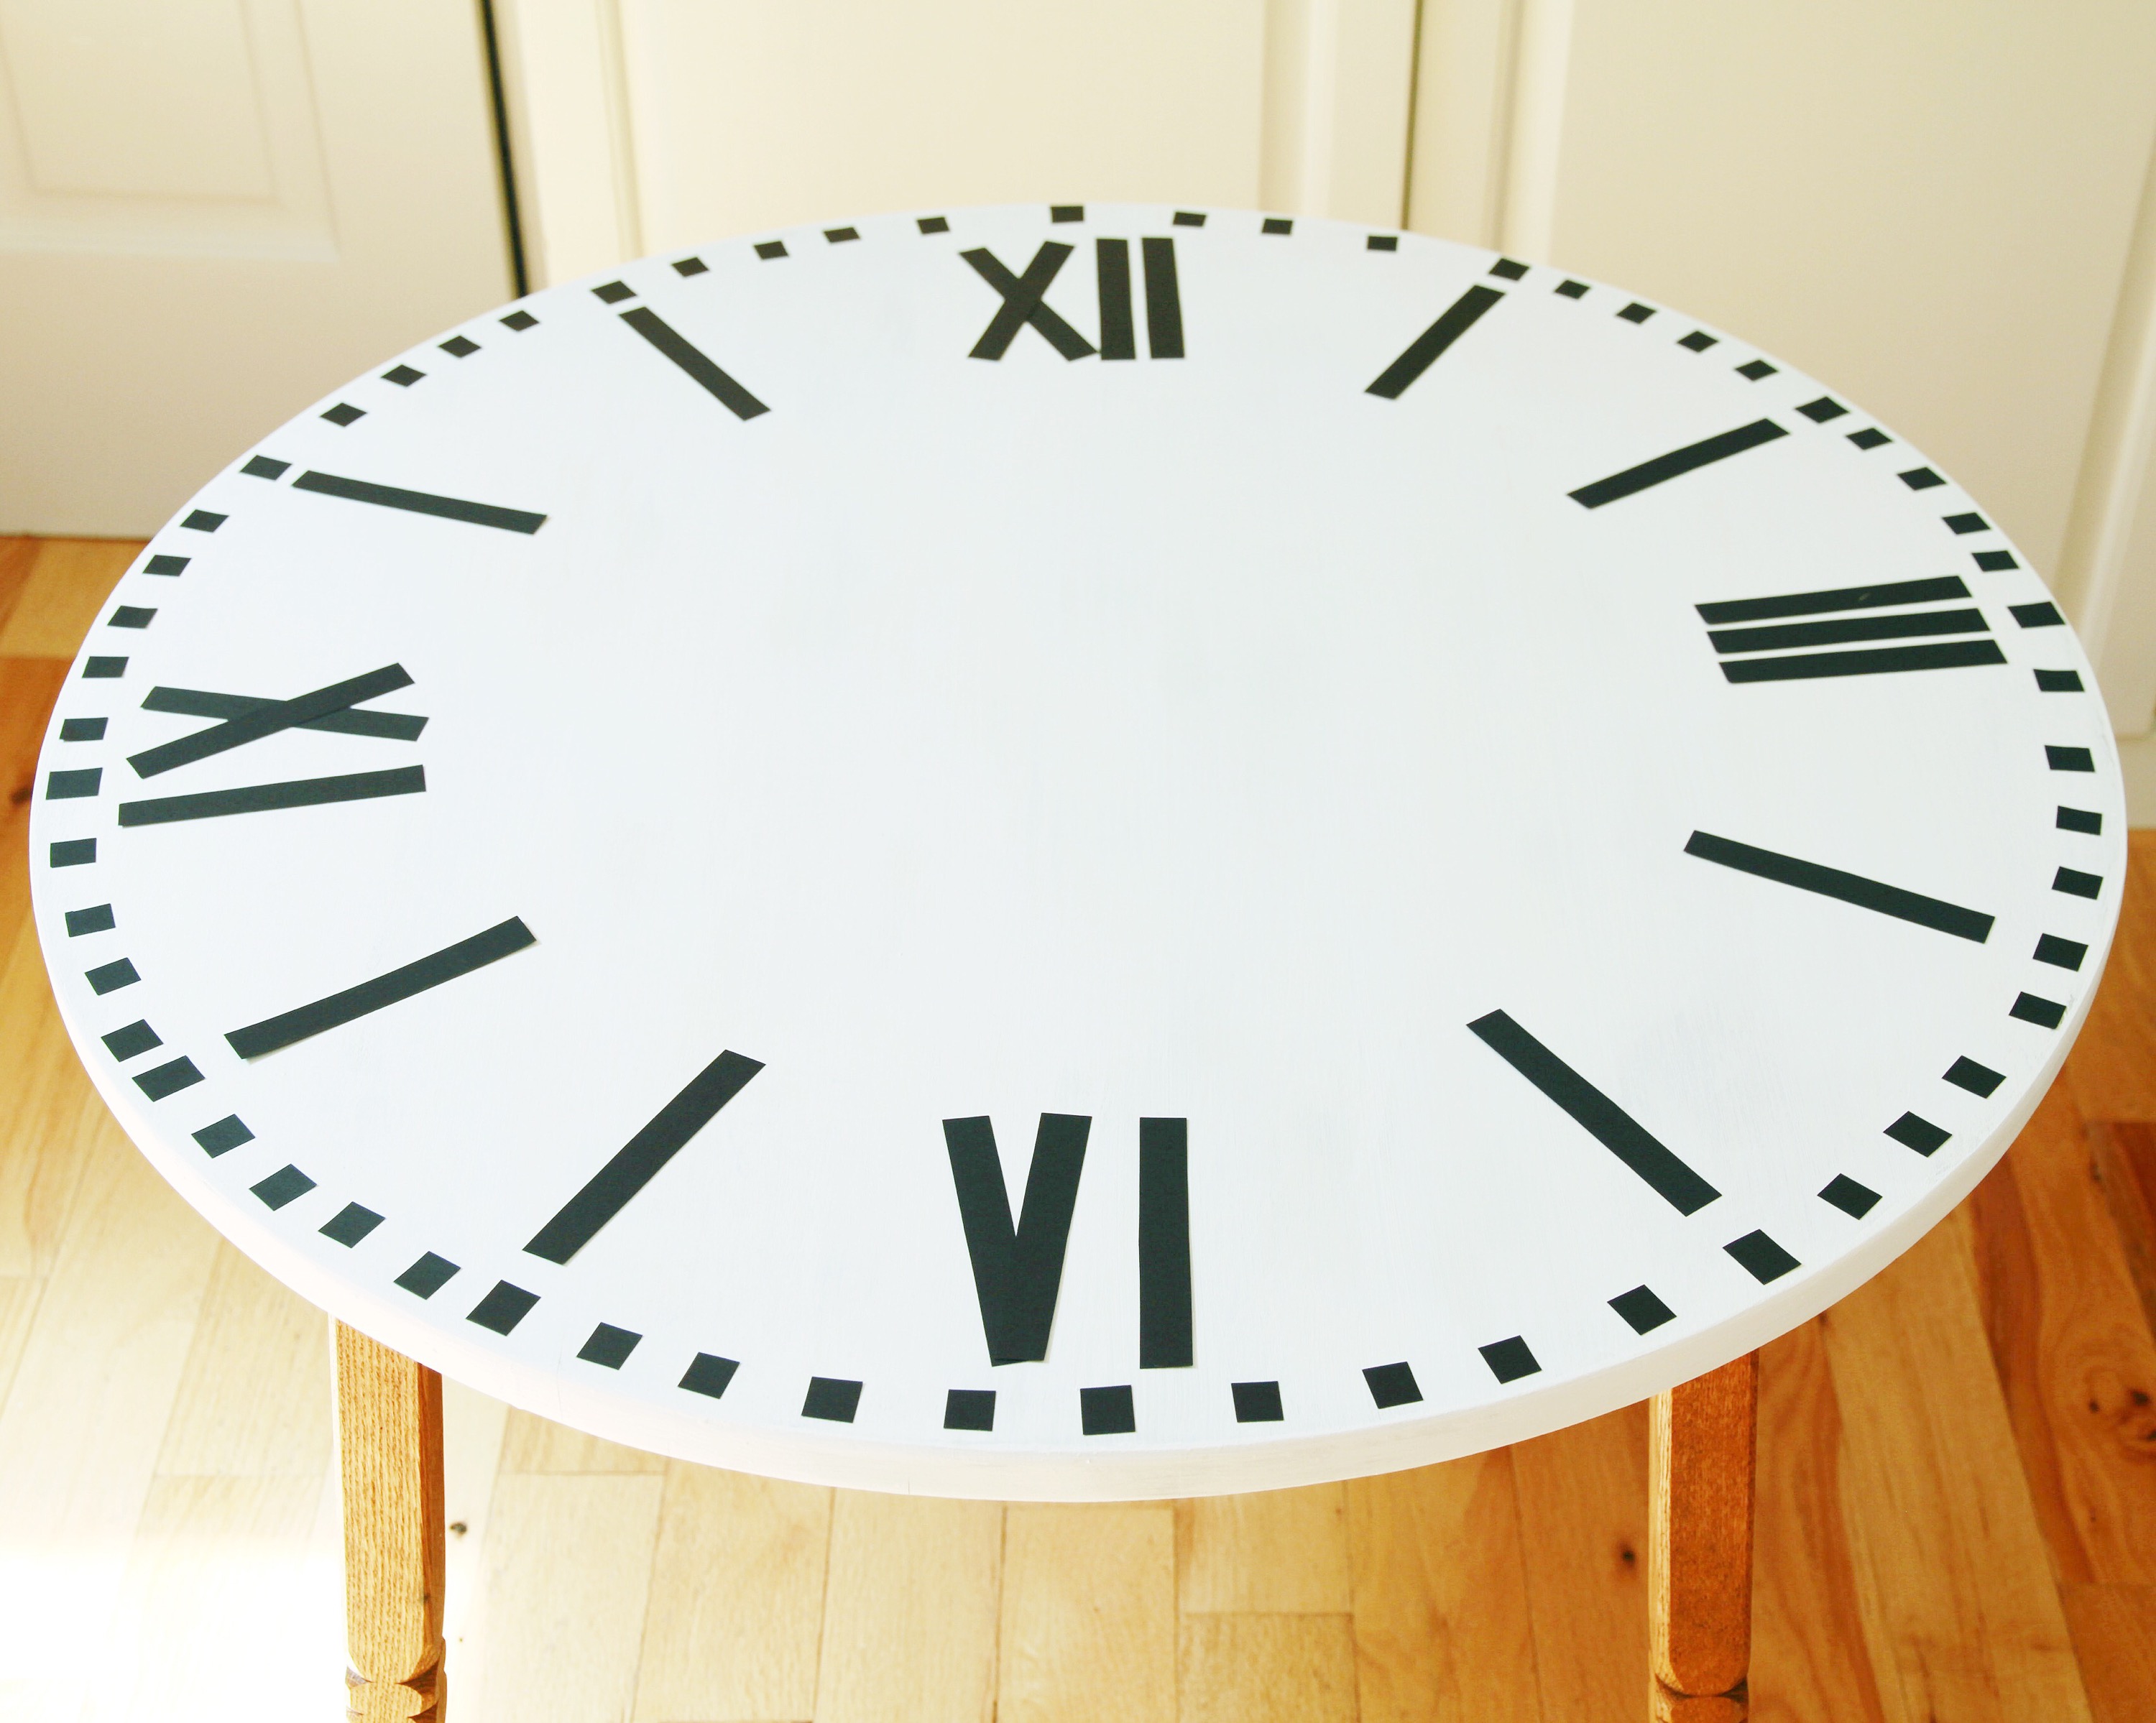
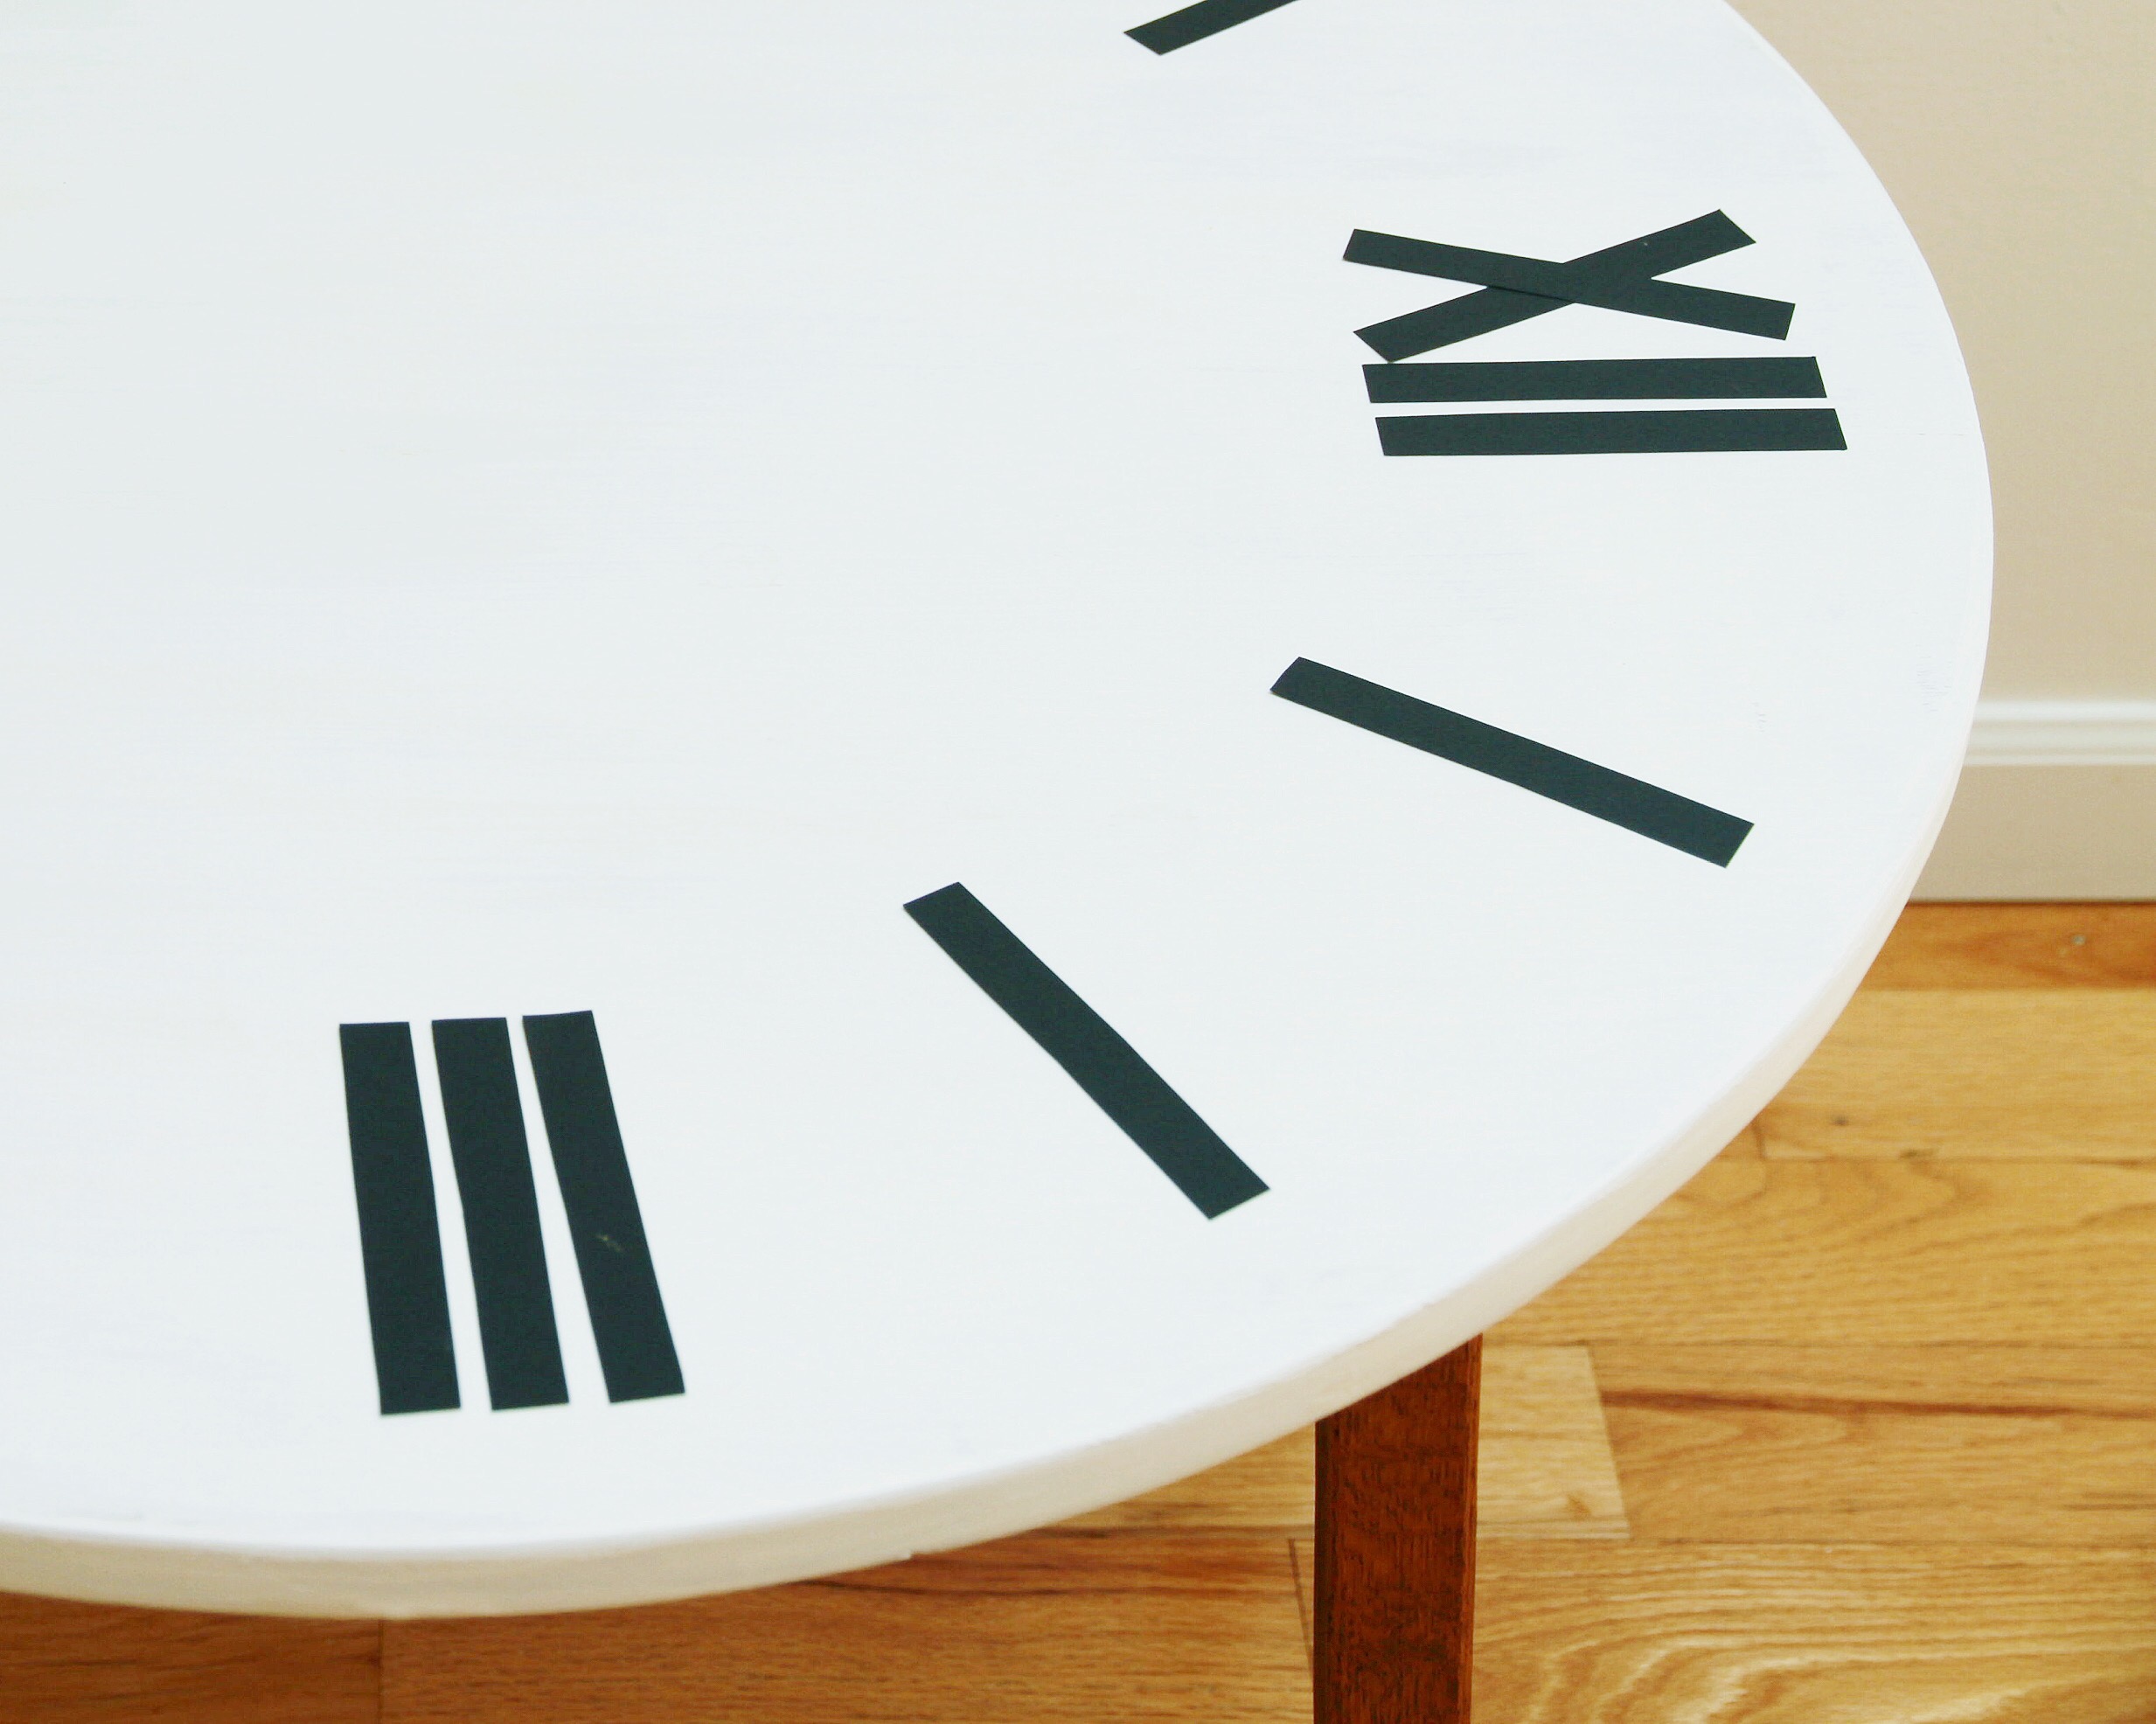
- Then using scrap paper, I cut out strips to form my Roman Numerals. I did this using a ruler and scissors. I chose this shape because I could easily create it myself without having to print out numbers or get to fancy with my font.
- I tried a couple different layouts until I found the one that suited our decor the best.
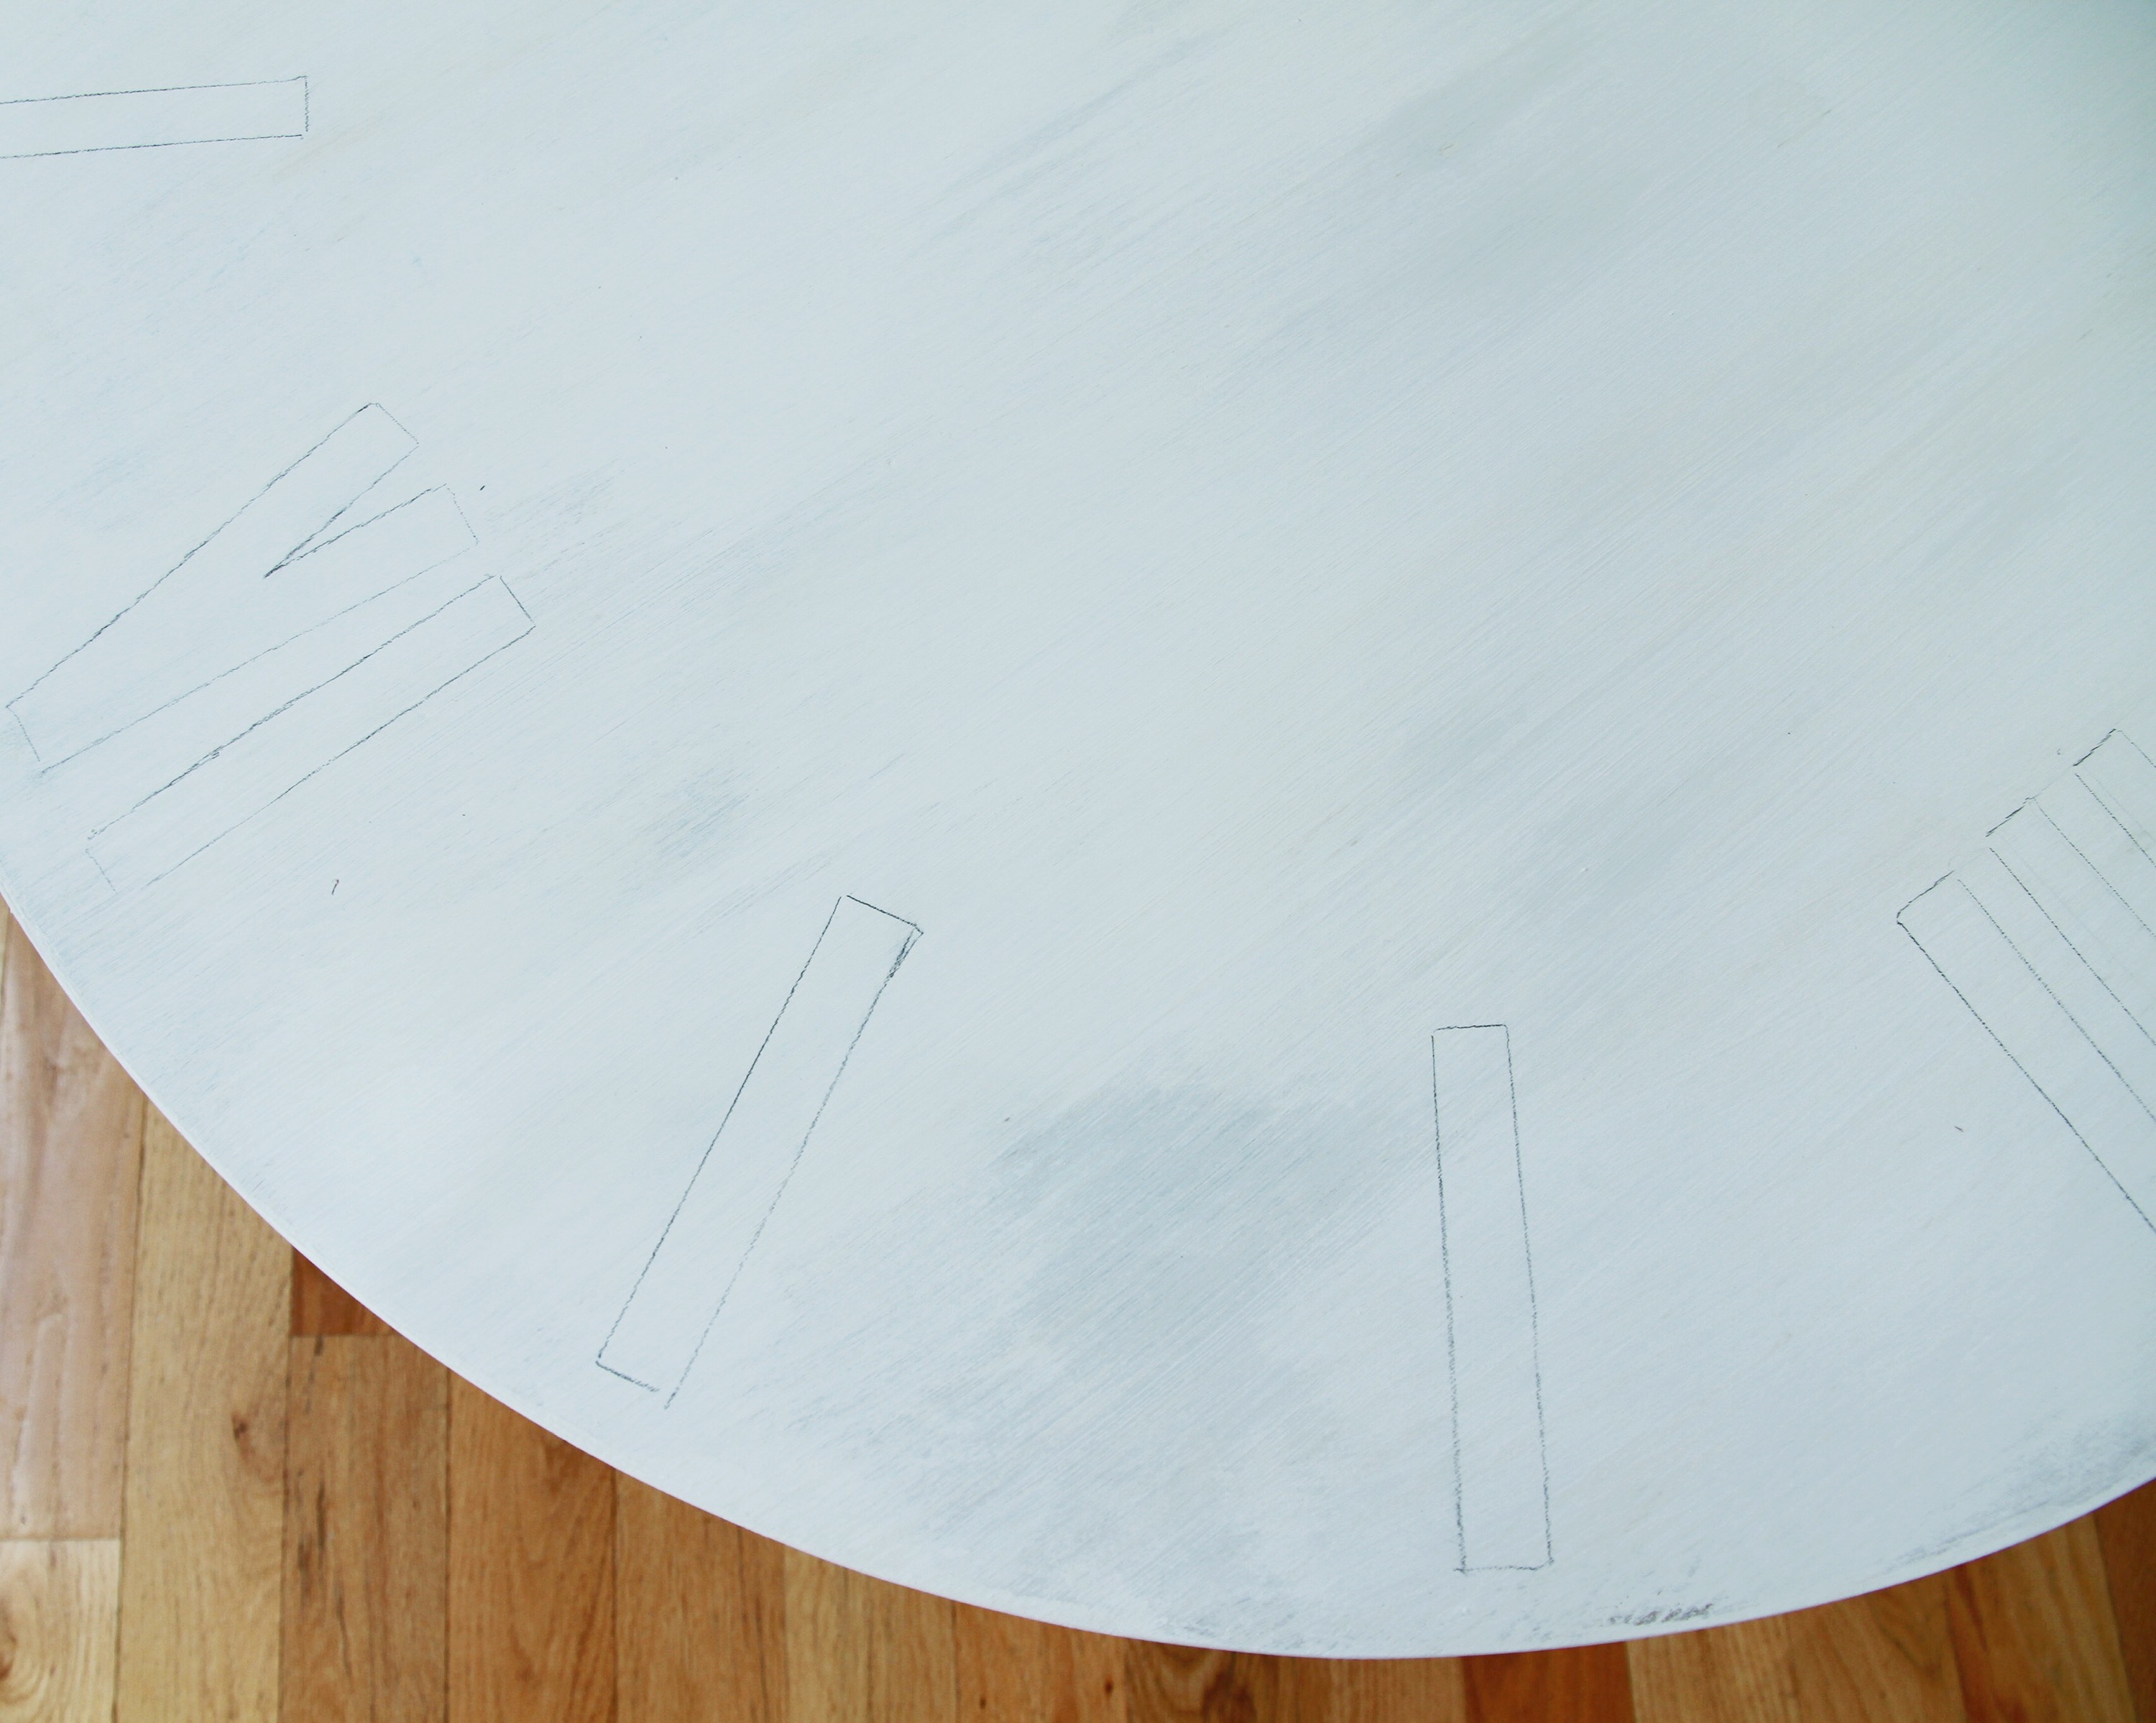
- I traced my numbers on.
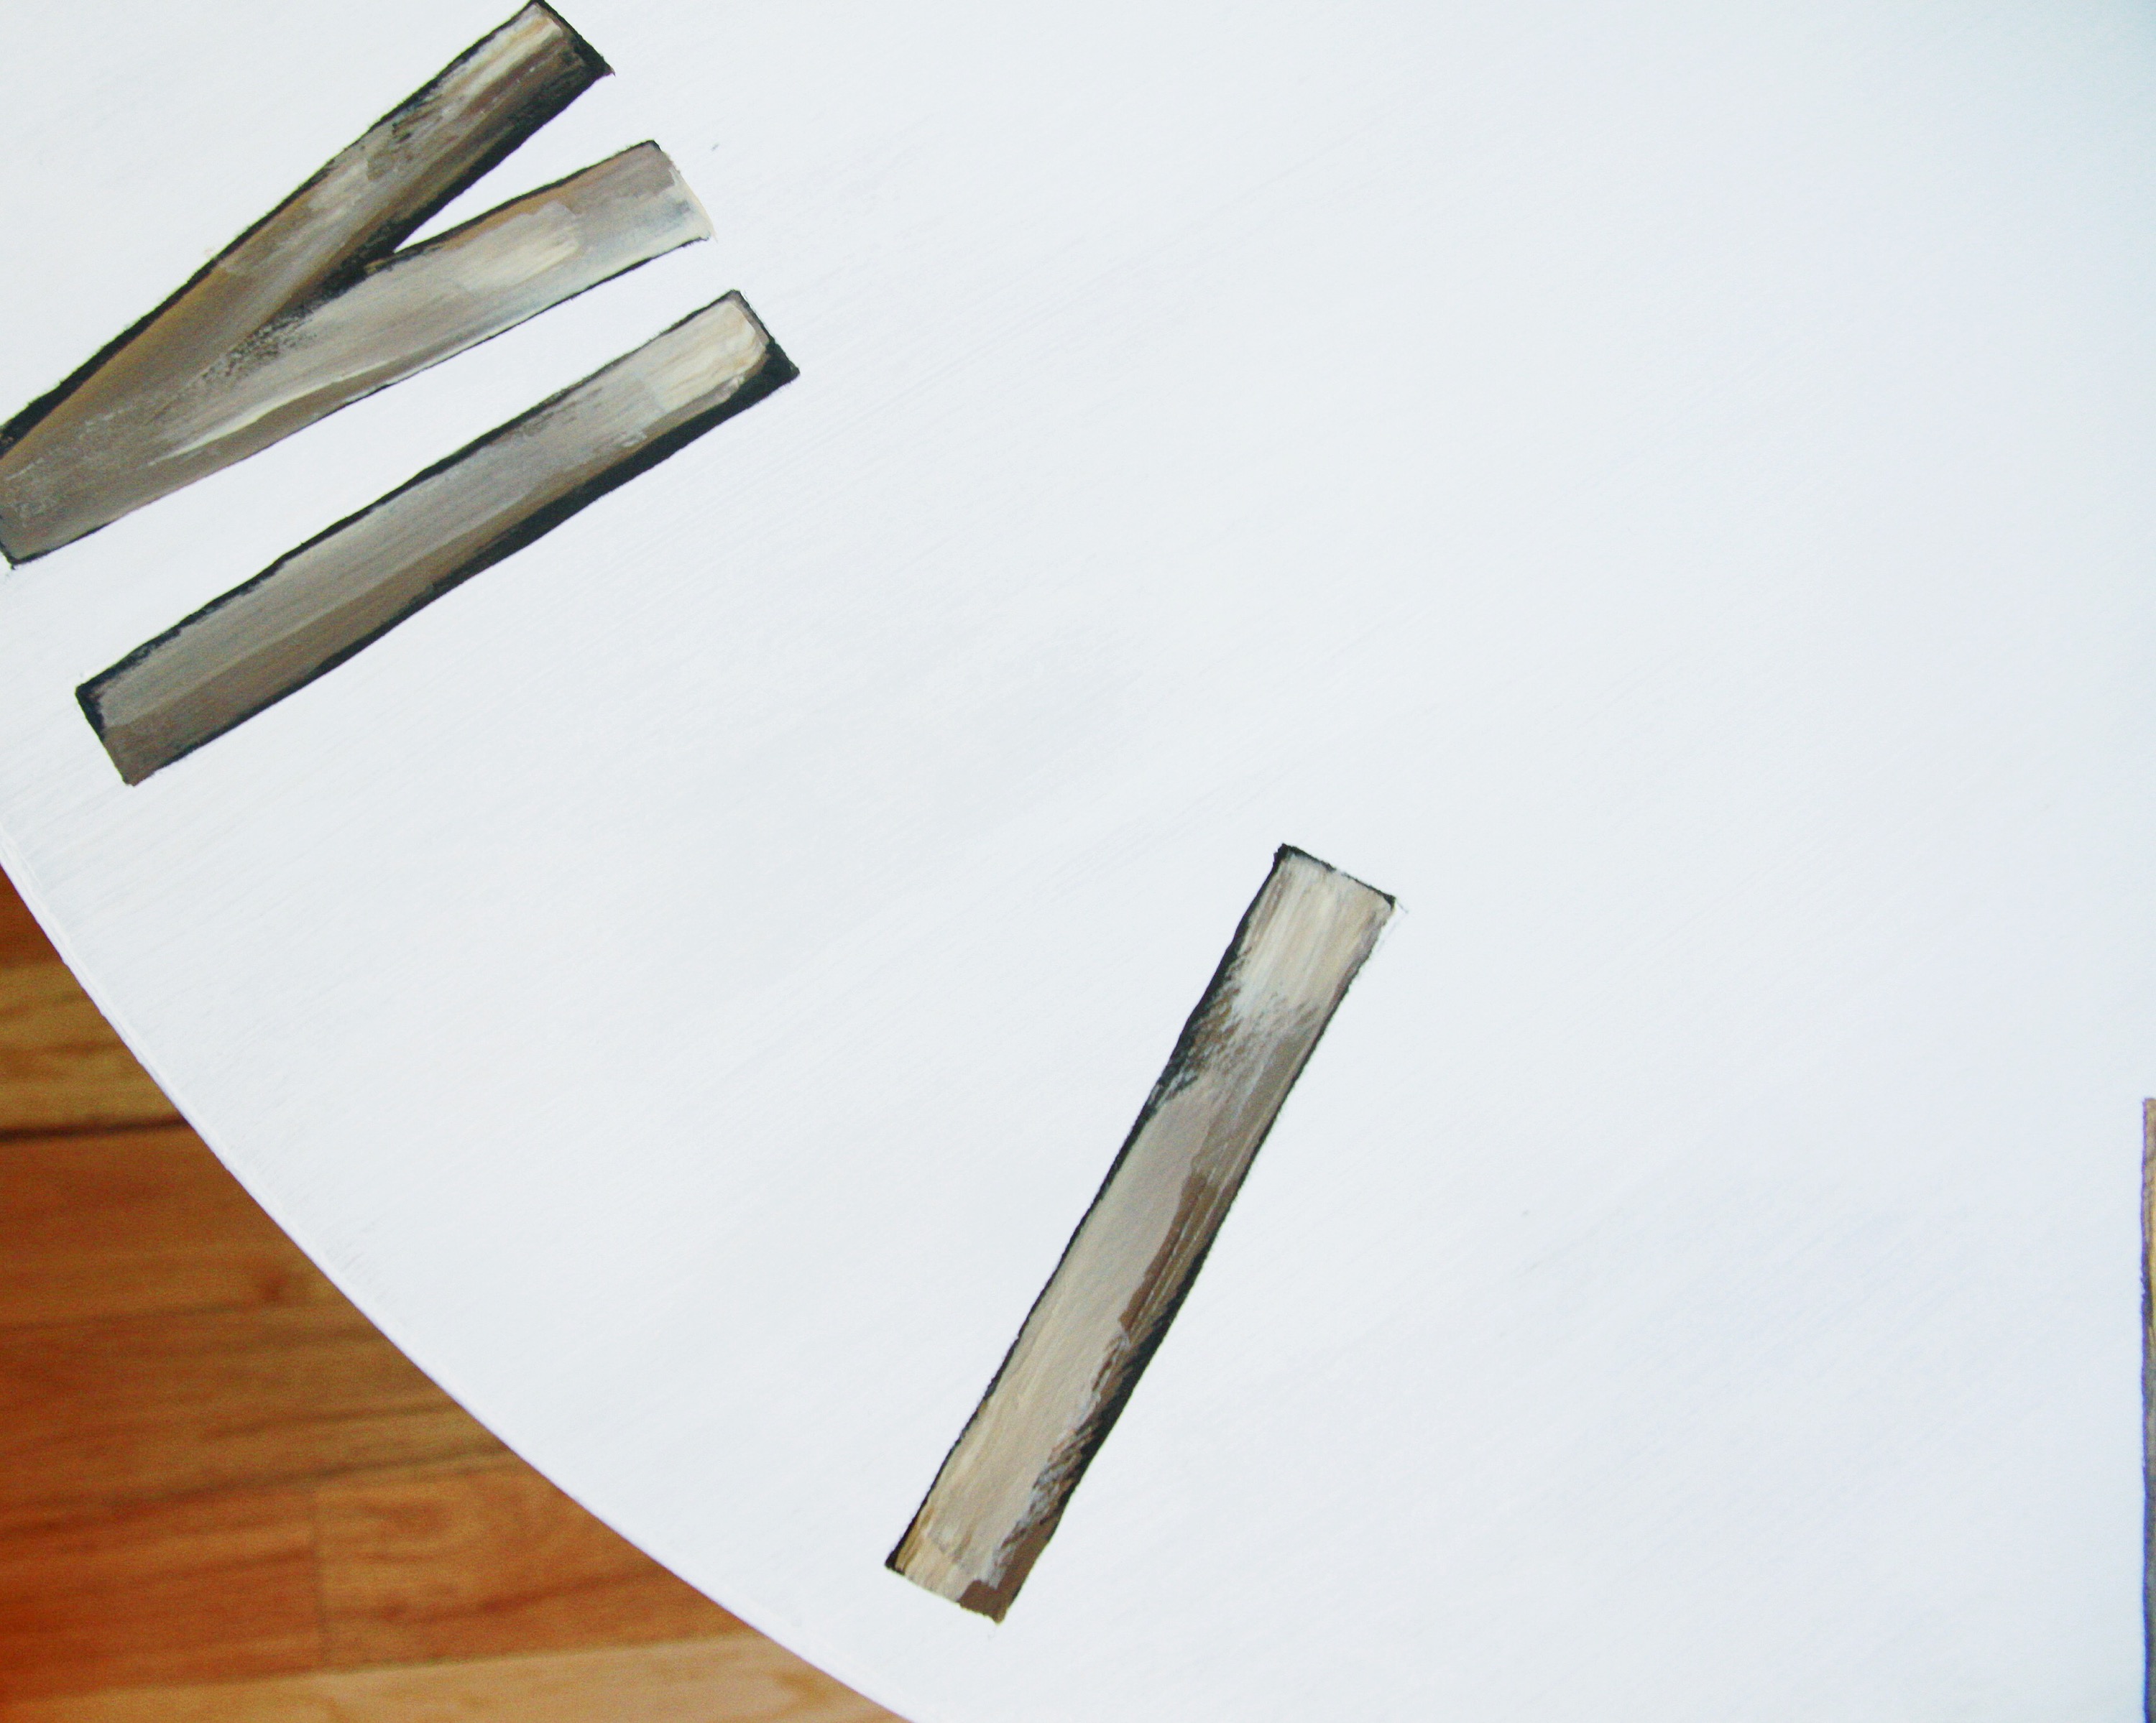
- Next I began painting in the numerals. I used acrylic paints for this and didn’t have any issues painting on top of the chalk paint. I did this because I had many colors on hand and knew I wanted a gradient of color in each number (this is completely optional and one color would look fantastic). I started with black and then lightened each layer with a lighter brown. I kept it organic and wasn’t too concerned about my highlighting or shading.
- Once I was happy with the numerals, I sanded down the entire face using the instructions from my previous post (here).
- I finished the face by applying a clear wax (waited the appropriate amount of time between coats) and then applied a mixture of the clear and antique wax (you can make mixtures of colors). I used the t-shirt to apply and when doing the darker wax I wanted some places to be darker than others. I buffed it with another lint free cloth the day after.
For the clock arms… 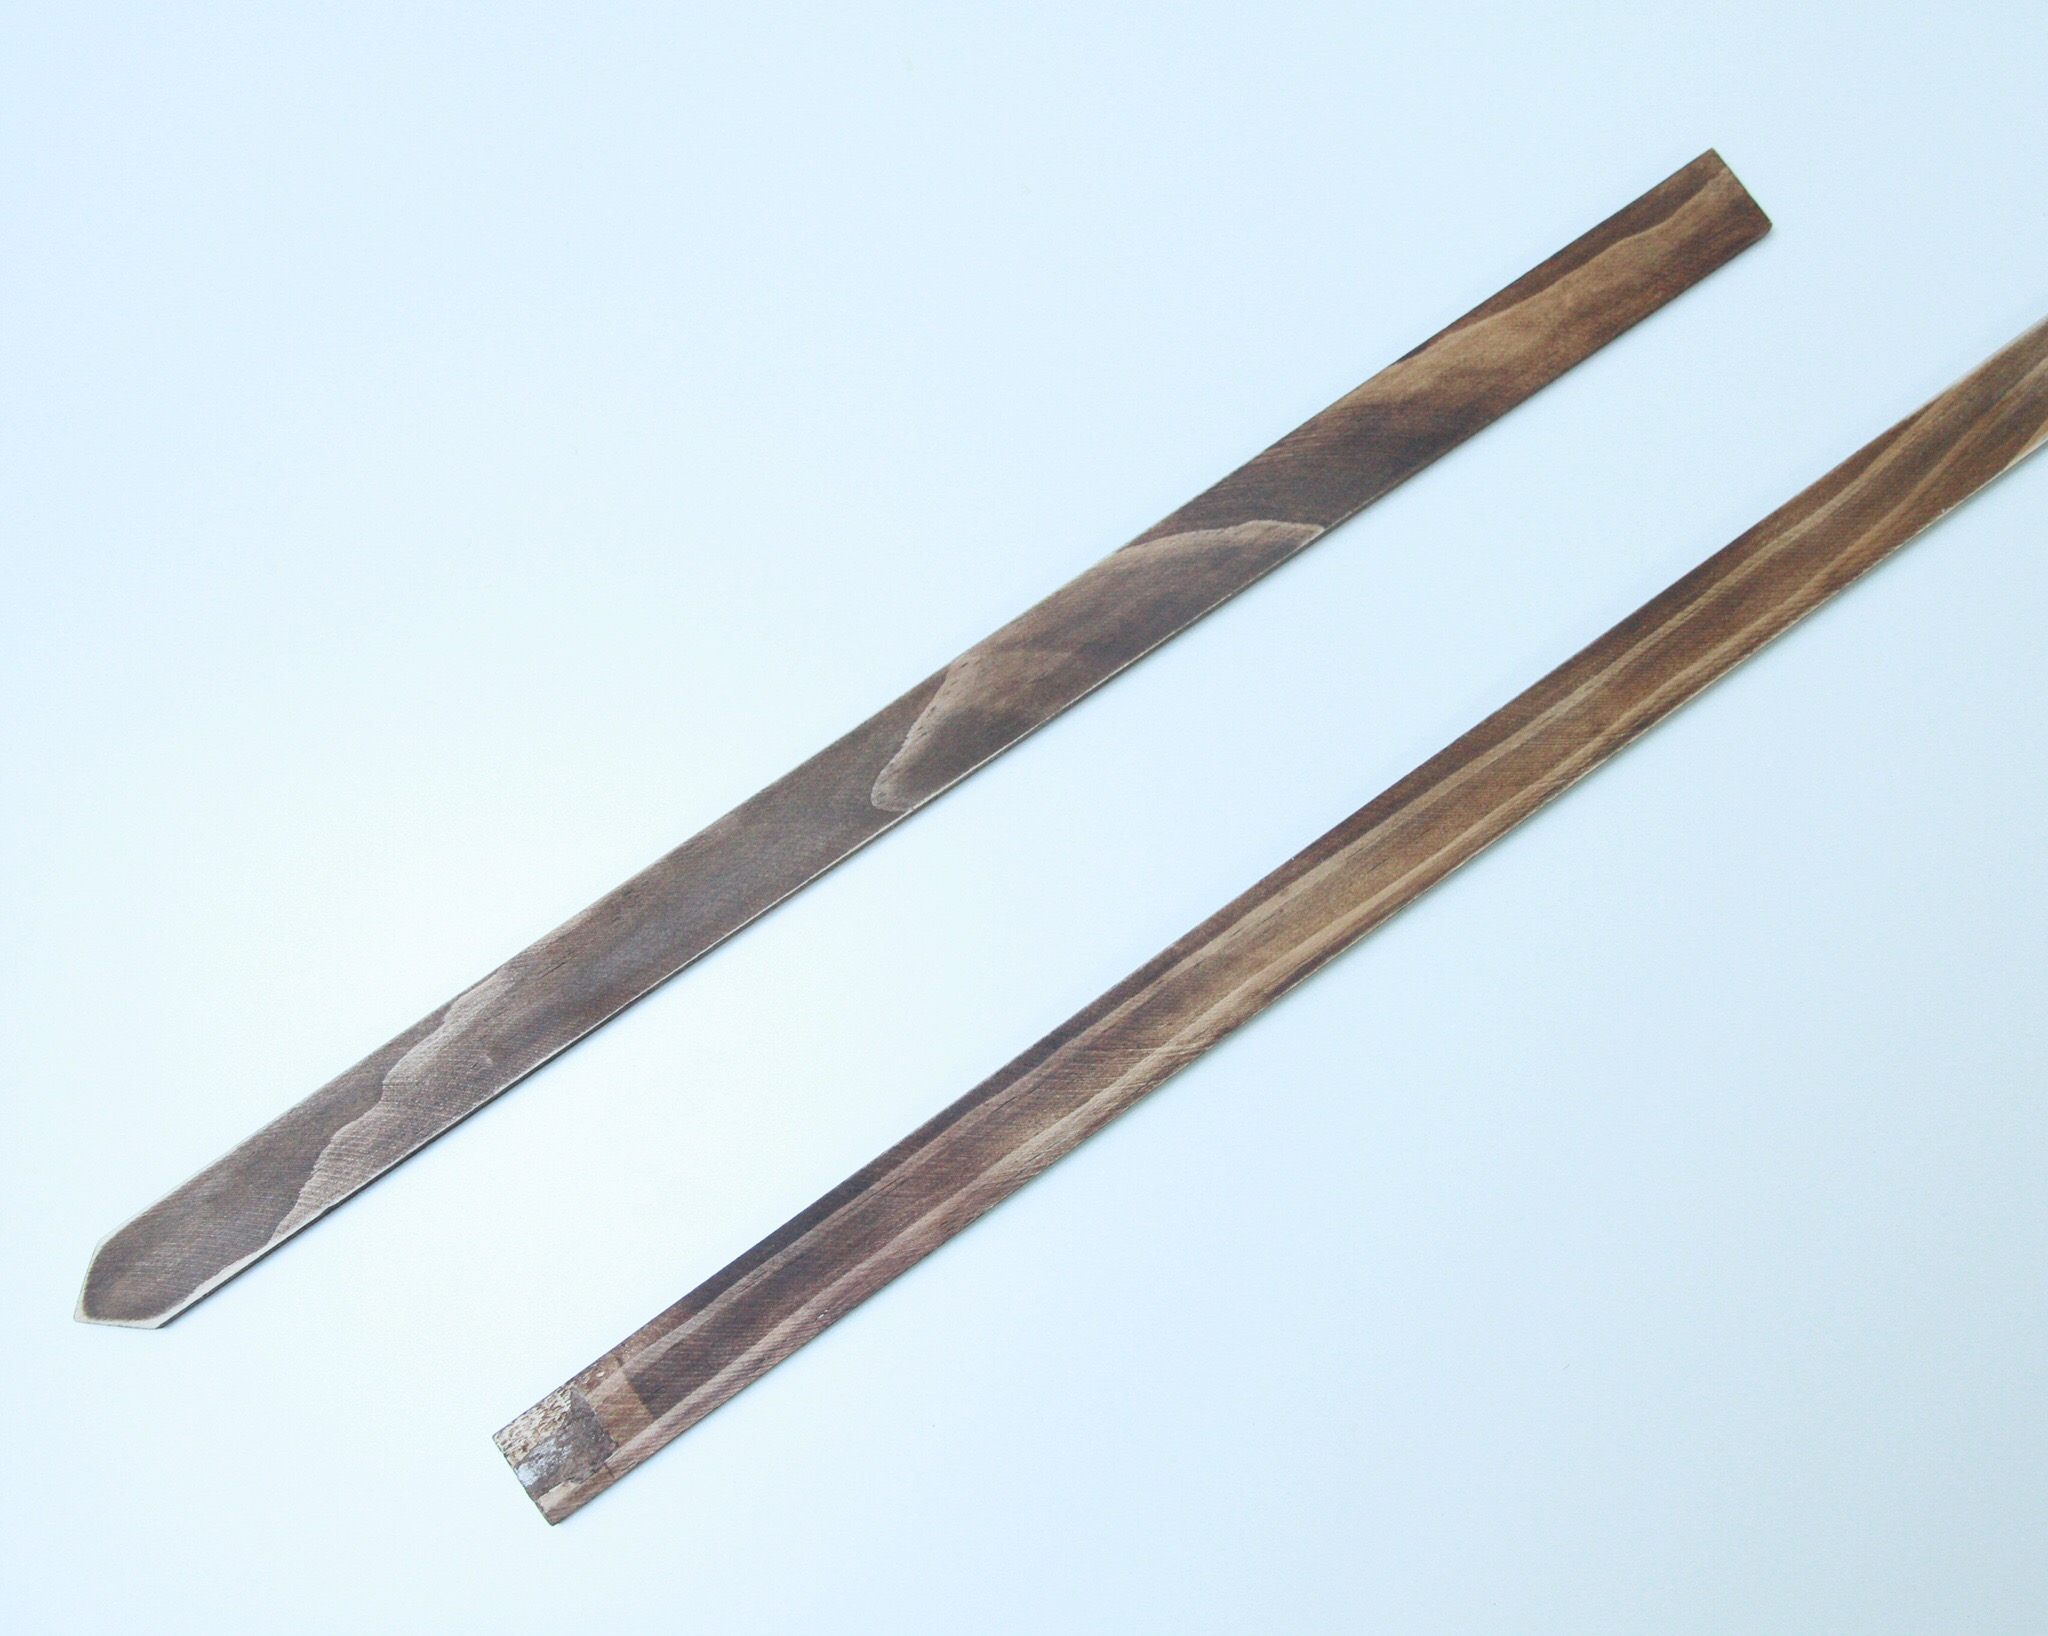
You will need…
- Unfinished picket stakes (I found something similar to these in the the wood craft section of our local JoAnn Fabrics).
- Dark antiquing wax mixed with a small amount of white chalk paint.
How you will prepare the clock arms…
- I used a simple hand saw to make these the length of choice and sanded down the rough sides.
- I used another lint free cloth and applied the mixture of wax (antiquing wax and white chalk paint). I sanded/distressed in between and reapplied another coat. I made sure to let it dry adequately.
To apply the arms to the clock…
- I measured out the center of my clock face and used a drill to secure in a screw (you could also hammer in with a nail, glue or use an actual clock motor). This part is up to the purpose of your clock. I wanted to finish the construction before thinking about an actual working clock. This may be something I do later).


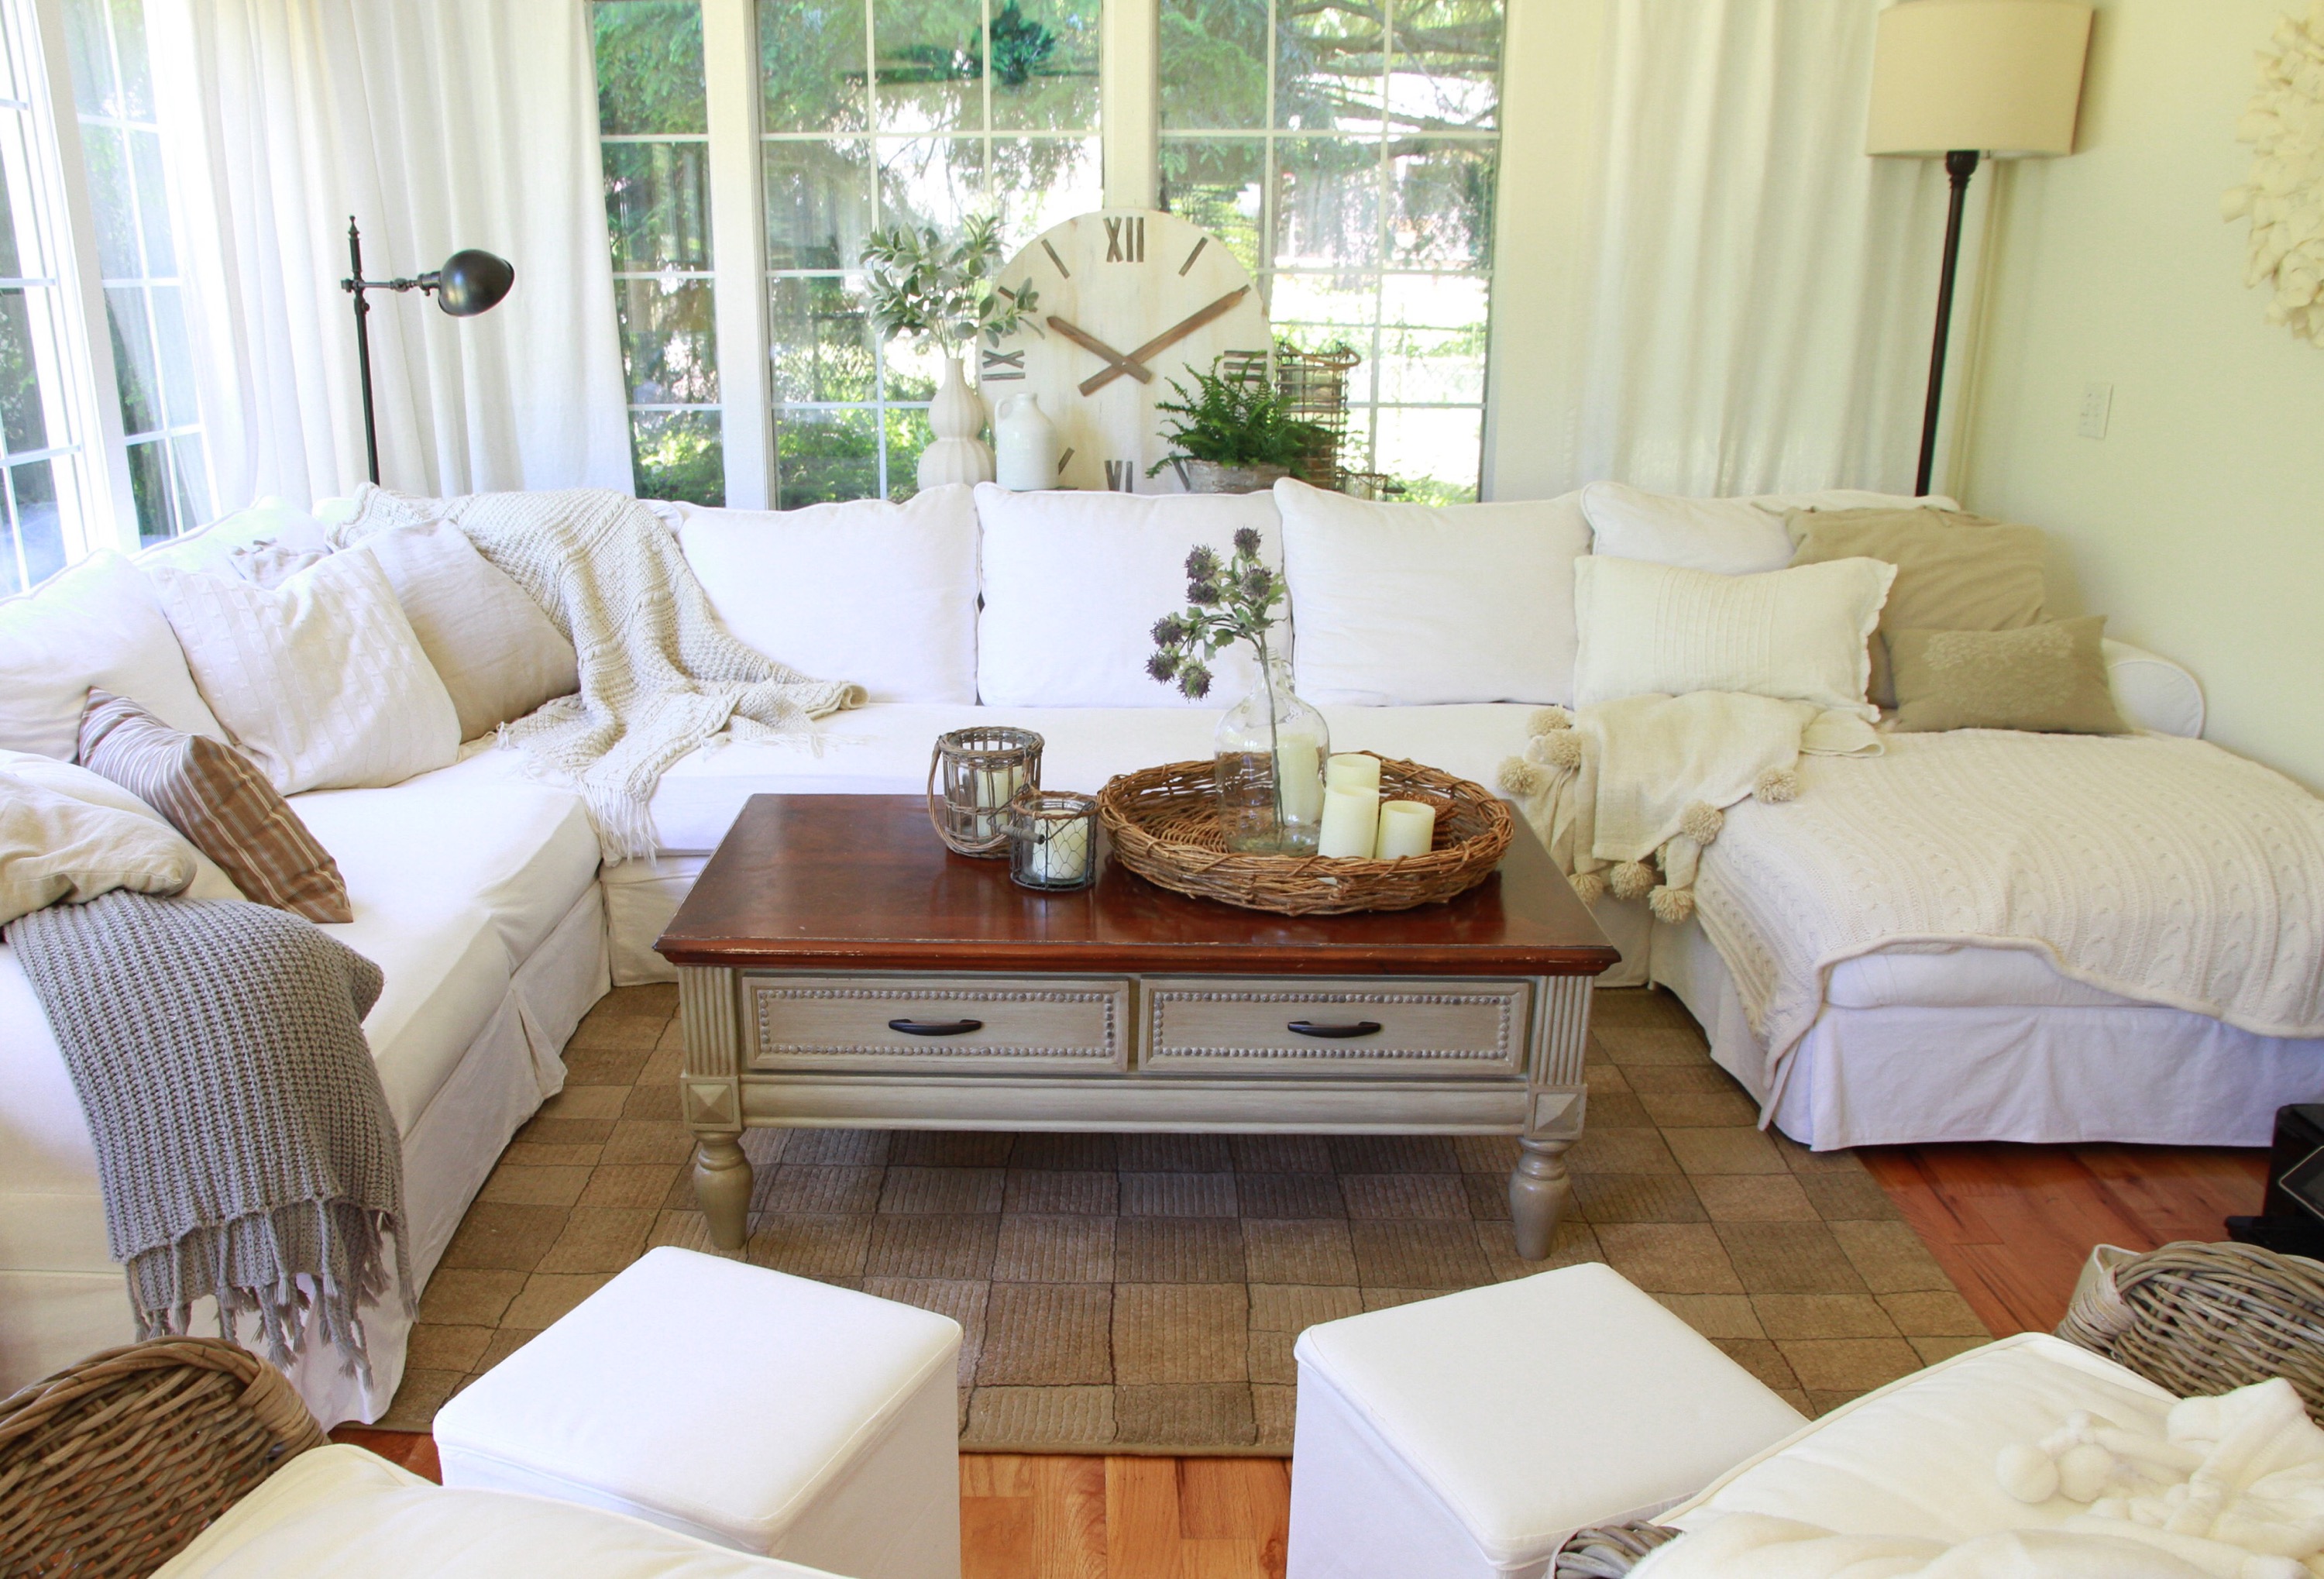

I hope this inspires you to try thing something unwanted and give it a transformation. This entire project cost less than $30.00 to finish and makes a fun statement in our living room. Decorating on a budget is possible with a little patience and imagination. Don’t forget to check these other incredible bloggers and their projects too! As always thanks for stopping by!
Becky G. from The Other Side of Neutral
Becky C. From Buckets of Burlap
Ashley from Little Glass Jar
Wendy from Life On the Shady Grove
Stephanie from The Yammering Cabin
Jolia from Farm Fresh Homestead
Avery from East Egg Style
Jennifer from The Willow Farmhouse


Annie, this turned out so cute! Love how you did the Roman numerals!
Thanks so much Heather!!
I love it! Looks fantastic!
This is so creative! Love it! I enjoy all of your group’s posts about this contest 🙂
Dear Annie,
This is my first time to your blog and I love your clock. I have been wanting one of these to hang in our living room for quite some time. When I saw the table and what you did with it I realized I have an old round table that I can do this to as well…Thank you for the inspiration and I love your blog. We must be kindred clock spirits.
Kim
Kim – nice to meet you and I am glad you stopped by here! It makes me so happy to hear you can try this project out. Have a wonderful week!
Your room is so pretty and I especially like all the textures. The clock from a tabletop is a great idea and it turned out so well.
Elizabeth thank you very much and I am glad you like it. Have a great day!